Redis 环境
2023年12月17日大约 5 分钟
Redis 环境
1 Downloads
redis-6.2.6.tar.gz: https://redis.io/
2 编译安装
官网下载的为源码,并非二进制文件,需要进行编译安装。
# 解压
$ tar zxvf redis-6.2.6.tar.gz
$ cd redis-6.2.6

# 编译 & 安装
$ make
$ make install

# redis 默认安装到 /usr/local/bin/ 下
$ ls /usr/local/bin/
redis-benchmark  redis-check-aof  redis-check-rdb  redis-cli  redis-sentinel  redis-server
3 配置文件
./redis.conf
################################## NETWORK #####################################

# By default, if no "bind" configuration directive is specified, Redis listens
# for connections from all available network interfaces on the host machine.
# It is possible to listen to just one or multiple selected interfaces using
# the "bind" configuration directive, followed by one or more IP addresses.
# Each address can be prefixed by "-", which means that redis will not fail to
# start if the address is not available. Being not available only refers to
# addresses that does not correspond to any network interfece. Addresses that
# are already in use will always fail, and unsupported protocols will always BE
# silently skipped.
#
# Examples:
#
# bind 192.168.1.100 10.0.0.1     # listens on two specific IPv4 addresses
# bind 127.0.0.1 ::1              # listens on loopback IPv4 and IPv6
# bind * -::*                     # like the default, all available interfaces
#
# ~~~ WARNING ~~~ If the computer running Redis is directly exposed to the
# internet, binding to all the interfaces is dangerous and will expose the
# instance to everybody on the internet. So by default we uncomment the
# following bind directive, that will force Redis to listen only on the
# IPv4 and IPv6 (if available) loopback interface addresses (this means Redis
# will only be able to accept client connections from the same host that it is
# running on).
#
# IF YOU ARE SURE YOU WANT YOUR INSTANCE TO LISTEN TO ALL THE INTERFACES
# JUST COMMENT OUT THE FOLLOWING LINE.
# ~~~~~~~~~~~~~~~~~~~~~~~~~~~~~~~~~~~~~~~~~~~~~~~~~~~~~~~~~~~~~~~~~~~~~~~~
#bind 127.0.0.1 -::1

# Protected mode is a layer of security protection, in order to avoid that
# Redis instances left open on the internet are accessed and exploited.
#
# When protected mode is on and if:
#
# 1) The server is not binding explicitly to a set of addresses using the
#    "bind" directive.
# 2) No password is configured.
#
# The server only accepts connections from clients connecting from the
# IPv4 and IPv6 loopback addresses 127.0.0.1 and ::1, and from Unix domain
# sockets.
#
# By default protected mode is enabled. You should disable it only if
# you are sure you want clients from other hosts to connect to Redis
# even if no authentication is configured, nor a specific set of interfaces
# are explicitly listed using the "bind" directive.
protected-mode no


################################# GENERAL #####################################

# By default Redis does not run as a daemon. Use 'yes' if you need it.
# Note that Redis will write a pid file in /var/run/redis.pid when daemonized.
# When Redis is supervised by upstart or systemd, this parameter has no impact.
daemonize yes
配置密码:
# IMPORTANT NOTE: starting with Redis 6 "requirepass" is just a compatibility
# layer on top of the new ACL system. The option effect will be just setting
# the password for the default user. Clients will still authenticate using
# AUTH <password> as usually, or more explicitly with AUTH default <password>
# if they follow the new protocol: both will work.
#
# The requirepass is not compatable with aclfile option and the ACL LOAD
# command, these will cause requirepass to be ignored.
#
# requirepass foobared

################################# REPLICATION #################################

# Master-Replica replication. Use replicaof to make a Redis instance a copy of
# another Redis server. A few things to understand ASAP about Redis replication.
#
#   +------------------+      +---------------+
#   |      Master      | ---> |    Replica    |
#   | (receive writes) |      |  (exact copy) |
#   +------------------+      +---------------+
#
# 1) Redis replication is asynchronous, but you can configure a master to
#    stop accepting writes if it appears to be not connected with at least
#    a given number of replicas.
# 2) Redis replicas are able to perform a partial resynchronization with the
#    master if the replication link is lost for a relatively small amount of
#    time. You may want to configure the replication backlog size (see the next
#    sections of this file) with a sensible value depending on your needs.
# 3) Replication is automatic and does not need user intervention. After a
#    network partition replicas automatically try to reconnect to masters
#    and resynchronize with them.
#
# replicaof <masterip> <masterport>

# If the master is password protected (using the "requirepass" configuration
# directive below) it is possible to tell the replica to authenticate before
# starting the replication synchronization process, otherwise the master will
# refuse the replica request.
#
# masterauth <master-password>
4 Standalone 模式
# 启动
$ redis-server redis.conf

# 查看是否启动成功
$ ps -ef | grep redis
5 Sentinel 哨兵模式
./sentinel.conf
# By default Redis Sentinel does not run as a daemon. Use 'yes' if you need it.
# Note that Redis will write a pid file in /var/run/redis-sentinel.pid when
# daemonized.
daemonize yes

# sentinel monitor <master-name> <ip> <redis-port> <quorum>
#
# Tells Sentinel to monitor this master, and to consider it in O_DOWN
# (Objectively Down) state only if at least <quorum> sentinels agree.
#
# Note that whatever is the ODOWN quorum, a Sentinel will require to
# be elected by the majority of the known Sentinels in order to
# start a failover, so no failover can be performed in minority.
#
# Replicas are auto-discovered, so you don't need to specify replicas in
# any way. Sentinel itself will rewrite this configuration file adding
# the replicas using additional configuration options.
# Also note that the configuration file is rewritten when a
# replica is promoted to master.
#
# Note: master name should not include special characters or spaces.
# The valid charset is A-z 0-9 and the three characters ".-_".
sentinel monitor mymaster 127.0.0.1 6379 2
# 启动 sentinel
redis-sentinel sentinel.conf
# 查看 sentinel 状态 redis-cli -p 26379
info sentinel
# 查看 node 状态 redis-cli -p 6379
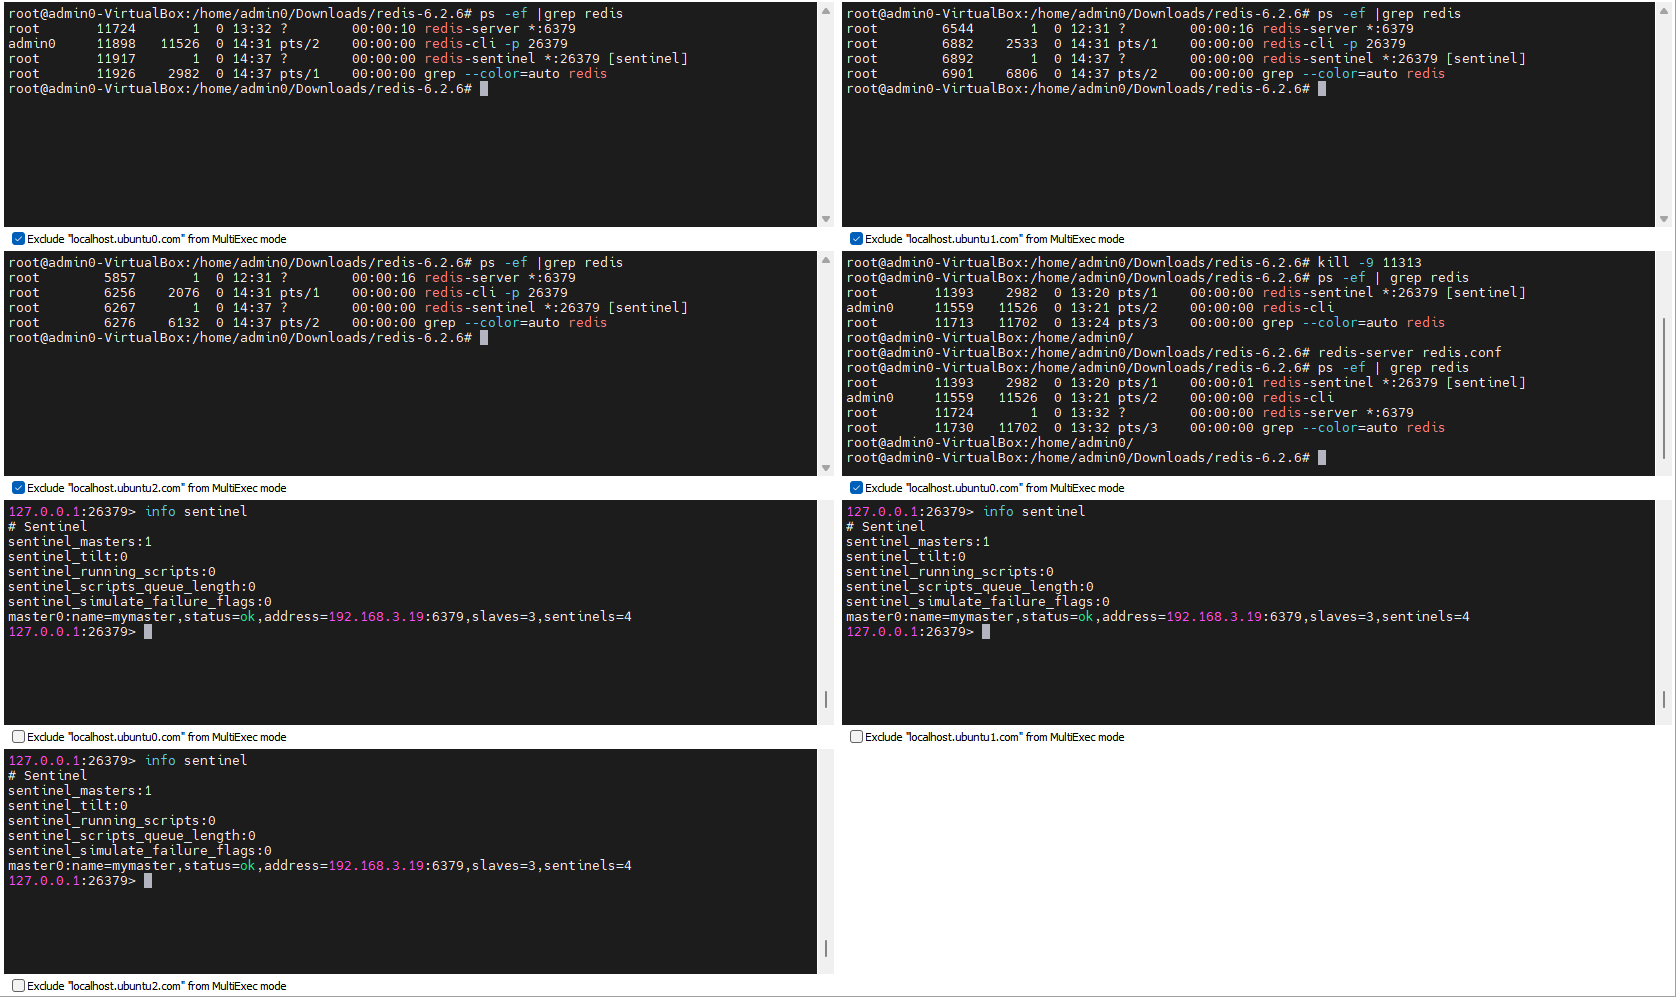
info replication运行截图:

6 Cluster 集群模式
./redis.conf
################################ REDIS CLUSTER  ###############################

# Normal Redis instances can't be part of a Redis Cluster; only nodes that are
# started as cluster nodes can. In order to start a Redis instance as a
# cluster node enable the cluster support uncommenting the following:
#
# cluster-enabled yes

# Every cluster node has a cluster configuration file. This file is not
# intended to be edited by hand. It is created and updated by Redis nodes.
# Every Redis Cluster node requires a different cluster configuration file.
# Make sure that instances running in the same system do not have
# overlapping cluster configuration file names.
#
# cluster-config-file nodes-6379.conf

# Cluster node timeout is the amount of milliseconds a node must be unreachable
# for it to be considered in failure state.
# Most other internal time limits are a multiple of the node timeout.
#
# cluster-node-timeout 15000
$ vim redis6380.conf
include redis.conf
port 6380
dbfilename "dump6380.rdb"
pidfile "/var/run/redis_6380.pid"
cluster-config-file nodes-6380.conf# 每台主机启动 2 个实例
$ redis-server redis.conf
$ redis-server redis6380.conf
# 创建集群
$ redis-cli --cluster create 192.168.3.19:6379 192.168.3.19:6380 192.168.3.20:6379 192.168.3.20:6380 192.168.3.21:6379 192.168.3.21:6380 --cluster-replicas 1
>>> Performing hash slots allocation on 6 nodes...
Master[0] -> Slots 0 - 5460
Master[1] -> Slots 5461 - 10922
Master[2] -> Slots 10923 - 16383
Adding replica 192.168.3.20:6380 to 192.168.3.19:6379
Adding replica 192.168.3.21:6380 to 192.168.3.20:6379
Adding replica 192.168.3.19:6380 to 192.168.3.21:6379
M: 5629c9bd2ed534ab08d32304a50cec1c2df77e06 192.168.3.19:6379
slots:[0-5460] (5461 slots) master
S: f5a2fb2dc2a8a36db9fce2c66158fc4b706dfbe0 192.168.3.19:6380
replicates 3e636f6283839a6cdf64c3f2536b71f9afd10183
M: 2b46af737c5c9352a19c88839d7e316110f5f83a 192.168.3.20:6379
slots:[5461-10922] (5462 slots) master
S: 629da6385cbbab3ace1240cfcbfc2b2f8bad06af 192.168.3.20:6380
replicates 5629c9bd2ed534ab08d32304a50cec1c2df77e06
M: 3e636f6283839a6cdf64c3f2536b71f9afd10183 192.168.3.21:6379
slots:[10923-16383] (5461 slots) master
S: d4c4410da556d9f11cd99e57f879e64e7c9024ba 192.168.3.21:6380
replicates 2b46af737c5c9352a19c88839d7e316110f5f83a
Can I set the above configuration? (type 'yes' to accept): yes
>>> Nodes configuration updated
>>> Assign a different config epoch to each node
>>> Sending CLUSTER MEET messages to join the cluster
Waiting for the cluster to join
.
>>> Performing Cluster Check (using node 192.168.3.19:6379)
M: 5629c9bd2ed534ab08d32304a50cec1c2df77e06 192.168.3.19:6379
slots:[0-5460] (5461 slots) master
1 additional replica(s)
S: d4c4410da556d9f11cd99e57f879e64e7c9024ba 192.168.3.21:6380
slots: (0 slots) slave
replicates 2b46af737c5c9352a19c88839d7e316110f5f83a
M: 2b46af737c5c9352a19c88839d7e316110f5f83a 192.168.3.20:6379
slots:[5461-10922] (5462 slots) master
1 additional replica(s)
M: 3e636f6283839a6cdf64c3f2536b71f9afd10183 192.168.3.21:6379
slots:[10923-16383] (5461 slots) master
1 additional replica(s)
S: f5a2fb2dc2a8a36db9fce2c66158fc4b706dfbe0 192.168.3.19:6380
slots: (0 slots) slave
replicates 3e636f6283839a6cdf64c3f2536b71f9afd10183
S: 629da6385cbbab3ace1240cfcbfc2b2f8bad06af 192.168.3.20:6380
slots: (0 slots) slave
replicates 5629c9bd2ed534ab08d32304a50cec1c2df77e06
[OK] All nodes agree about slots configuration.
>>> Check for open slots...
>>> Check slots coverage...
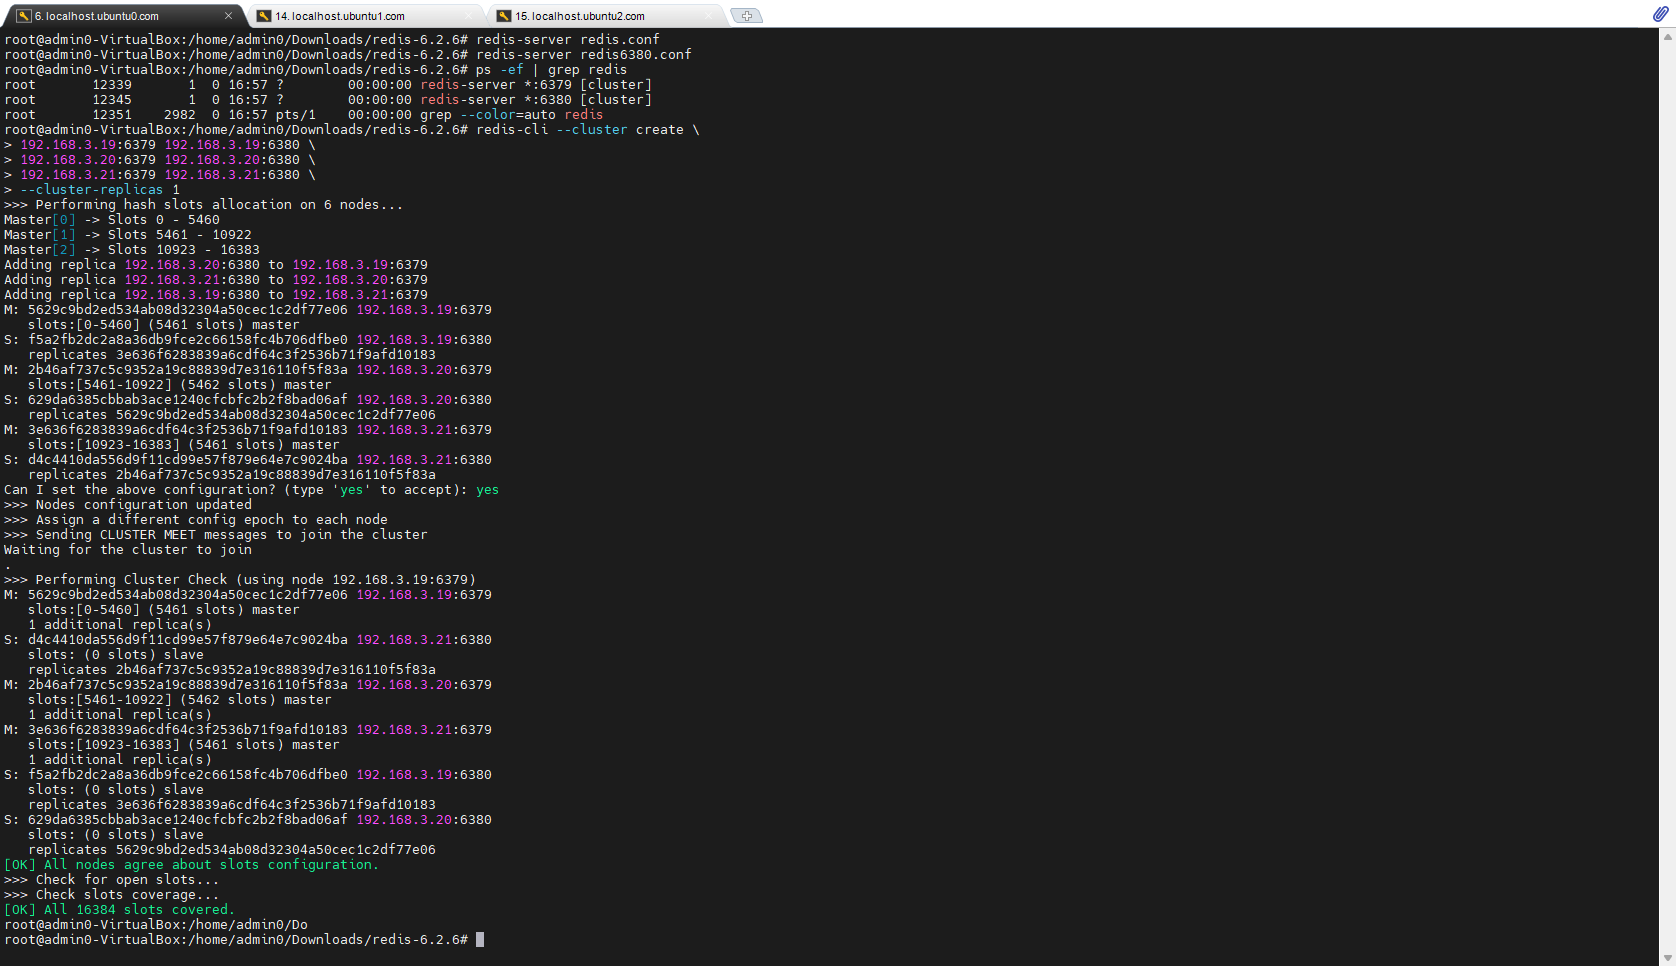
[OK] All 16384 slots covered.运行截图:

7 RDB 与 AOF
- RDB (Redis DataBase)
- AOF (Append Only File)
官方文档: https://redis.io/topics/persistence
(全文完)