第 2 章 选择器 Selectors
第 2 章 选择器 Selectors
One of the primary advantages of CSS is its ability to easily apply a set of styles to all elements of the same type. Unimpressed? Consider this: by editing a single line of CSS, you can change the colors of all your headings. Don’t like the blue you’re using? Change that one line of code, and they can all be purple, yellow, maroon, or any other color you desire. That lets you, the designer, focus on design, rather than grunt work. The next time you’re in a meeting and someone wants to see headings with a different shade of green, just edit your style and hit Reload. Voilà! The results are accomplished in seconds and there for everyone to see.
CSS 的主要优点之一是能够轻松地将一组样式应用于相同类型的元素。 想象不出来? 考虑一下:通过编辑单单一行 CSS,您就可以更改所有标题的颜色。 不喜欢您使用的蓝色吗?只需更改一行代码,它们就可以变成紫色,黄色,栗色或您想要的任何其他颜色。 这样一来,设计师就可以专注于设计,而不是那些琐屑的工作。下次您开会时,有人想要看到带有不同绿色阴影的标题,只需编辑样式并单击“重新加载”即可。 瞧! 结果在几秒钟内出现,而且每个人都可以看到。
CSS can’t solve all your problems—you can’t use it to change the colorspace of your PNGs, for example, at least not yet—but it can make some global changes much easier. So let’s begin with selectors and structure.
当然,CSS 不能解决所有问题——比如,它不能用来改变 PNG 图片的色域,至少现在还不能——但它确实让全局修改变得容易多了。接下来我们先从选择器和结构开始。
2.1 基本样式规则 Basic Style Rules
As stated, a central feature of CSS is its ability to apply certain rules to an entire set of element types in a document. For example, let’s say that you want to make the text of all h2 elements appear gray. Using old-school HTML, you’d have to do this by inserting <font color="gray">…</font> tags inside all your h2 elements. Using the style attribute, which is also bad practice, would require you to include style="color: gray;" in all your h2 elements, like this:
如上所述,CSS 的核心特性是将某些样式应用于文档中所有的同种类型元素。例如,如果你想把所有
h2元素的文本显示为灰色,使用老套的 HTML,你必须在所有的h2元素中插入<font color="gray">…</font>标签;使用style属性也不好,这需要你在所有的h2元素上添加style="color: gray;":
<h2><font color="gray">This is h2 text</font></h2>
<h2 style="color: gray;">This is h2 text</h2>
This will be a tedious process if your document contains a lot of h2 elements. Worse, if you later decide that you want all those h2s to be green instead of gray, you’d have to start the manual tagging all over again. (Yes, this is really how it used to be done!)
显然,如果你的文档里面有许多
h2元素,修改过程将是乏味的。更糟糕的是,如果你之后又想把所有的h2从灰色变成绿色,你又得重新开始手动设置一遍便签。(没错,以前就是这么干的!)
CSS allows you to create rules that are simple to change, edit, and apply to all the text elements you define (the next section will explain how these rules work). For example, you can write this rule once to make all your h2 elements gray:
CSS 让你可以创建易于编辑的规则,并把它们应用于所有你定义的文本元素(下一部分将解释规则如何生效)。例如,你可以仅写一次下面的规则,就把所有的
h2元素都变成灰色:
h2 {
  color: gray;
}
If you want to change all h2 text to another color—say, silver—just alter the value:
如果你想把所有
h2的文本变成另一种颜色——比如银色——只需要简单地更改里面的值:
h2 {
  color: silver;
}
2.1.1 元素选择器 Element Selectors
An element selector is most often an HTML element, but not always. For example, if a CSS file contains styles for an XML document, the element selectors might look something like this:
元素选择器通常都是 HTML 元素,但也有例外。例如,如果 CSS 文件的样式是用于 XML 文档的,元素选择器可能会是这样:
quote {
  color: gray;
}
bib {
  color: red;
}
booktitle {
  color: purple;
}
myElement {
  color: red;
}
In other words, the elements of the document serve as the most basic selectors. In XML, a selector could be anything, since XML allows for the creation of new markup languages that can have just about anything as an element name. If you’re styling an HTML document, on the other hand, the selector will generally be one of the many HTML elements such as p, h3, em, a, or even html itself. For example:
换句话说,文档的元素是最基本的选择器。在 XML 中,选择器可以是任何东西,因为 XML 允许创建新的标记语言,任何东西都可以作为元素名称。而另一方面,如果在 HTML 文档中添加样式,选择器一般为 HTML 元素之一,如
p,h3,em,a,甚至html元素本身。例如:
html {
  color: black;
}
h1 {
  color: gray;
}
h2 {
  color: silver;
}
样式表的结果在图 1-1 中展示:
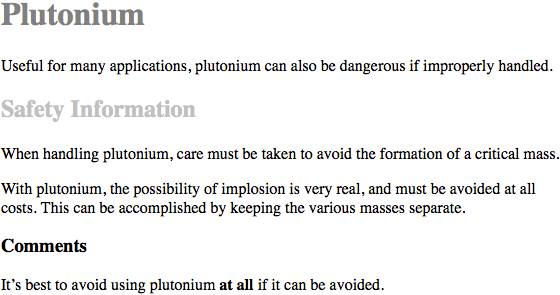
图 2-1: 简单文档的简单样式
Once you’ve globally applied styles directly to elements, you can shift those styles from one element to another. Let’s say you decide that the paragraph text, not the h1 elements, in Figure 2-1 should be gray. No problem. Just change the h1 selector to p:
当你直接全局地给元素设置了样式,你可以把样式从一个样式移到另一个样式上。如果你想要图 1-1 中的段落文本而不是
h1元素是灰色,没问题,只要把h1选择器换成p就行了;
html {
  color: black;
}
p {
  color: gray;
}
h2 {
  color: silver;
}
结果在图 2-2 中展示:
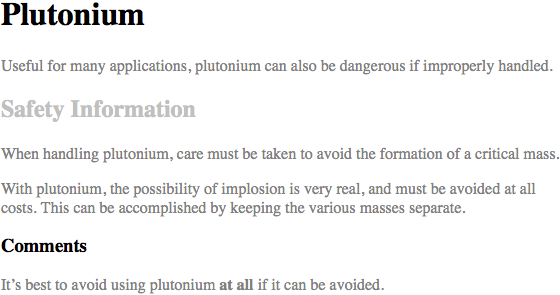
图 2-2: 把样式从一个元素应用到另一个元素上
2.1.2 声明和关键字 Declarations and Keywords
The declaration block contains one or more declarations. A declaration is always formatted as a property followed by a colon and then a value followed by a semicolon. The colon and semicolon can be followed by zero or more spaces. In nearly all cases, a value is either a single keyword or a space-separated list of one or more keywords that are permitted for that property. If you use an incorrect property or value in a declaration, the whole rule will be ignored. Thus, the following two declarations would fail:
声明块包含一或多条声明。一条声明的格式总是一个属性后面跟着一个冒号,然后一个值后面跟着一个分号。冒号和分号后面可以有零或多个空白。几乎所有的值都是单个关键字或者空白分隔的当前属性允许的多个关键字组成的串。如果在一条声明中使用了错误的属性或值,整条规则都会被忽略。因此,下面这两条声明是无效的:
brain-size: 2cm; /* unknown property 'brain-size' */
color: ultraviolet; /* unknown value 'ultraviolet' */
In an instance where you can use more than one keyword for a property’s value, the keywords are usually separated by spaces, with some cases requiring slashes (/) or commas. Not every property can accept multiple keywords, but many, such as the font property, can. Let’s say you want to define medium-sized Helvetica for paragraph text, as illustrated in Figure 2-3.
属性值可以使用多个关键字的时候,关键字通常用空白分隔,有些情况下需要斜线(
/)或者逗号。很多属性都允许接收多个关键字(如font属性),但不是全部属性都可以。如果想为段落字体设置中等大小的 Helvetica 字体,就像在图 1-3 中显示的:
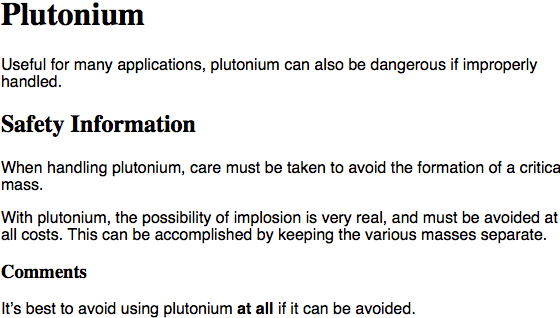
图 2-3: 属性值包含多个关键字的结果
The rule would read as follows:
规则将是这样:
p {
  font: medium Helvetica;
}
Note the space between medium and Helvetica, each of which is a keyword (the first is the font’s size and the second is the actual font name). The space allows the user agent to distinguish between the two keywords and apply them correctly. The semicolon indicates that the declaration has been concluded.
注意两个关键字
medium和Helvetica之间的空白,这两个都是关键字(第一个是字体大小,第二个是字体名称)。空白可以让开发者分辨出两个关键字并正确地使用它们。分号指明当前声明已经结束。
These space-separated words are referred to as keywords because, taken together, they form the value of the property in question. For instance, consider the following fictional rule:
这些空白分隔的词被称为关键字,因为它们在一起组成了整个属性的值。例如下面这个虚构的规则:
rainbow: red orange yellow green blue indigo violet;There is no such property as rainbow, but the example is useful for illustrative purposes. The value of rainbow is red orange yellow green blue indigo violet, and the seven keywords add up to a single, unique value. We can redefine the value for rainbow as follows:
当然不存在
rainbow这个属性,它只是被当做例子来进行说明。rainbow的值是red orange yellow green blue indigo violet,这 7 个关键字放在一起组成了一个唯一的值。我们可以像下面这样重新定义rainbow的值:
rainbow: infrared red orange yellow green blue indigo violet ultraviolet;Now we have a new value for rainbow composed of nine keywords instead of seven. Although the two values look mostly the same, they are as unique and different as zero and one. This may seem an abstract point, but it’s critical to understanding some of the subtler effects of specificity and the cascade (covered in later in this book).
现在我们有了一个由 9 个而不是 7 个关键字组成的新值。虽然这两个值看起来很像,但他们就像 0 和 1 一样是不同而且唯一的。这里好像有点抽象,但它对理解一些特性和层叠(在本书后面部分讨论)的细节影响是至关重要的。
As we’ve seen, CSS keywords are usually separated by spaces. In CSS2.1 there was one exception: in the CSS property font, there is exactly one place where a forward slash (/) could be used to separate two specific keywords. Here’s an example:
如我们所见。CSS 关键字通常使用空白分隔。在 CSS2.1 中有个例外:
font属性值可以使用正斜杠(/)分隔两个特殊的关键字,例如:
h2 {
  font: large/150% sans-serif;
}
The slash separates the keywords that set the element’s font size and line height. This is the only place the slash is allowed to appear in the font declaration. All of the other keywords allowed for font are separated by spaces.
斜线分隔的关键字设置元素的字体大小和行高,这是
font声明中唯一允许使用斜线的地方,font的所有其他关键字都使用空白分隔。
The slash has since worked its way into a number of other properties’ values. These include, but may not always be limited to the following:
斜线已经可以使用在其他一些属性值中,包括但不限于下面的属性:
backgroundborder-imageborder-radiusgridgrid-areagrid-columngrid-rowgrid-templatemask-border
There are also some keywords that are separated by commas. When declaring multiple values, such as multiple background images, transition properties, and shadows, the declarations are separated with commas. Additionally, parameters in functions, such as linear gradients and transforms, are comma separated, as the following example shows:
还有些关键字使用逗号分隔。声明多个值时,例如多背景图片、过渡和阴影,声明时使用逗号分隔。另外函数参数,如
linear gradiennts和transform等,也使用逗号分隔,示例:
.box {
  box-shadow: inset -1px -1px white, 3px 3px 3px rgba(0, 0, 0, 0.2);
  background-image: url(myimage.png), linear-gradient(180deg, #fff 0%, #000 100%);
  transform: translate(100px, 200px);
}
a:hover {
  transition: color, background-color 200ms ease-in 50ms;
}
Those are the basics of simple declarations, but they can get much more complex. The next section begins to show you just how powerful CSS can be.
这些是基础的简单声明,但它们也可以变得非常复杂。下一节我们将要展示 CSS 有多么强大。
2.2 组合 Grouping
So far, we’ve seen fairly simple techniques for applying a single style to a single selector. But what if you want the same style to apply to multiple elements? If that’s the case, you’ll want to use more than one selector or apply more than one style to an element or group of elements.
如我们所见,把一个简单样式应用在一个简单选择器上是非常简单的,但是如果你想把相同的样式引用在多个元素上应该怎么做呢?这种场景下,你会想要把多个选择器或多个样式应用在一个或一组元素上。
2.2.1 组合选择器 Grouping Selectors
Let’s say you want both h2 elements and paragraphs to have gray text. The easiest way to accomplish this is to use the following declaration:
如果你想让
h2元素和段落都显示灰色文本,最简单的方式是使用下面的声明:
h2,
p {
  color: gray;
}
By placing the h2 and p selectors on the left side of the rule and separating them with a comma, you’ve defined a rule where the style on the right (color: gray;) applies to the elements referenced by both selectors. The comma tells the browser that there are two different selectors involved in the rule. Leaving out the comma would give the rule a completely different meaning, which we’ll explore in “Descendant Selectors” on page 56.
把
h2和p选择器放置在规则左边并用逗号分隔,右边已经定义好的规则(color: gray;)就会应用于这两个选择器。逗号告诉浏览器规则里面是两个不同的选择器,如果去掉逗号,会使语句变成另外一条含义完全不同的规则。(参见后面的章节“后代选择器”。)
There are really no limits to how many selectors you can group together. For example, if you want to display a large number of elements in gray, you might use something like the following rule:
组合的选择器数目没有限制,例如,如果你想把一大堆元素都设置成灰色,你可以用这样的规则:
body,table,th,td,h1,h2,h3,h4,p,pre,strong,em,b,i {color: gray;}Grouping allows an author to drastically compact certain types of style assignments, which makes for a shorter stylesheet. The following alternatives produce exactly the same result, but it’s pretty obvious which one is easier to type:
组合允许开发者大幅压缩样式分配,从而使样式表更精简。下面两种写法的结果是一样的,哪一种更容易输入是显而易见的:
h1 {color: purple;}
h2 {color: purple;}
h3 {color: purple;}
h4 {color: purple;}
h5 {color: purple;}
h6 {color: purple;}

h1,h2,h3,h4,h5,h6 {color: purple;}
.
Grouping allows for some interesting choices. For example, all of the groups of rules in the following example are equivalent—each merely shows a different way of grouping both selectors and declarations:
组合允许做出一些有趣的行为,例如下面例子中的写法都是等效的,每个例子都展示了一种组合选择器和基本声明混合使用的不同方式:
/* group 1 */
h1 {color: silver; background: white;}
h2 {color: silver; background: gray;}
h3 {color: white; background: gray;}
h4 {color: silver; background: white;}
b {color: gray; background: white;}

/* group 2 */
h1,h2,h4 {color: silver;}
h2,h3 {background: gray;}
h1,h4,b {background: white;}
h3 {color: white;}
b {color: gray;}

/* group 3 */
h1,h4 {color: silver; background: white;}
h2 {color: silver;}
h3 {color: white;}
h2,h3 {background: gray;}
b {color: gray; background: white;}
.
Any of these will yield the result shown in Figure 2-4. (These styles use grouped declarations, which are explained in “Grouping Declarations” on page 35.)
每个例子都会生成图 2-4 显示的结果。(这些样式使用的组合声明,将在接下来的“组合声明”中探讨。)
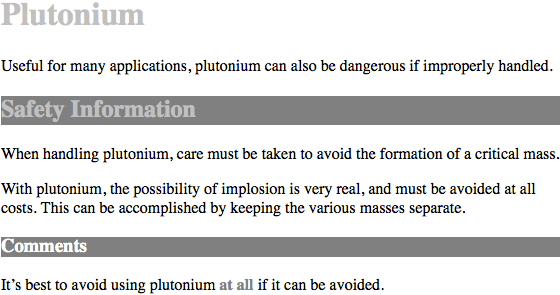
图 2-4: 等效样式表的结果
通配符选择器 The universal selector
CSS2 introduced a new simple selector called the universal selector, displayed as an asterisk (*). This selector matches any element at all, much like a wildcard. For example, to make every single element in a document red, you would write:
CSS2 引入了一个新的简单选择器叫做通配符选择器,使用星号(
*)标注。这个选择器就像一张百搭牌,可以匹配所有元素。例如,要把文档中的每个元素(文本)都设置成红色,可以这样写:
* {
  color: red;
}
This declaration is equivalent to a grouped selector that lists every single element contained within the document. The universal selector lets you assign the color value red to every element in the document in one efficient stroke. Beware, however: although the universal selector is convenient, with a specificity on 0-0-0; and because it targets everything within its declaration scope, it can have unintended consequences, which are discussed later in this book.
此声明等效于一个列出文档中所有元素的组合选择器。通配选择器允许你以一种高效的方式为文档中每个元素的
color属性设置一个值red。但是,要注意,虽然通配选择器很方便,它的特殊性是 0-0-0,而且因为会匹配所有声明域中的元素,它可能会带来意外的后果,这些我们将在本书后面的部分讨论。
2.2.2 组合声明 Grouping Declarations
Since you can group selectors together into a single rule, it follows that you can also group declarations. Assuming that you want all h1 elements to appear in purple, 18-pixel-high Helvetica text on an aqua background (and you don’t mind blinding your readers), you could write your styles like this:
你不仅仅可以对选择器进行组合,还可以对声明进行组合。假如你想把所有的
h1元素设置为紫色、18 像素高的 Helvetica 字体显示在水色背景上(你不介意闪瞎用户),你可以把样式写成这样:
h1 {
  font: 18px Helvetica;
}
h1 {
  color: purple;
}
h1 {
  background: aqua;
}
But this method is inefficient—imagine creating such a list for an element that will carry 10 or 15 styles! Instead, you can group your declarations together:
但这种方式是低效的——想象一下为每个元素创建一个 10 或 15 个样式的表!你可以把声明组合在一起来替代前面的写法:
h1 {
  font: 18px Helvetica;
  color: purple;
  background: aqua;
}
This will have exactly the same effect as the three-line stylesheet just shown.
这种写法和上面的三行样式表是一样的结果。
Note that using semicolons at the end of each declaration is crucial when you’re grouping them. Browsers ignore whitespace in stylesheets, so the user agent must rely on correct syntax to parse the stylesheet. You can fearlessly format styles like the following:
要注意写组合声明时每条声明后面的分号都至关重要。浏览器会忽略样式表中的空白,因此用户代理要依赖正确的语法来解析样式表。你可以放心地按这种格式写样式表:
h1 {
  font: 18px Helvetica;
  color: purple;
  background: aqua;
}
You can also minimize your CSS, removing all non-required spaces.
也可以通过移除不必要的空白来压缩 CSS:
h1{font:18px Helvetica;color: purple;background: aqua;}Ignoring whitespace, the last three are treated equally by the server, but the second one is most human readable, and the recommended method of marking up your CSS during development. (You might choose to minimize your CSS for networkperformance reasons, but this is usually handled by a server-side script, caching network, or other service.)
忽略掉空白后,上例的后三种写法对服务器来说是等效的,但第二种更易于人类阅读,也是 CSS 开发环境中的推荐写法。(也许出于提高网络性能的原因你会选择压缩 CSS,但通常这应该通过服务器端脚本、网络缓存或其他方式来实现。)
If the semicolon is omitted on the second statement, the user agent will interpret the stylesheet as follows:
如果第二个例子中漏掉了第二个分号,用户代理会把样式表理解成下面这样:
h1 {
	font: 18px Helvetica;
	color: purple background: aqua;
}
Because background: is not a valid value for color, and because color can be given only one keyword, a user agent will ignore the color declaration (including the back ground: aqua part) entirely. You might think the browser would at least render h1s as purple text without an aqua background, but not so. Instead, they will be the default color (which is usually black) with a transparent background (which is also a default). The declaration font: 18px Helvetica will still take effect since it was correctly terminated with a semicolon.
因为
background:并不是color属性的合法值,而且color属性只能有一个关键字,因此用户代理会完全忽略color声明(包括background: aqua的部分)。你可能认为浏览器至少会把h1设置成紫色字体但没有水色背景,然而并不是,它们会被设置成默认颜色(通常是黑色)和透明背景(默认)。声明font: 18px Helvetica将会依然生效,因为它是以一个分号正确结束的。
Although it is not technically necessary to follow the last declaration of a rule with a semicolon in CSS, it is generally good practice to do so. First, it will keep you in the habit of terminating your declarations with semicolons, the lack of which is one of the most common causes of rendering errors. Second, if you decide to add another declaration to a rule, you won’t have to worry about forgetting to insert an extra semicolon. Third, if you ever use a preprocessor like Sass, trailing semicolons are often required for all declarations. Avoid all these problems—always follow a declaration with a semicolon, wherever the rule appears.
虽然从技术上来讲,最后一条声明后面的分号并不是必需的,但通常为它加上分号是一个好的原则。首先,丢失分号是渲染错误的最常见的原因之一,遵循这个原则可以使你保持使用分号结束声明的良好习惯;其次,当你为样式规则追加一条声明的时候,不必担心前面的声明后面是否忘了插入分号;第三,如果你曾使用过像 Sass 这样的预处理器,通常尾部的分号对所有声明都是必需的。在每条声明后都跟随一个分号就可以避免上面的问题。
As with selector grouping, declaration grouping is a convenient way to keep your stylesheets short, expressive, and easy to maintain.
组合声明和组合选择器一起使用,可以方便地使样式表简洁、易读和易于维护。
2.2.3 组合所有 Grouping Everything
You now know that you can group selectors and you can group declarations. By combining both kinds of grouping in single rules, you can define very complex styles using only a few statements. Now, what if you want to assign some complex styles to all the headings in a document, and you want the same styles to be applied to all of them? Here’s how to do it:
我们知道,选择器和声明都可以分组,在单条样式中使用这两种分组,可以使用很少的声明定义非常复杂的样式。如果你要把一些复杂样式应用在文档的所有标题上,而且为他们应用相同的样式,应该怎么做呢?下面是做法:
h1,h2,h3,h4,h5,h6 {
  color: gray;
  background: white;
  padding: 0.5em;
  border: 1px solid black;
  font-family: Charcoal, sans-serif;
}
.
Here we’ve grouped the selectors, so the styles on the right side of the rule will be applied to all the headings listed; grouping the declarations means that all of the listed styles will be applied to the selectors on the left side of the rule. The result of this rule is shown in Figure 2-5.
这里我们组合了选择器,所以右侧的规则会应用在列出的所有标题上;组合声明表明所有列出的样式都会被应用在左侧的选择器上。规则显示的结果如图 2-5。
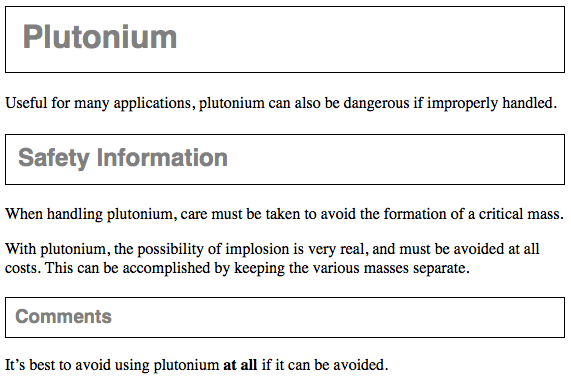
图 2-5: 分组选择器和规则
This approach is preferable to the drawn-out alternative, which would begin with something like this:
这种方案比下面的方案更好:
h1 {color: gray;}
h2 {color: gray;}
h3 {color: gray;}
h4 {color: gray;}
h5 {color: gray;}
h6 {color: gray;}
h1 {background: white;}
h2 {background: white;}
h3 {background: white;}
.
and continue for many lines. You can write out your styles the long way, but I wouldn’t recommend it—editing them would be as tedious as using style attributes everywhere!
等等还有许多行。你也可以像这样写出长长的样式,但我建议你不要这样做——编辑它们就像到处使用
style属性一样无聊。
It’s possible to add even more expression to selectors and to apply styles in a way that cuts across elements in favor of types of information. To get something so powerful, you’ll have to do a little work in return, but it’s well worth it.
你可以向选择器附加更多的表达式并以语义化的方式应用到元素上。为了获得这种能力,你必须在接下来花费更多的功夫,不过这一切都是值得的。
旧浏览器中的新元素 New Elements in Old Browsers
With updates to HTML, such as the HTML5 specification, new elements have come into being. Some browsers predate these newer elements, and so don’t recognize them. Versions of Internet Explorer prior to IE9, for example, did not support selecting elements they did not understand. The solution was to create the element in the DOM, thereby informing the browser that said element exists.
作为 HTML 的升级版,HTML5 规范引入了新的元素。比新元素更早的浏览器不能识别它们。例如,IE9 以前的浏览器无法选中它们不支持的元素。解决办法是在 DOM 中创建元素,以此告知浏览器元素的存在。
For example, IE8 does not recognize the <main> element. The following JavaScript line informs IE8 of main’s existence:
例如,IE8 不能识别
<main>元素,下面这行 JavaScript 代码告诉 IE8main元素的存在:
document.createElement("main");By running that line of code, older versions of Internet Explorer will recognize the existence of the element, allowing it to be selected and styled.
执行这行代码,旧版本的 IE 浏览器可以识别到这些元素,并允许选中它们以及为它们添加样式。
2.3 类和 ID 选择器 Class and ID Selectors
So far, we’ve been grouping selectors and declarations together in a variety of ways, but the selectors we’ve been using are very simple ones that refer only to document elements. Element selectors are fine up to a point, but there are times when you need something a little more specialized.
到目前为止,我们已经以各种方式组合使用了选择器和声明,但我们使用的选择器都非常简单。这些选择器只能用文档元素本身来选择,它们很好用,但有时你需要更专门的选择器。
In addition to raw document elements, there are class selectors and ID selectors, which let you assign styles in a way that is independent of document elements. These selectors can be used on their own or in conjunction with element selectors. However, they work only if you’ve marked up your document appropriately, so using them generally involves a little forethought and planning.
除了原生文档元素,还有类选择器和 ID 选择器,它们允许以独立于文档元素的方式分配样式。这些选择器可以单独使用,也可以与元素选择器结合使用。但是,它们只有在文档被正确标记的时候才能生效,因此使用它们通常需要做一些构思。
For example, say you’re drafting a document that discusses ways of handling plutonium. The document contains various warnings about safely dealing with such a dangerous substance. You want each warning to appear in boldface text so that it will stand out. However, you don’t know which elements these warnings will be. Some warnings could be entire paragraphs, while others could be a single item within a lengthy list or a small section of text. So, you can’t define a rule using element selectors of any kind. Suppose you tried this route:
例如,假设你正在起草一份讨论处理钚的方法的文件。 该文件包含关于安全处理这种危险物质的各种警告。 您希望每个警告都以粗体文本显示以便更突出,但你不知道这些警告将是哪些元素。 一些警告可能是整个段落,而其他警告可能是冗长列表中的一小条或一小段文本。 因此,你不能使用任何元素选择器定义规则。 假设你尝试这样写:
p {
  font-weight: bold;
  color: red;
}
All paragraphs would be red and bold, not just those that contain warnings. You need a way to select only the text that contains warnings, or more precisely, a way to select only those elements that are warnings. How do you do it? You apply styles to parts of the document that have been marked in a certain way, independent of the elements involved, by using class selectors.
所有的段落都会被加粗,而不仅仅是包含警告的那些。你需要一种方法来选择仅包含警告的文本,或者更准确地说,只选择那些警告元素。怎么做呢?使用类选择器,把样式应用于文档中那些被用特定方式标记出来的部分,而不是那些什么元素。
2.3.1 类选择器 Class Selectors
The most common way to apply styles without worrying about the elements involved is to use class selectors. Before you can use them, however, you need to modify your actual document markup so that the class selectors will work. Enter the class attribute:
忽略元素类型去应用样式的最常用方式,是使用类选择器。但是在使用它们之前需要添加
class属性设置文档标记,以便选择器能够生效:
<p class="warning">
  When handling plutonium, care must be taken to avoid the formation of a
  critical mass.
</p>
<p>
  With plutonium,
  <span class="warning"
    >the possibility of implosion is very real, and must be avoided at all
    costs</span
  >. This can be accomplished by keeping the various masses separate.
</p>
To associate the styles of a class selector with an element, you must assign a class attribute the appropriate value. In the previous code block, a class value of warning was assigned to two elements: the first paragraph and the span element in the second paragraph.
要把类选择器和一个元素联系起来,必须为
class属性设置一个合适的值。在上面的代码中,一个值为warning的类被分配给两个元素:第一个段落和第二个段落里的span元素。
All you need now is a way to apply styles to these classed elements. In HTML documents, you can use a compact notation where the name of a class is preceded by a period (.) and can be joined with an element selector:
现在只需要一种方式把样式应用在这些元素上。在 HTML 文档中,在
class名称前写上一个句点(.)即可,句点前面还可以再加上元素名称,这样就可以跟元素选择器混合使用:
.warning {
  font-weight: bold;
}
When combined with the example markup shown earlier, this simple rule has the effect shown in Figure 2-6. That is, the declaration font-weight: bold will be applied to every element (thanks to the presence of the implicit universal selector) that carries a class attribute with a value of warning.
当使用前面所示的示例,这个简单规则的效果如图 2-6 所示。亦即,声明
font-weight: bold会应用在每个(得益于隐含的通配选择器)class属性值为warning的元素上。
通配选择器的符号是*,使用 ID、类、属性选择器、伪类选择器以及伪元素选择器等时,如果没有结合元素选择器,它们会隐式地包含通配选择器。
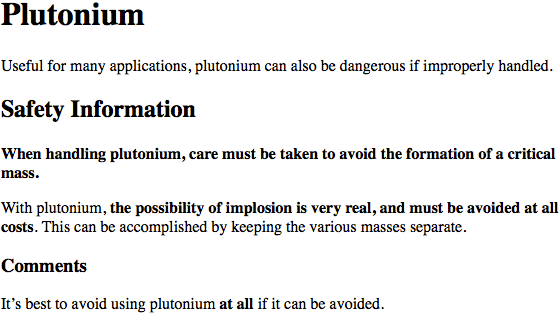
图 2-6: 使用类选择器
As you can see, the class selector works by directly referencing a value that will be found in the class attribute of an element. This reference is always preceded by a period (.), which marks it as a class selector. The period helps keep the class selector separate from anything with which it might be combined—such as an element selector. For example, you may want boldface text only when an entire paragraph is a warning:
如你所见,类选择器直接通过元素
class属性中的值来引用元素。引用始终以句点(.)开头,标记它是一个类选择器。句点把类选择器和与其组合在一起的其他部分区分开来(例如元素选择器)。假如当只有整个段落是警告时,才设置为粗体:
p.warning {
  font-weight: bold;
}
The selector now matches any p elements that have a class attribute containing the word warning, but no other elements of any kind, classed or otherwise. Since the span element is not a paragraph, the rule’s selector doesn’t match it, and it won’t be displayed using boldfaced text.
选择器现在只会匹配任何
class属性值中包含单词warning的p元素,而其他类型的元素无论有没有设置class值都不会被选中。因为span元素不是段落,选择器不会匹配到它,因此它不会显示为粗体文字。
If you did want to assign different styles to the span element, you could use the selector span.warning:
如果想为
span元素分配不同的样式,可以使用选择器span.warning:
p.warning {
  font-weight: bold;
}
span.warning {
  font-style: italic;
}
In this case, the warning paragraph is boldfaced, while the warning span is italicized. Each rule applies only to a specific type of element/class combination, so it does not leak over to other elements.
这样,警告段落被设置为粗体,而警告
span被设置为斜体。每个规则仅应用于特定的元素/类组合,而不会影响到其他元素。
Another option is to use a combination of a general class selector and an elementspecific class selector to make the styles even more useful, as in the following markup:
另一种做法是使用一个通用的类选择器和一个特定元素的类选择器,来让样式更加实用,例如这样:
.warning {
  font-style: italic;
}
span.warning {
  font-weight: bold;
}
The results are shown in Figure 2-7.
效果在图 2-7 中。
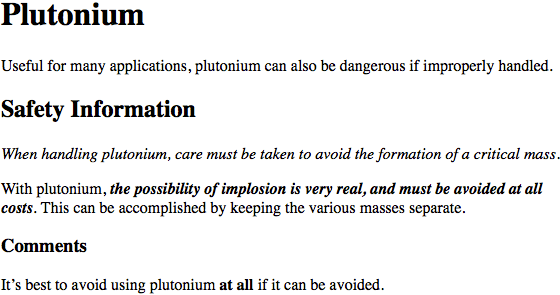
图 2-7: 使用一般和特定选择器联合样式
In this situation, any warning text will be italicized, but only the text within a span element with a class of warning will be both boldfaced and italicized.
这样设置,任何警告文字都被设置成斜体,但只有
class属性值为warning的span元素中,文本既是粗体又是斜体。
Notice the format of the general class selector in the previous example: it’s a class name preceded by a period without any element name, and no universal selector. In cases where you only want to select all elements that share a class name, you can omit the universal selector from a class selector without any ill effects.
请注意上例中的一般类选择器,它只包含一个类名和前面的句点,而没有任何元素名称,也没有通配选择器。如果你想选择具有某个类名的所有元素,省略通配选择器不会有任何影响。
2.3.2 多个类 Multiple Classes
In the previous section, we dealt with class values that contained a single word. In HTML, it’s possible to have a space-separated list of words in a single class value. For example, if you want to mark a particular element as being both urgent and a warning, you could write:
我们在前面看到了包含单个单词的
class的属性值。在 HTML 中,使用空白分隔的单词列表可以作为单个class的值。例如,如果你想把某个特定元素标记为既是紧急的又是一个警告,可以这样写:
<p class="urgent warning">
  When handling plutonium, care must be taken to avoid the formation of a
  critical mass.
</p>
<p>
  With plutonium,
  <span class="warning"
    >the possibility of implosion is very real, and must be avoided at all
    costs</span
  >. This can be accomplished by keeping the various masses separate.
</p>
The order of the words doesn’t matter; warning urgent would also suffice and would yield precisely the same results no matter how the CSS class attribute is written.
(
class值中)单词的顺序没有影响,写成warning urgent会产生完全相同的结果。
Now let’s say you want all elements with a class of warning to be boldfaced, those with a class of urgent to be italic, and those elements with both values to have a silver background. This would be written as follows:
假如你想让所有
class值为warning的元素加粗,把class值为urgent的设为斜体,而同时包含两个值的元素设置银色背景,写法是这样:
.warning {
  font-weight: bold;
}
.urgent {
  font-style: italic;
}
.warning.urgent {
  background: silver;
}
By chaining two class selectors together, you can select only those elements that have both class names, in any order. As you can see, the HTML source contains class="urgent warning" but the CSS selector is written .warning.urgent. Regardless, the rule will still cause the “When handling plutonium . . . ” paragraph to have a silver background, as illustrated in Figure 2-8. This happens because the order the words are written in doesn’t matter. (This is not to say the order of classes is always irrelevant, but we’ll get to that later in the book.)
连接两个类选择器,可以仅选择那些同时具有两个类名的元素,无论类名的顺序如何。正如示例,HTML 代码中含有
class="urgent warning",但 CSS 选择器却写作.warning.urgent。这条规则依然可以把“When handling plutonium . . .”这段设置为银色背景,如图 2-8 所示,这是因为单词书写的顺序并不重要。(但这并不表示类名的顺序总是无关紧要的,我们将会在本书稍后涉及。)
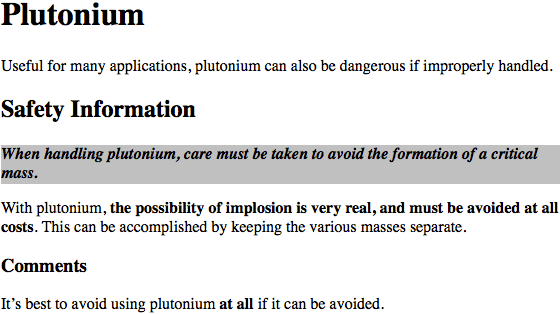
图 2-8: 使用多类名选择元素
If a multiple class selector contains a name that is not in the space-separated list, then the match will fail. Consider the following rule:
如果多类选择器里面包含一个无空格分隔的类名,匹配将会失效。例如这个规则:
p.warning.help {
  background: red;
}
As you would expect, the selector will match only those p elements with a class containing the words warning and help. Therefore, it will not match a p element with just the words warning and urgent in its class attribute. It would, however, match the following:
你可能期望这个选择器会匹配所有
class中仅含有单词warning或help的p元素,然而实际上它不会匹配class属性中只有warning和urgent的p元素。它还会匹配这样的元素:
<p class="urgent warning help">Help me!</p>2.3.3 ID 选择器 ID Selectors
In some ways, ID selectors are similar to class selectors, but there are a few crucial differences. First, ID selectors are preceded by an octothorpe (#)—also known as a pound sign (in the US), hash sign, hash mark, or tic-tac-toe board—instead of a period. Thus, you might see a rule like this one:
从某些方面说,ID 选择器和类选择器类似,但它们有一些重要区别。首先,ID 选择器使用井号(
#)开头,因此,一条规则可能是这样的:
*#first-para {
  font-weight: bold;
}
This rule produces boldfaced text in any element whose id attribute has a value of first-para.
这条规则为任意
id属性值为first-para的元素设置文本粗体。
The second difference is that instead of referencing values of the class attribute, ID selectors refer, unsurprisingly, to values found in id attributes. Here’s an example of an ID selector in action:
第二个区别是 ID 选择器(理所当然地)匹配
id属性而不是class属性的值。这是一个 ID 选择器生效的例子:
*#lead-para {
  font-weight: bold;
}<p id="lead-para">This paragraph will be boldfaced.</p>
<p>This paragraph will NOT be bold.</p>Note that the value lead-para could have been assigned to any element within the document. In this particular case, it is applied to the first paragraph, but we could have applied it just as easily to the second or third paragraph. Or an unordered list. Or anything.
注意值
lead-para可以关联给文档中的任意元素。在这个例子中,它只赋给了第一个段落,但是你可以同样赋给第二个、第三个段落。或者赋给一个无须列表,甚至是任何元素。
As with class selectors, it is possible to omit the universal selector from an ID selector. In the previous example, we could also have written:
和类选择器一样,ID 选择器中的通配选择符可以忽略。上例也可以写成这样:
#lead-para {
  font-weight: bold;
}
The effect of this selector would be the same.
效果是一样的。
Another similarity between classes and IDs is that IDs can be selected independently of an element. There may be circumstances in which you know that a certain ID value will appear in a document, but you don’t know the element on which it will appear (as in the plutonium-handling warnings), so you’ll want to declare standalone ID selectors. For example, you may know that in any given document, there will be an element with an ID value of mostImportant. You don’t know whether that most important thing will be a paragraph, a short phrase, a list item, or a section heading. You know only that it will exist in each document, occur in an arbitrary element, and appear no more than once. In that case, you would write a rule like this:
另一个与类选择器相似的地方是,ID 选择器也可以独立于元素类型。可能有些场景下你知道有一个确定 ID 值会出现在文档中,但不知道会出现在哪个元素上(如在前面的钚处理警告中),因此需要声明独立的 ID 选择器。例如,在任意给定的文档中,有一个元素的 ID 值是
mostImportant,但不知道这个元素是一个段落、引用、列表还是段落头,只知道这个值会出现在每个文档中的某个随机的元素上,而且在每个文档中仅出现一次。在这种情况下,规则可以这样写:
#mostImportant {
  color: red;
  background: yellow;
}
This rule would match any of the following elements (which, as noted before, should not appear together in the same document because they all have the same ID value):
这条规则会匹配下面的每一个元素(正如上面强调的,因为它们有相同的 ID 值,所以它们不应该同时出现在一个文档中):
<h1 id="mostImportant">This is important!</h1>
<em id="mostImportant">This is important!</em>
<ul id="mostImportant">
  This is important!
</ul>
2.3.4 使用 Class 还是 ID Deciding Between Class and ID
You may assign classes to any number of elements, as demonstrated earlier; the class name warning was applied to both a p and a span element, and it could have been applied to many more elements. IDs, on the other hand, should be used once, and only once, within an HTML document. Therefore, if you have an element with an id value of lead-para, no other element in that document should have an id value of lead-para.
类可以分配给任意多的元素,类名
warning可以分配给一个p元素或者一个span元素,或者更多其他元素。然而,ID 在一个 HTML 文档中使用且仅使用一次。因此如果有了一个id值为lead-para的元素,该文档中的其他元素都不能有lead-para的id值。
In the real world, browsers don’t always check for the uniqueness of IDs in HTML. That means that if you sprinkle an HTML document with several elements, all of which have the same value for their ID attributes, you’ll probably get the same styles applied to each. This is incorrect behavior, but it happens anyway. Having more than one of the same ID value in a document also makes
DOM scripting more difficult, since functions like getElementById() depend on there being one, and only one, element with a given ID value.
在实际中,浏览器并不总会检查 HTML 中 ID 的唯一性。如果你为多个元素设置了相同的 ID 属性值,它们可能都会被设置为相同的样式。这是不正确的实现,但这种情况很普遍。在一个文档中存在多个 ID 值相同的元素还会导致 DOM 脚本的问题,因为像getElementById()这样的函数依赖于文档中只存在一个 ID 为特定值的元素。
Unlike class selectors, ID selectors can’t be combined with other IDs, since ID attributes do not permit a space-separated list of words.
与类选择器不同,ID 选择器不能联合使用,因为 ID 属性不允许使用空白分隔的单词列表。
Another difference between class and id names is that IDs carry more weight when you’re trying to determine which styles should be applied to a given element. This will be explained in greater detail in the next chapter.
class和id名称的另一个区别是,当决定某个元素应该应用哪个样式时,ID 有更高的权重。这点将在后面详细讨论。
Also note that class and ID selectors may be case-sensitive, depending on the document language. HTML defines class and ID values to be case-sensitive, so the capitalization of your class and ID values must match that found in your documents. Thus, in the following pairing of CSS and HTML, the element’s text will not be boldfaced:
还要注意类和 ID 可能是大小写敏感的,这取决于文档的语言。HTML 语言把类和 ID 定义为大小写敏感的,因此类和 ID 选择器的大小写要和文档中的匹配。在下面的 CSS 和 HTML 中,元素文字不会被设置为粗体:
p.criticalInfo {
  font-weight: bold;
}<p class="criticalinfo">Don't look down.</p>Because of the change in case for the letter i, the selector will not match the element shown.
因为字母
i的大小写不一致,选择器不会匹配元素。
On a purely syntactical level, the dot-class notation (e.g., .warning) is not guaranteed to work for XML documents. As of this writing, the dot-class notation works in HTML, SVG, and MathML, and it may well be permitted in future languages, but it’s up to each language’s specification to decide that. The hash-ID notation (e.g., #lead) will work in any document language that has an attribute that enforces uniqueness within a document. Uniqueness can be enforced with an attribute called id, or indeed anything else, as long as the attribute’s contents are defined to be unique within the document.
从纯语法层次来说,点-类标记(例如:
.warning)不能保证在 XML 文档中生效。在撰写本文时,点-类标记在 HTML、SVG 和 MathML 中有效,它可能在未来被更多语言支持,但这要取决于语言本身的规范。井号-ID 标记(例如:#lead)在所有强制属性唯一性的语言中都有效。唯一性可以强制使用名为id的属性,或者任何其他属性,只要在文档中属性内容被定义为唯一的即可。
2.4 属性选择器 Attribute Selectors
When it comes to both class and ID selectors, what you’re really doing is selecting values of attributes. The syntax used in the previous two sections is particular to HTML, XHTML, SVG, and MathML documents (as of this writing). In other markup languages, these class and ID selectors may not be available (as, indeed, those attributes may not be present). To address this situation, CSS2 introduced attribute selectors, which can be used to select elements based on their attributes and the values of those attributes. There are four general types of attribute selectors: simple attribute selectors, exact attribute value selectors, partial-match attribute value selectors, and leading-value attribute selectors.
当你使用类和 ID 选择器时,实际上是在选中属性的值。类选择器和 ID 选择器专用于 HTML、XHTML、SVG 和 MathML 文档(到撰写本文时),但在其它的标记语言中,这两个选择器可能是不可用的(属性可能不存在)。因此,CSS2 引入了属性选择器,使用元素的任意属性和值来选中元素。属性选择器有四种基本类型:简单属性选择器、准确属性值选择器、部分匹配属性选择器和头值属性选择器。
2.4.1 简单属性选择器 Simple Attribute Selectors
If you want to select elements that have a certain attribute, regardless of that attribute’s value, you can use a simple attribute selector. For example, to select all h1 elements that have a class attribute with any value and make their text silver, write:
如果想选择具有某个特定属性的元素,而无论属性的值是什么,可以使用简单属性选择器。例如,选择所有具备
class属性的h1元素,然后将其文本设置为银色:
h1[class] {
  color: silver;
}
So, given the following markup:
对如下代码:
<h1 class="hoopla">Hello</h1>
<h1>Serenity</h1>
<h1 class="fancy">Fooling</h1>
you get the result shown in Figure 2-9.
将得到如图 2-9 的结果:
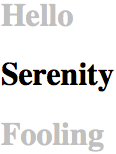
图 2-9: 使用属性选择元素
This strategy is very useful in XML documents, as XML languages tend to have element and attribute names that are specific to their purpose. Consider an XML language that is used to describe planets of the solar system (we’ll call it PlanetML). If you want to select all pml-planet elements with a moons attribute and make them boldface, thus calling attention to any planet that has moons, you would write:
这种策略对 XML 文档非常有用,因为 XML 语言的元素经常含有表示特定意义的属性名。例如可以想象一种描述太阳系行星的 XML 语言(可以叫它 PlanetML)。如果想要选择所有包含
moons属性的pml-planet元素,把文本设置成粗体,用来突出有月亮的行星,可以这样写:
pml-planet[moons] {
  font-weight: bold;
}
This would cause the text of the second and third elements in the following markup fragment to be boldfaced, but not the first:
第二个和第三个元素将会被设置成粗体,第一个则不会:
<pml-planet>Venus</pml-planet>
<pml-planet moons="1">Earth</pml-planet>
<pml-planet moons="2">Mars</pml-planet>
In HTML documents, you can use this feature in a number of creative ways. For example, you could style all images that have an alt attribute, thus highlighting those images that are correctly formed:
在 HTML 中可以用一些创新的方式使用这个特性。例如可以为所有包含
alt属性的图片设置样式,因此突出格式规范的图片:
img[alt] {
  border: 3px solid red;
}
(This particular example is generally useful more for diagnostic purposes—that is, determining whether images are indeed correctly marked up—than for design purposes.)
(这个特殊例子更适用于检查而不是设计目的,用来查看图片是否被设置了完全规范的标记。)
If you wanted to boldface any element that includes title information, which most browsers display as a “tool tip” when a cursor hovers over the element, you could write:
大部分浏览器在鼠标放到元素上的时候,会显示元素的
title属性值,称为“tool tip”。如果想把所有包含title信息的元素粗体显示,可以这样:
*[title] {
  font-weight: bold;
}
Similarly, you could style only those anchors (a elements) that have an href attribute, thus applying the styles to any hyperlink but not to any placeholder anchors.
相似地,可以选择那些包含
href属性的锚点(a)元素,以此为超链接而不是所有锚点元素添加样式。
It is also possible to select based on the presence of more than one attribute. You do this by chaining the attribute selectors together. For example, to boldface the text of any HTML hyperlink that has both an href and a title attribute, you would write:
也可以基于多个属性选择元素,只需简单地并列多个属性选择器即可。例如,把包含
href和title属性的 HTML 超链接设置为粗体:
a[href][title] {
  font-weight: bold;
}
This would boldface the first link in the following markup, but not the second or third:
第一个链接会设置为粗体,第二个和第三个不会:
<a href="http://www.w3.org/" title="W3C Home">W3C</a><br />
<a href="http://www.webstandards.org">Standards Info</a><br />
<a name="dead" title="Not a link">dead.letter</a>
2.4.2 基于准确属性值选择 Selection Based on Exact Attribute Value
You can further narrow the selection process to encompass only those elements whose attributes are a certain value. For example, let’s say you want to boldface any hyperlink that points to a certain document on the web server. This would look something like:
可以进一步缩小选择器范围选择那些某个属性为某个确定值的元素。例如,把指向服务器上某个特定文档的链接设置为粗体:
a[href="http://www.css-discuss.org/about.html"]
{
  font-weight: bold;
}
This will boldface the text of any a element that has an href attribute with exactly the value http://www.css-discuss.org/about.html. Any change at all, even dropping the www. part or changing to a secure protocol with https, will prevent a match.
所有
href属性值准确地是http://www.css-discuss.org/about.html的a元素会被设置为粗体。任何修改,即使去掉了www.,也会造成无法匹配。
Any attribute and value combination can be specified for any element. However, if that exact combination does not appear in the document, then the selector won’t match anything. Again, XML languages can benefit from this approach to styling. Let’s return to our PlanetML example. Suppose you want to select only those planet elements that have a value of 1 for the attribute moons:
任何属性和值的组合都可以定义在任何元素上,然而,如果这个组合没有(准确地)出现在文档中,选择器不会匹配任何东西。XML 语言再次得益于这种方式来设置属性。回到 PlantML 的例子,如果想选择那些
moons属性值为1的planet元素:
planet[moons="1"] {
  font-weight: bold;
}
This would boldface the text of the second element in the following markup fragment, but not the first or third:
第二个元素的文本将会被设置为粗体,第一个和第三个不会:
<planet>Venus</planet>
<planet moons="1">Earth</planet>
<planet moons="2">Mars</planet>
As with attribute selection, you can chain together multiple attribute-value selectors to select a single document. For example, to double the size of the text of any HTML hyperlink that has both an href with a value of http://www.w3.org/ and a title attribute with a value of W3C Home, you would write:
与属性选择一样,使用多个元素-值选择器也可以选中单个元素。例如,将
href属性值为http://www.w3.org/且title属性值为W3C Home的 HTML 超链接文本设置为两倍尺寸:
a[href="http://www.w3.org/"][title="W3C Home"]
{
  font-size: 200%;
}
This would double the text size of the first link in the following markup, but not the second or third:
第一个元素会被设置为双倍尺寸字体,第二个和第三个不会:
<a href="http://www.w3.org/" title="W3C Home">W3C</a><br />
<a href="http://www.webstandards.org" title="Web Standards Organization"
  >Standards Info</a
><br />
<a href="http://www.example.org/" title="W3C Home">dead.link</a>
结果如图 2-10。

图 2-10: 使用属性和值选择元素
Again, this format requires an exact match for the attribute’s value. Matching becomes an issue when the selector form encounters values that can in turn contain a space-separated list of values (e.g., the HTML attribute class). For example, consider the following markup fragment:
再次提醒,这种方式需要属性值的精准匹配。属性值为多个空白分隔的值列表时,匹配可能会因多个值的顺序不同而产生问题(如 HTML 的属性
class)。例如下面的代码片段:
<planet type="barren rocky">Mercury</planet>The only way to match this element based on its exact attribute value is to write:
匹配这个元素的唯一方式是使用准确的属性值:
planet[type="barren rocky"] {
  font-weight: bold;
}
If you were to write planet[type="barren"], the rule would not match the example markup and thus would fail. This is true even for the class attribute in HTML. Consider the following:
如果使用
planet[type="barren"],规则不会匹配是这个示例。即使是 HTML 中的class属性,也会出现这种情况。例如:
<p class="urgent warning">
  When handling plutonium, care must be taken to avoid the formation of a
  critical mass.
</p>
To select this element based on its exact attribute value, you would have to write:
要基于准确属性值选择元素,应该这样:
p[class="urgent warning"] {
  font-weight: bold;
}
This is not equivalent to the dot-class notation covered earlier, as we will see in the next section. Instead, it selects any p element whose class attribute has exactly the value "urgent warning", with the words in that order and a single space between them. It’s effectively an exact string match.
我们将在下节看到,这和之前介绍的点-类选择是不等同的。这条规则将会选择
class属性值精确地是urgent warning的所有p元素,单词以相同的顺序,并且中间以单个空格隔开。它实际上是一个精确字符串匹配。
Also, be aware that ID selectors and attribute selectors that target the id attribute are not precisely the same. In other words, there is a subtle but crucial difference between h1#page-title and h1[id="page-title"]. This difference is explained in “Specificity” on page 97.
同样地,ID 选择器和使用
id属性的属性选择器也不是恰好相同的。换句话说,在h1#page-title和h1[id="page-title"]之间,存在着细微但很重要的区别。这种区别将在章节“特度”解释。
2.4.3 基于部分属性值选择 Selection Based on Partial Attribute Values
Odds are that you’ll want to select elements based on portions of their attribute values, rather than the full value. For such situations, CSS actually offers a variety of options for matching substrings in an attribute’s value. These are summarized in Table 2-1.
你可能想基于属性值的一部分而不是整个值来选择元素,这种情况下 CSS 提供了一些选择,匹配属性值中的子串。它们总结在表格 1-1 中。
表格 2-1:子串匹配属性选择器
| 类型 | 描述 |
|---|---|
[foo~="bar"] | 选择所有带有foo属性、且foo属性被空白分隔的单词列表中含有单词bar的元素。 |
[foo*="bar"] | 选择所有带有foo属性、且foo属性值中含有子串bar的元素。 |
[foo^="bar"] | 选择所有带有foo属性、且foo属性值以bar开头的元素。 |
[foo$="bar"] | 选择所有带有foo属性、且foo属性值以bar结束的元素。 |
[foo|="bar"] | 选择所有带有foo属性、且foo属性值以bar开头后接一个短线(U+002D)或者属性值是bar的元素。 |
2.4.4 A Particular Attribute Selection Type 特定的属性选择器
The first of these attribute selectors that match on a partial subset of an element’s attribute value is actually easier to show than it is to describe. Consider the following rule:
基于部分属性值的选择器中的最后一个,展示它的用法比描述它更简单。看下面的规则:
*[lang|="en"] {
  color: white;
}
This rule will select any element whose lang attribute is equal to en or begins with en-. Therefore, the first three elements in the following example markup would be selected, but the last two would not:
这条规则会选择任何
lang属性等于en或者以en-开头的元素。因此,下面的示例中前三个标签会被选中,而后两个则不会:
<h1 lang="en">Hello!</h1>
<p lang="en-us">Greetings!</p>
<div lang="en-au">G'day!</div>
<p lang="fr">Bonjour!</p>
<h4 lang="cy-en">Jrooana!</h4>
In general, the form [att|="val"] can be used for any attribute and its values. Let’s say you have a series of figures in an HTML document, each of which has a filename like figure-1.gif and figure-3.jpg. You can match all of these images using the following selector:
一般来说,
[att|="val"]的格式可以用于任何属性和属性值。如果 HTML 文档中有一系列图片,文件名都像figure-1.gif和figure-3.jpg这样,可以使用这样的选择器匹配所有这样的图片:
img[src|="figure"] {
  border: 1px solid gray;
}
Or, if you’re creating a CSS framework or pattern library, instead of creating redundant classes like "btn btn-small btn-arrow btn-active", you can declare "btnsmall-arrow-active", and target the class of elements with:
如果你正在创建一个 CSS 框架或模式库,不必创建许多繁琐的类:
"btn btn-small btn-arrow btn-active",你可以声明"btn-small-arrow-active",然后这样匹配元素的类:
*[class|="btn"] {
  border-radius: 5px;
}<button class="btn-small-arrow-active">Click Me</button>The most common use for this type of attribute selector is to match language values, as demonstrated in an upcoming section, “The :lang Pseudo-Class” on page 88.
这个属性选择器最常用的场景是用来匹配语言值,我们将在 88 页"
:lang伪类"章节看到。
匹配空白分隔的列表中的一个单词
For any attribute that accepts a space-separated list of words, it is possible to select elements based on the presence of any one of those words. The classic example in HTML is the class attribute, which can accept one or more words as its value. Consider our usual example text:
任何使用空白分隔单词列表的属性,都可以基于这些单词中的任意一个对元素进行选择。HTML 中最经典的例子是
class属性,该属性可以使用一或多个单词作为值。看这个常用例子:
<p class="urgent warning">
  When handling plutonium, care must be taken to avoid the formation of a
  critical mass.
</p>
Let’s say you want to select elements whose class attribute contains the word warn ing. You can do this with an attribute selector:
如果要选择
class属性中包含单词warning的元素,可以使用这样的属性选择器:
p[class~="warning"] {
  font-weight: bold;
}
Note the presence of the tilde (~) in the selector. It is the key to selection based on the presence of a space-separated word within the attribute’s value. If you omit the tilde, you would have an exact value-matching attribute selector, as discussed in the previous section.
注意选择器中的波浪线(~),这是基于属性值中分离单词进行选择的关键字。如果忽略了波浪线,选择器就变成了前面讨论过的精确值匹配的属性选择器。
This selector construct is equivalent to the dot-class notation discussed in “Deciding Between Class and ID” on page 44. Thus, p.warning and p[class~="warning"] are equivalent when applied to HTML documents. Here’s an example that is an HTML version of the “PlanetML” markup seen earlier:
这个选择器跟“使用 Class 还是 ID”中的点-类选择器是等同的。也就是说,用于 HTML 文档时,
p.warning和p[class~="warning"]是相等同的。这是前面提到过的“PlanetML”标记例子的一个 HTML 版本:
<span class="barren rocky">Mercury</span>
<span class="cloudy barren">Venus</span>
<span class="life-bearing cloudy">Earth</span>
To italicize all elements with the word barren in their class attribute, you write:
要把所有
class属性值中包含单词barren的元素设置为斜体:
span[class~="barren"] {
  font-style: italic;
}
This rule’s selector will match the first two elements in the example markup and thus italicize their text, as shown in Figure 2-11. This is the same result we would expect from writing span.barren {font-style: italic;}.
这个选择器将会匹配例子中的前两个元素并把它们设置为斜体。这和使用
span.barren {font-style: italic;}是一样的效果。

图 2-11: 使用部分属性值选择元素
So why bother with the tilde-equals attribute selector in HTML? Because it can be used for any attribute, not just class. For example, you might have a document that contains a number of images, only some of which are figures. You can use a partialmatch value attribute selector aimed at the title text to select only those figures:
既然效果相同,为什么还要在 HTML 中使用波浪线-等号属性选择器呢?因为它可被用于任何属性,而不仅仅是
class。例如:一个文档中包含许多图片,其中一部分是图表,你可以使用匹配部分属性值的选择器选择title属性的文字,来选中那些是图表的图片:
img[title~="Figure"] {
  border: 1px solid gray;
}
This rule selects any image whose title text contains the word Figure. Therefore, as long as all your figures have title text that looks something like “Figure 4. A baldheaded elder statesman,” this rule will match those images. For that matter, the selector img[title~="Figure"] will also match a title attribute with the value “How to Figure Out Who’s in Charge.” Any image that does not have a title attribute, or whose title value doesn’t contain the word “Figure,” won’t be matched.
这条规则会选择所有
title文字中包含Figure的单词。因此,如果所有的图表的title中都有像“Figure 4. A bald- headed elder statesman,”这样的文字,这条规则会匹配所有的图表。同样的,选择器img[title~="Figure"]也会匹配title属性值是“How to Figure Out Who’s in Charge.”这样内容的图片。所有没有title属性的图片,或者title值中不包含单词“Figure”的图片,都不会被匹配。
匹配属性值中的子串 Matching a substring within an attribute value
Sometimes you want to select elements based on a portion of their attribute values, but the values in question aren’t space-separated lists of words. In these cases, you can use the form [att*="val"] to match substrings that appear anywhere inside the attribute values. For example, the following CSS matches any span element whose class attribute contains the substring cloud, so both “cloudy” planets are matched, as shown in Figure 2-12:
有时需要匹配属性值的一部分,但并不是空格分隔的单词。这种情况下,可以使用
[att*="val"]的形式匹配属性值中的任何位置。例如:下面的 CSS 匹配任何class属性值中包含子串cloud的span元素,所以两个“cloudy”的行星都会被匹配,如图 1-12。
span[class*="cloud"] {
  font-style: italic;
}<span class="barren rocky">Mercury</span>
<span class="cloudy barren">Venus</span>
<span class="life-bearing cloudy">Earth</span>
图 2-12: 基于属性值内子串选择元素
As you can imagine, there are many useful applications for this particular capability. For example, suppose you wanted to specially style any links to the O’Reilly website. Instead of classing them all and writing styles based on that class, you could instead write the following rule:
可以想象到,这种用法有许多有用的场景,例如为所有到 O'Reilly Media 网页的链接添加特殊样式。避免给它们设置类名并基于类添加样式,可以简单地使用下面的规则:
a[href*="oreilly.com"] {
  font-weight: bold;
}
You aren’t confined to the class and href attributes. Any attribute is up for grabs here: title, alt, src, id…if the attribute has a value, you can style based on a substring within that value. The following rule draws attention to any image with the string “space” in its source URL:
选择不限于使用
class和href属性,任何属性都可以。title、alt、src、id……可以基于任何属性值的子串添加样式。下面的规则选择所有源文件 URL 中包含字符串“space”的图片:
img[src*="space"] {
  border: 5px solid red;
}
Similarly, the following rule draws attention to input elements that have a title tells the user what to, and any other input whose title contains the substring “format” in its title:
类似地,下面的规则选中有标题的
input元素,其中标题包含子串format:
input[title*="format"] {
  background-color: #dedede;
}<input
type="tel"
title="Telephone number should be formatted as XXX-XXX-XXXX"
pattern="\d{3}\-\d{3}\-\d{4}"
/>A common use for the general substring attribute selector is to match a section of a class in pattern library class names. Elaborating on the last example, we can target any class name that starts with "btn" followed by a dash, and that contains the substring “arrow” preceded by a dash:
属性子串匹配选择器常用来匹配模式库中的类名。在前面的例子中,我们可以匹配以
btn开始后跟一个短线,并且包含前面有短线的子串arrow的类名:
*[class|="btn"][class*="-arrow"]:after {
  content: "▼";
}<button class="btn-small-arrow-active">Click Me</button>The matches are exact: if you include whitespace in your selector, then whitespace must also be present in an attribute’s value. The attribute names and values must be case-sensitive only if the underlying document language requires case sensitivity. Class names, titles, URLs, and ID values are all case-sensitive, but HTML attribute keyterm values, such as input types, are not:
这种匹配方式是精确匹配的——如果选择器中包含空白,属性值中必须包含空白才能匹配。只有当依赖的文档语言要求区分大小写时,属性名和值才必须区分大小写。类名、标题和 ID 值都是大小写敏感的,但 HTML 的属性关键字值,比如
input元素的类型,不区分大小写:
input[type="CHeckBoX"] {
  margin-right: 10px;
}<input type="checkbox" name="rightmargin" value="10px" />匹配属性值开头的子串 Matching a substring at the beginning of an attribute value
In cases where you want to select elements based on a substring at the beginning of an attribute value, then the attribute selector pattern [att^="val"] is what you’re seeking. This can be particularly useful in a situation where you want to style types of links differently, as illustrated in Figure 2-13.
当需要基于属性值开头的子串选择元素时,可以使用属性选择器模式
[attr^="val"]。这个匹配模式在给不同类别的链接设置样式时特别有用,如图 2-13 所示:
a[href^="https:"] {
  font-weight: bold;
}
a[href^="mailto:"] {
  font-style: italic;
}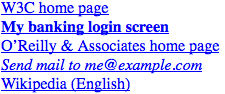
图 2-13: 基于属性开头的子串选择元素
Another use case is when you want to style all images in an article that are also figures, as in the figures you see throughout this text. Assuming that the alt text of each figure begins with text in the pattern “Figure 5”—which is an entirely reasonable assumption in this case—then you can select only those images as follows:
另一个使用场景是为文档中所有内容是说明的图片添加样式——假定所有的说明图的
alt属性的文字都以“Figure 5”这样的模式开头——则可以使用这种方式选择这些图片:
img[alt^="Figure"] {
  border: 2px solid gray;
  display: block;
  margin: 2em auto;
}
The potential drawback here is that any img element whose alt starts with “Figure”will be selected, whether or not it’s meant to be an illustrative figure. The likeliness of that occurring depends on the document in question.
潜藏的问题是,任何
alt属性值以“Figure”开头的img标签都会被选择,而无论它是不是一个说明图。显然,是否产生这个问题是由文档决定的(而不是选择器)。
Another use case is selecting all of the calendar events that occur on Mondays. In this case, let’s assume all of the events have a title attribute containing a date in the format “Monday, March 5th, 2012.” Selecting them all is a simple matter of [title^="Monday"].
另一个使用场景是选择所有周一的日程。这种场景中,我们约定所有的事件都有个
title属性,它以这样的日期格式Monday,March 5th,2012开头。选择它们只需要简单地使用[title^="Monday"]。
匹配属性值结尾的字串 Matching a substring at the end of an attribute value
The mirror image of beginning-substring matching is ending-substring matching, which is accomplished using the [att$="val"]pattern. A very common use for this capability is to style links based on the kind of resource they target, such as separate styles for PDF documents, as illustrated in Figure 2-14.
与开头子串匹配相对应的是结尾子串匹配,使用选择器模式
[att$="val"]。最常见的使用场景是基于链接的资源类型添加样式,例如图 2-14 所示,为指向 PDF 文档的链接添加特定样式。
a[href$=".pdf"] {
  font-weight: bold;
}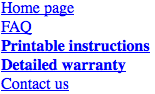
图 2-14: 基于属性结尾的子串选择元素
Similarly, you could (for whatever reason) select images based on their image format:
类似地,可以(无论原因)基于格式选择图片:
img[src$=".gif"] {
  ...;
}
img[src$=".jpg"] {
  ...;
}
img[src$=".png"] {
  ...;
}
To continue the calendar example from the previous section, it would be possible to select all of the events occurring within a given year using a selector like [title $="2015"].
上一节中日程的例子,可以基于给定的年份选择所有对象,使用一个类似这样的选择器
[title$="2015"]。
You may have noticed that I’ve quoted all the attribute values in the attribute selectors. Quoting is required if the value includes any special characters, begins with a dash or digit, or is otherwise invalid as an identifier and needs to be quoted as a string. To be safe, I recommend always quoting attribute values in attribute selectors, even though it is only required to makes strings out of invalid identifiers.
你可能注意到了,属性选择器中的所有属性值都用了引号包围。当属性值包含任何特殊字符、以短线或数字开头、或其他非法标识符时,需要使用引号把它标记成字符串。为了安全,建议在任何情况下都为属性选择器中的属性值添加引号,尽管只有非法标识符导致它需要被标记成字符串的时候引号才是必需的。
2.4.5 忽略大小写标识符 The Case Insensitivity Identifier
CSS Selectors level 4 introduces a case-insensitivity option to attribute selectors. Including an i before the closing bracket will allow the selector to match attribute values case-insensitively, regardless of document language rules.
CSS Selectors level 4 为属性选择器引入了忽略大小写选项。在中括号关闭之前使用i允许选择器匹配属性值的时候忽略大小写,无视文档语言的规则。
For example, suppose you want to select all links to PDF documents, but you don’t know if they’ll end in .pdf, .PDF, or even .Pdf. Here’s how:
例如,你想选择所有指向 PDF 文档的链接,但并不确定它们以
a[href$='.PDF' i]Adding that humble little i means the selector will match any a element whose href attribute’s value ends in .pdf, regardless of the capitalization of the letters P, D, and F.
添加一个小小的
i表示选择器匹配任何href属性以a元素,无论其中是否包含大写的P、D或F。
This case-insensitivity option is available for all attribute selectors we’ve covered. Note, however, that this only applies to the values in the attribute selectors. It does not enforce case insensitivity on the attribute names themselves. Thus, in a case-sensitive language, planet[type*="rock" i] will match all of the following.
忽略大小写选项适用于前面涉及的所有属性选择器,但要注意它只用于属性选择器的值,而不能用于属性名本身。因此,在大小写敏感的语言中,
planet[type*="rock" i]还是可以匹配下面所有的元素:
<planet type="barren rocky">Mercury</planet>
<planet type="cloudy ROCKY">Venus</planet>
<planet type="life-bearing Rock">Earth</planet>
It will not match the following element, because the attribute TYPE isn’t matched by type:
但不能匹配下面的元素,因为属性
TYPE不匹配type:
<planet TYPE="dusty rock">Mars</planet>Again, that’s in langauges that enforce case sensitivity in the element and attribute syntax. XHTML was one such. In languages that are case-insensitive, like HTML5, this isn’t an issue.
再次说明,是否在元素和属性语法中强制区分大小写是由语言决定的,XHTML 就是大小写敏感的语言。而在大小写不敏感的语言中没有这样的问题,例如 HTML5。
As of late 2017, Opera Mini, the Android browser, and Edge did not support this capability.
至 2017 年底,Opera Mini、Android 浏览器和 Edge 不支持此能力。
2.5 使用文档结构 Using Document Structure
CSS is powerful because it uses the structure of documents to determine appropriate styles and how to apply them. Yet structure plays a much larger role in the way styles are applied to a document. Let’s take a moment to discuss structure before moving on to more powerful forms of selection.
如前面所说,CSS 之强大在于它利用文档结构决定(元素的)样式和样式作用于元素的方式。结构确实在样式作用于文档时扮演了非常重要的角色,在继续讨论更强大的选择形式之前,我们先来讨论结构。
2.5.1 理解父-子关系 Understanding the Parent-Child Relationship
To understand the relationship between selectors and documents, we need to once again examine how documents are structured. Consider this very simple HTML document:
为了理解选择器和文档之间的关系,我们要再次回顾文档结构是如何形成的,看下面这个非常简单的 HTML 文档:
<html>
  <head>
    <base href="http://www.meerkat.web/" />
    <title>Meerkat Central</title>
  </head>
  <body>
    <h1>Meerkat <em>Central</em></h1>
    <p>
      Welcome to Meerkat <em>Central</em>, the
      <strong
        >best meerkat web site on
        <a href="inet.html">the <em>entire</em> Internet</a></strong
      >!
    </p>
    <ul>
      <li>
        We offer:
        <ul>
          <li>
            <strong>Detailed information</strong> on how to adopt a meerkat
          </li>
          <li>Tips for living with a meerkat</li>
          <li>
            <em>Fun</em> things to do with a meerkat, including:
            <ol>
              <li>Playing fetch</li>
              <li>Digging for food</li>
              <li>Hide and seek</li>
            </ol>
          </li>
        </ul>
      </li>
      <li>...and so much more!</li>
    </ul>
    <p>Questions? <a href="mailto:suricate@meerkat.web">Contact us!</a></p>
  </body>
</html>
Much of the power of CSS is based on the parent-child relationship of elements. HTML documents (actually, most structured documents of any kind) are based on a hierarchy of elements, which is visible in the “tree” view of the document (see Figure 2-15). In this hierarchy, each element fits somewhere into the overall structure of the document. Every element in the document is either the parent or the child of another element, and it’s often both.
CSS 的能力很大程度基于于元素的父-子关系。HTML 文档(事实上绝大部分结构化文档)基于元素层级结构,构成文档的“树状”视图(见图 2-15)。在这种层级结构中,每个元素都处在整个文档结构中的某个适当位置上,每个元素都是其他元素的父或者子,常常既是父又是子。
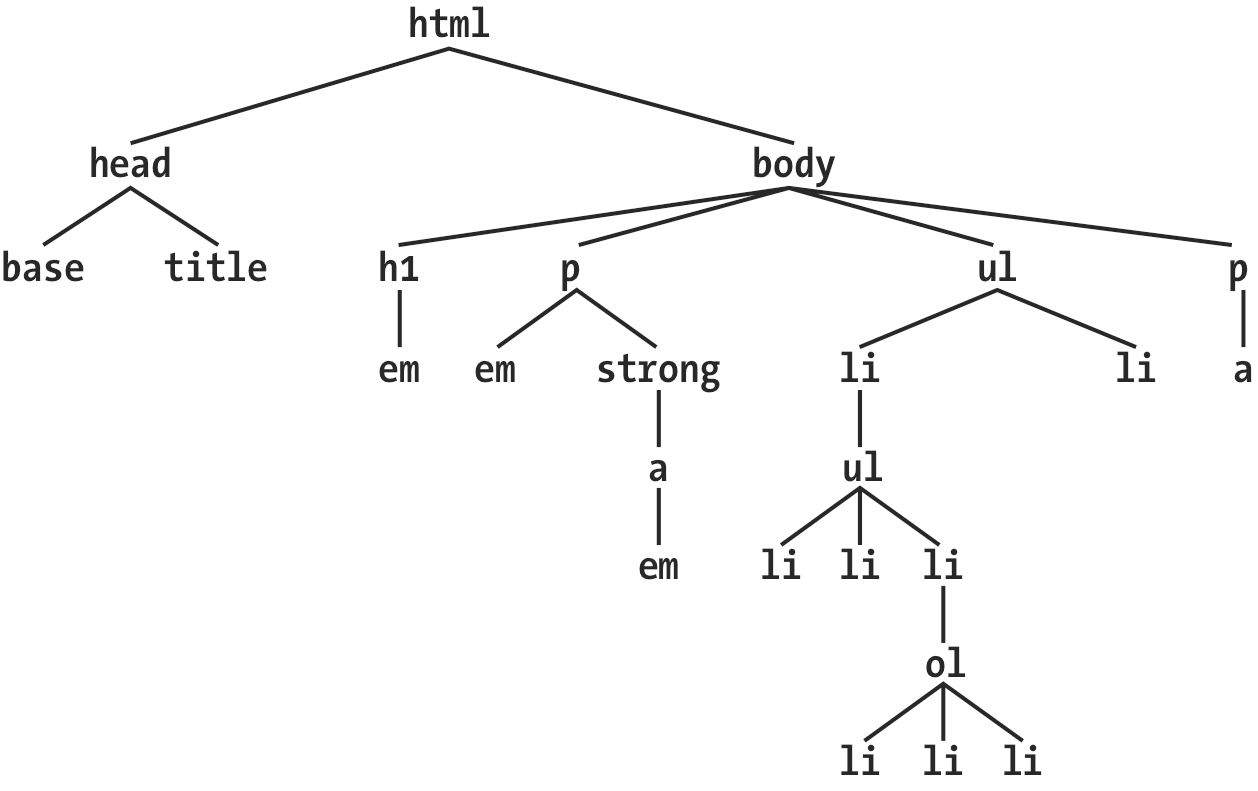
图 2-15: 文档树结构
An element is said to be the parent of another element if it appears directly above that element in the document hierarchy. For example, in Figure 2-15, the first p element is parent to the em and strong elements, while strong is parent to an anchor (a) element, which is itself parent to another em element. Conversely, an element is the child of another element if it is directly beneath the other element. Thus, the anchor element in Figure 2-15 is a child of the strong element, which is in turn child to the p element, which is itself child to the body, and so on.
在文档层级结构中,如果一个元素在另一个元素的紧邻的上方,就被称作那个元素的父元素。例如,在图 2-15 中,第一个
p元素是em和strong元素的父元素,同时strong是一个锚点(a)元素的父元素,这个a元素又是另一个em元素的父元素。反过来,如果在文档层级中,一个元素在另一个元素的紧邻的下方,就被称作那个元素的子元素。因此,图 1-15 中的锚点元素是strong元素的子元素,strong元素又是p元素的子元素,等等。
The terms “parent” and “child” are specific applications of the terms ancestor and descendant. There is a difference between them: in the tree view, if an element is exactly one level above or below another, then they have a parent-child relationship. If the path from one element to another is traced through two or more levels, the elements have an ancestor-descendant relationship, but not a parent-child relationship. (A child is also a descendant, and a parent is also an ancestor.) In Figure 2-15, the first ul element is parent to two li elements, but the first ul is also the ancestor of every element descended from its li element, all the way down to the most deeply nested li elements.
“父”和“子”是祖先和后代的特例。它们的区别是:在树状视图中,如果一个元素在另一个元素上面一级,那么它们是父-子关系。如果一个元素到另一个元素的路径有两级或者更多,那么它们是祖先-后代关系,但不是父-子关系。(当然,子也是后代,同时父也是祖先。)在图 2-15 中,第一个
ul元素是两个li元素的父元素,同时也是它的li元素所有后代元素的祖先元素,直到嵌套路径最深的li元素。
Also, in Figure 2-15, there is an anchor that is a child of strong, but also a descendant of p, body, and html elements. The body element is an ancestor of everything that the browser will display by default, and the html element is ancestor to the entire document. For this reason, in an HTML or XHTML document, the html element is also called the root element.
同时,在图 2-15 中,存在着一个锚点元素既是
strong元素的子元素,又是p、body和html元素的后代元素。body元素是浏览器默认显示的所有元素的祖先元素,html是整个文档中所有其他元素的祖先元素。因此在 HTML 或 XHTML 文档中,html元素也被叫做根元素。
2.5.2 后代选择器 Descendant Selectors
The first benefit of understanding this model is the ability to define descendant selectors (also known as contextual selectors). Defining descendant selectors is the act of creating rules that operate in certain structural circumstances but not others. As an example, let’s say you want to style only those em elements that are descended from h1 elements. You could put a class attribute on every em element found within an h1, but that’s almost as time-consuming as using the font tag. It’s far more efficient to declare rules that match only em elements that are found inside h1 elements.
理解文档模型的第一个用处是可以定义后代选择器(也叫做上下文选择器)。定义后代选择器可以创建只作用于特定结构的规则。例如,如果想要只为那些是
h1元素的后代的em元素设置样式。你可以为h1中的em元素添加一个class属性,但这样做会跟使用font标签一样耗费时间。很明显,声明一个只匹配h1元素中的em元素的规则更加方便。
To do so, write the following:
实现这个规则,可以这样写:
h1 em {
  color: gray;
}
This rule will make gray any text in an em element that is the descendant of an h1 element. Other em text, such as that found in a paragraph or a block quote, will not be selected by this rule. Figure 2-16 makes this clear.
这条规则会把所有是
h1元素后代的em元素中的文本设置为灰色。其他的em文本,例如在段落(p)或引用(blackquote)中的em元素,不会被这条规则选择。见图 2-16。

图 2-16: 基于上下文选择元素
In a descendant selector, the selector side of a rule is composed of two or more spaceseparated selectors. The space between the selectors is an example of a combinator. Each space combinator can be translated as “found within,” “which is part of,” or “that is a descendant of,” but only if you read the selector right to left. Thus, h1 em can be translated as, “Any em element that is a descendant of an h1 element.” (To read the selector left to right, you might phrase it something like, “Any h1 that contains an em will have the following styles applied to the em.”)
在后代选择器中,选择器由两个或更多空白分隔的选择器组成。选择器之间的空格是一个组合器的标记。每个空格组合器都可以被译作“在……中”、“是……的一部分”或“是……的后代”,前提是选择器从右向左读。因此,
h1 em可以被译作“把样式作用于任何em元素,如果它是h1元素的后代”。(如果选择器从左向右读,则是:“选择任何h1,如果它包含一个em元素,规则将会作用于它包含的em”)。
You aren’t limited to two selectors. For example:
可以使用不止两个选择器,例如:
ul ol ul em {
  color: gray;
}
In this case, as Figure 2-17 shows, any emphasized text that is part of an unordered list that is part of an ordered list that is itself part of an unordered list (yes, this is correct) will be gray. This is obviously a very specific selection criterion.
在这种情况下,任何
em文本,如果这个em在一个ul中,同时ul在一个ol中,而ol又在另一个ul中,这个em会被设置为灰色,如 2-17 所示。这是一条非常具体的选择规则。
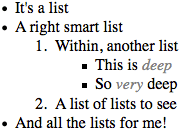
图 2-17: 一个非常具体的后代选择器
Descendant selectors can be extremely powerful. They make possible what could never be done in HTML—at least not without oodles of font tags. Let’s consider a common example. Assume you have a document with a sidebar and a main area. The sidebar has a blue background, the main area has a white background, and both areas include lists of links. You can’t set all links to be blue because they’d be impossible to read in the sidebar.
后代选择器非常有用,它使得 HTML 中(至少是不使用怪异的
font标签时)办不到的事情变成可能。一个常见的场景是:如果文档中有一个侧边栏和一个主区域,侧边栏的背景是蓝色,而主区域的背景是白色,它们都包含链接。不能把链接设置为蓝色,因为如果这样的话,侧边栏中的链接就看不到了。
The solution: descendant selectors. In this case, you give the element that contains your sidebar a class of sidebar and enclose the main area in a main element. Then, you write styles like this:
解决方法是:后代选择器。在这种情况下,给包含侧边栏的元素(一般是一个
div)添加一个class值sidebar,把主区域的class命名为main,然后使用如下样式:
.sidebar {
  background: blue;
}
.main {
  background: white;
}
.sidebar a:link {
  color: white;
}
.main a:link {
  color: blue;
}
Figure 2-18 shows the result.
图 2-18 显示了样式的结果。
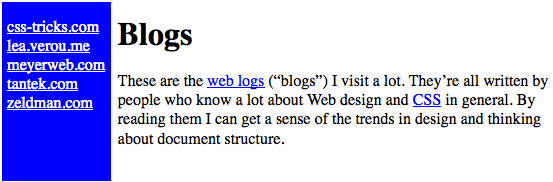
图 2-18: 使用后代选择器为同一类型的元素添加不同的样式
:link refers to links to resources that haven’t been visited. We’ll talk about it in detail in “Hyperlink pseudo-classes” on page 77.
:link选择那些尚未被访问过的资源链接,我们将在“超链接伪类”中详细讨论。
Here’s another example: let’s say that you want gray to be the text color of any b (boldface) element that is part of a blockquote and for any bold text that is found in a normal paragraph:
另一个例子是:如果要把所有在
blockquote和p中的b元素文本设置为灰色:
blockquote b,
p b {
  color: gray;
}
The result is that the text within b elements that are descended from paragraphs or block quotes will be gray
这条样式的结果是在段落或引用段落中的
b元素中的文本显示为灰色。
One overlooked aspect of descendant selectors is that the degree of separation between two elements can be practically infinite. For example, if you write ul em, that syntax will select any em element descended from a ul element, no matter how deeply nested the em may be. Thus, ul em would select the em element in the following markup:
后代选择器的一个容易被忽略的地方是,元素和后代元素之间可以间隔无限代其他元素。例如,如果使用规则
ul em,将会选择ul元素后代中的任何em元素,无论em元素嵌套多么深。因此,对下面的代码,ul em会匹配到其中的em元素。
<ul>
  <li>
    List item 1
    <ol>
      <li>List item 1-1</li>
      <li>List item 1-2</li>
      <li>
        List item 1-3
        <ol>
          <li>List item 1-3-1</li>
          <li>List item <em>1-3-2</em></li>
          <li>List item 1-3-3</li>
        </ol>
      </li>
      <li>List item 1-4</li>
    </ol>
  </li>
</ul>
A more subtle aspect of descendant selectors is that they have no notion of element proximity. In other words, the closeness of two elements within the document tree has no bearing on whether a rule applies or not. This is important when it comes to specificity (which we’ll cover later on) and when considering rules that might appear to cancel each other out.
后代选择器的另一个更微妙的地方是,它没有接近程度的概念。换句话说,文档树中两个元素的紧密程度与是否应用规则无关。这将会在考虑特异性(特度,在后面讨论)和元素规则之间的相互抵消时产生影响。
For example, consider the following (which contains a selector type we’ll discuss in the upcoming section, “The Negation Pseudo-Class” on page 89):
例如,考虑下面的代码(包含我们将会在本章“否定伪类”中讨论的选择器):
div:not(.help) span {color: gray;} div.help span {color: red;}

<div class="help">
  <div class="aside">
    This text contains <span>a span element</span> within.
  </div>
</div>
What the CSS says, in effect, is “any span inside a div that doesn’t have a class containing the word help should be gray” in the first rule, and “any span inside a div whose class contains the word help” in the second rule. In the given markup fragment, both rules apply to the span shown.
第一条规则表示“任何
class中不包含单词help的div元素中的span元素被设置为灰色”,第二条规则表示“任何class中包含单词help的div元素中的span元素被设置为红色”。对示例中的 HTML 代码来说,两条规则都会被作用于span元素。
Because the two rules have equal weight and the “red” rule is written last, it wins out and the span is red. The fact that the div class="aside" is “closer to” the span than the div class="help" is irrelevant. Again: descendant selectors have no notion of element proximity. Both rules match, only one color can be applied, and due to the way CSS works, red is the winner here. (We’ll discuss why in the next chapter.)
因为两条规则有相同的权重,且“红色”规则被写在后面,
span会被设置为红色。虽然div class="aside"比div class="help"相比,与span元素更“紧密”,但实际上这种紧密程度与规则的选择毫不相关。亦即:后代选择器没有紧密程度的概念。两条规则都匹配了元素,只有一种颜色可以生效,根据 CSS 的工作方式,红色“胜利”了。(下一章讨论)
2.5.3 选择子元素 Selecting Children
In some cases, you don’t want to select an arbitrarily descended element. Rather, you want to narrow your range to select an element that is a child of another element. You might, for example, want to select a strong element only if it is a child (as opposed to any level of descendant) of an h1 element. To do this, you use the child combinator, which is the greater-than symbol (>):
有时,我们并不想选择全部的后代元素,而是把选择范围控制在元素的子集,例如选择一个是
h1元素的子元素(而不是任意后代元素)的strong元素,这种情况下,可以使用子元素组合器,它是一个大于号(>):
h1 > strong {
  color: red;
}
This rule will make red the strong element shown in the first h1, but not the second:
这条规则将会把下面的第一个
h1元素中的strong元素设置为红色,第二个h1元素中的strong元素则不会被设置为红色。
<h1>This is <strong>very</strong> important.</h1>
<h1>
  This is <em>really <strong>very</strong></em> important.
</h1>
Read right to left, the selector h1 > strong translates as, “Selects any strong element that is a direct child of an h1 element.” The child combinator can be optionally surrounded by whitespace. Thus, h1 > strong, h1> strong, and h1>strong are all equivalent. You can use or omit whitespace as you wish.
从右往左读,选择器
h1 > strong可以译作“选择任何strong元素,如果它是一个h1元素的子元素”。子元素组合器两边可以添加空格, 你可以根据自己的爱好添加或省略空格,h1 > strong、h1> strong和h1>strong是完全等价的。
When viewing the document as a tree structure, it’s easy to see that a child selector restricts its matches to elements that are directly connected in the tree. Figure 2-19 shows part of a document tree.
观察文档的树状结构视图,子元素选择器把匹配限制在直接连接的元素上。图 2-19 显示了部分文档树。
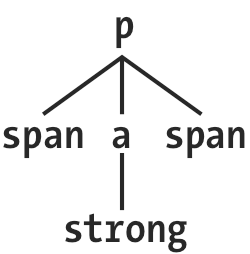
图 2-19: 一个文档树片段
In this tree fragment, you can pick out parent-child relationships. For example, the a element is parent to the strong, but it is child to the p element. You could match elements in this fragment with the selectors p > a and a > strong, but not p > strong, since the strong is a descendant of the p but not its child.
在这文档树片段中,可以很清楚的观察到父-子关系。例如,
a元素是strong元素的父元素,同时是p元素的子元素。在这个片段中,可以使用p > a和a > strong选择元素,但无法使用p > strong选择元素,因为strong是p的后代元素但不是子元素。
You can also combine descendant and child combinations in the same selector. Thus, table.summary td > p will select any p element that is a child of a td element that is itself descended from a table element that has a class attribute containing the word summary.
在同一个选择器中可以结合使用后代选择器和子元素原则器。
table.summary td > p选择是td元素子元素的p元素,同时这个td元素需要是一个class属性值包含summary的table元素的后代元素。
2.5.4 选择相邻兄弟元素 Selecting Adjacent Sibling Elements
Let’s say you want to style the paragraph immediately after a heading, or give a special margin to a list that immediately follows a paragraph. To select an element that immediately follows another element with the same parent, you use the adjacentsibling combinator, represented as a plus symbol (+). As with the child combinator, the symbol can be surrounded by whitespace, or not, at the author’s discretion.
假如想要为一个紧跟着标题的段落设置样式,或者给一个紧跟着段落的列表添加一个边距,可以使用相邻兄弟组合器来选择在同一个父级元素下紧跟着另一个元素的元素,组合器使用加号(
+)。就像子元素选择器一样,这个符号也可以在两边添加或省略空格。
To remove the top margin from a paragraph immediately following an h1 element,
write:
移除一个紧跟
h1元素的段落的上边距:
h1 + p {
  margin-top: 0;
}
The selector is read as, “Selects any p element that immediately follows an h1 element that shares a parent with the p element.”
选择器读作:“选择任何紧跟在
h1元素后面的p元素”。
To visualize how this selector works, it is easiest to once again consider a fragment of a document tree, shown in Figure 2-20.
看图 2-20 的文档树片段,更清晰地观察这个选择器是如何生效的:

图 2-20: 另一个文档树片段
In this fragment, a pair of lists descends from a div element, one ordered and the other not, each containing three list items. Each list is an adjacent sibling, and the list items themselves are also adjacent siblings. However, the list items from the first list are not siblings of the second, since the two sets of list items do not share the same parent element. (At best, they’re cousins, and CSS has no cousin selector.)
在这个片段中有两个列表都是
div元素的后代,一个是有序列表,另一个是无序列表,每个都包含三个列表项。两个列表互为相邻兄弟,每个列表中的列表项也互为相邻兄弟,但第一个列表中的项与第二个列表中的列不是相邻兄弟,因为它们没有共同的父元素。(它们最多是表兄弟元素,但 CSS 没有表兄弟元素选择器。)
Remember that you can select the second of two adjacent siblings only with a single combinator. Thus, if you write li + li {font-weight: bold;}, only the second and third items in each list will be boldfaced. The first list items will be unaffected, as illustrated in Figure 2-21.
选择后面的两个相邻兄弟只需要一个组合器符号,如果写作
li + li {font-weight: bold;},只有每个列表中的第二项和第三项会被设置为粗体,样式不会对第一项生效。见图 2-21.
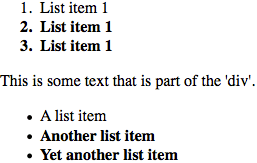
图 2-21: 选择相邻兄弟元素
To work properly, CSS requires that the two elements appear in “source order.” In our example, an ol element is followed by a ul element. This allows us to select the second element with ol + ul, but we cannot select the first using the same syntax. For ul + ol to match, an ordered list must immediately follow an unordered list.
CSS 的正确性依赖于两个元素的“代码顺序“。在上面的例子中,一个
ol元素后面紧跟着一个ul元素,因此可以使用ol + ul选择第二个(ul)元素,但不能选择第一个(ol)元素。如果想使ul + ol匹配,需要一个ol元素紧跟在一个ul元素后面。
Keep in mind that text content between two elements does not prevent the adjacentsibling combinator from working. Consider this markup fragment, whose tree view would be the same as that shown in Figure 2-19:
需要记住,两个元素之间的文本内容不会影响相邻元素组合器。下面的代码片段,树视图与图 2-19 是一样的:
<div>
  <ol>
    <li>List item 1</li>
    <li>List item 1</li>
    <li>List item 1</li>
  </ol>
  This is some text that is part of the 'div'.
  <ul>
    <li>A list item</li>
    <li>Another list item</li>
    <li>Yet another list item</li>
  </ul>
</div>
Even though there is text between the two lists, we can still match the second list with the selector ol + ul. That’s because the intervening text is not contained with a sibling element, but is instead part of the parent div. If we wrapped that text in a paragraph element, it would then prevent ol + ul from matching the second list. Instead, we might have to write something like ol + p + ul.
尽管两个列表之间有文本内容,选择器
ol + ul依然会匹配第二个列表。因为文本并不包含一个兄弟元素,而是属于父元素div的一部分。如果把文本内容用一个段落元素(p)包起来,ol + ul匹配第二个列表的行为将会被终止。要匹配第二个列表,需要用ol + p + ul这样的选择器。
As the following example illustrates, the adjacent-sibling combinator can be used in conjunction with other combinators:
相邻兄弟组合器可以与其他组合器连接使用,例如:
html > body table + ul {
  margin-top: 1.5em;
}
The selector translates as, “Selects any ul element that immediately follows a sibling table element that is descended from a body element that is itself a child of an html element.”
这个选择器是指:“选择任何紧跟
table元素的兄弟ul元素,同时这个table元素是一个body元素的后代,而body元素是一个html的子元素。”
As with all combinators, you can place the adjacent-sibling combinator in a more complex setting, such as div#content h1 + div ol. That selector is read as, “Selects any ol element that is descended from a div when the div is the adjacent sibling of an h1 which is itself descended from a div whose id attribute has a value of content.”
和所有组合器一样,相邻兄弟选择器可以用于很复杂的选择器中,如
div#content h1 + div ol。这个选择器是:“选择任何是div元素后代的ol元素,同时这个div元素是一个h1元素的紧邻兄弟元素,而这个h1元素是一个id属性值为content的div元素的子元素。”
2.5.5 选择跟随兄弟元素 Selecting Following Siblings
Selectors Level 3 introduced a new sibling combinator called the general sibling combinator. This lets you select any element that follows another element when both elements share the same parent, represented using the tilde (~) combinator.
Selectors Level 3 引入了一个新的兄弟组合器叫做一般兄弟选择器。这个组合器允许选择同一个父元素下,跟随(不一定是紧跟随)在某个元素后面的所有元素,使用波浪线符号(
~)。
As an example, to italicize any ol that follows an h2 and also shares a parent with the h2, you’d write h2 ~ol {font-style: italic;}. The two elements do not have to be adjacent siblings, although they can be adjacent and still match this rule. The result of applying this rule to the following markup is shown in Figure 2-22:
如下例,为同一个父元素下跟随在一个
h2元素后面的任何ol元素设置斜体,可以写作h2 ~ ol {font-style: italic;}。两个ol元素不必都是紧邻兄弟,尽管紧邻兄弟也会被这条规则匹配。效果见图 2-22.
<div>
  <h2>Subheadings</h2>
  <p>
    It is the case that not every heading can be a main heading. Some headings
    must be subheadings. Examples include:
  </p>
  <ol>
    <li>Headings that are less important</li>
    <li>Headings that are subsidiary to more important headlines</li>
    <li>Headings that like to be dominated</li>
  </ol>
  <p>Let's restate that for the record:</p>
  <ol>
    <li>Headings that are less important</li>
    <li>Headings that are subsidiary to more important headlines</li>
    <li>Headings that like to be dominated</li>
  </ol>
</div>
图 2-22: 选择跟随兄弟元素
As you can see, both ordered lists are italicized. That’s because both of them are ol elements that follow an h2 with which they share a parent (the div).
如图所示,两个有序列表都是斜体,因为两个
ol元素都在h2元素后面,且它们(三个)共有一个父元素(div)。
2.6 伪类选择器 Pseudo-Class Selectors
Things get really interesting with pseudo-class selectors. These selectors let you assign styles to what are, in effect, phantom classes that are inferred by the state of certain elements, or markup patterns within the document, or even by the state of the document itself.
伪类选择器非常有趣,它们是一些根据元素状态变化而产生作用的幽灵类。伪类选择器可以根据某些确定元素的状态、文档中的标记模式甚至文档本身的状态选择元素并添加样式。
The phrase “phantom classes” might seem a little odd, but it really is the best way to think of how pseudo-classes work. For example, suppose you wanted to highlight every other row of a data table. You could do that by marking up every other row something like class="even" and then writing CSS to highlight rows with that class —or (as we’ll soon see) you could use a pseudo-class selector to achieve the same effect, and through very similar means.
“幽灵类”的说法可能看起来有点怪,但这个词非常贴切地体现了伪类的工作方式。例如,假如你想要把一个数据表格每隔一行设置为高亮,你可以每隔一行在行元素上加一个
class="even",然后写一段 CSS 把class值有even的行设置为高亮。但是你也可以使用伪类选择器更简便地实现相同的效果,后面会很快看到它的用法。
2.6.1 组合伪类 Combining Pseudo-Classes
Before we start, a word about chaining. CSS makes it possible to combine (“chain”) pseudo-classes together. For example, you can make unvisited links red when they’re hovered and visited links maroon when they’re hovered:
在开始之前,先提一下“链式”。CSS 允许(链式)组合伪类选择器,例如,当鼠标停留在(
hover)一个未访问过的链接(<a>)上时,将其设置为红色,当鼠标停留在已经访问过的链接上时,将其设置为栗色:
a:link:hover {
  color: red;
}
a:visited:hover {
  color: maroon;
}
The order you specify doesn’t actually matter; you could also write a:hover:link to the same effect as a🔗hover. It’s also possible to assign separate hover styles to unvisited and visited links that are in another language—for example, German:
(伪类的)顺序无关紧要,
a:hover:link和a:link:hover的效果是一样的。同样的,可以为特定语言的不同状态的链接设置不同的样式,例如德语:
a:link:hover:lang(de) {
  color: gray;
}
a:visited:hover:lang(de) {
  color: silver;
}
Be careful not to combine mutually exclusive pseudo-classes. For example, a link cannot be both visited and unvisited, so a🔗visited doesn’t make any sense and will never match anything.
注意不要组合互斥的伪类,例如,一个链接不可能既是访问过的又是没访问过的,所以
a:link:visited没有任何意义,它并不会匹配任何东西。
2.6.2 结构性伪类 Structural Pseudo-Classes
The majority of pseudo-classes are structural in nature; that is, they refer to the markup structure of the document. Most of them depend on patterns within the markup, such as choosing every third paragraph, but others allow you to address specific types of elements. All pseudo-classes, without exception, are a word preceded by a single colon (:), and they can appear anywhere in a selector.
大部分伪类都是结构性的,即它们是与文档的标记结构相关的。大部分伪类由标签内的结构决定,例如某个伪类选择器选择(某个文档片段中的)第三个段落(
p)。其他一些选择器允许你处理特定类型的元素。所有的伪类都以一个冒号(:)开头,没有例外,而且它们可以出现在选择器的任何位置。
Before we get started, there’s an aspect of pseudo-classes that needs to be made explicit here: pseudo-classes always refer to the element to which they’re attached, and no other. Seems like a weirdly obvious thing to say, right? The reason to make it explicit is that for a few of the structural pseudo-classes, it’s a common error to think they are descriptors that refer to descendant elements.
在开始之前,关于伪类有一点需要明确:伪类永远只指向他们关联的元素,而不是其他元素。这点似乎非常明显而没有必要特意强调,之所以要明确它,是因为在实际使用中,有一些结构型伪类常常被错误地当成后代元素的描述符。
To illustrate this, I’d like to share a personal anecdote. When my first child was born in 2003, I announced it online (like you do). A number of people responded with congratulations and CSS jokes, chief among them the selector #ericmeyer:firstchild. The problem there is that selector would select me, not my daughter, and only if I were the first child of my parents (which, as it happens, I am). To properly select my first child, that selector would need to be #ericmeyer > :first-child.
为了进一步说明这点,我想分享一则我个人的轶事。2003 年,我的大女儿,也是我的第一个孩子,出生了。我在网上公布了这个消息(就像你们会做的一样_)。许多人回复我表示祝贺,并讲了一些 CSS 的小幽默,许多人用了选择器
#ericmeyer:first-child.。问题是这个选择器选择的是我,而且只有当我是我父母的第一个孩子的时候才会选择我(巧了,我还真是)。如果要选择我的第一个孩子,选择器应该是#ericmeyer > :first-child。
The confusion is understandable, which is why I’m addressing it here. Reminders will be found throughout the following sections. Just always keep in mind that the effect of pseudo-classes is to apply a sort of a “phantom class” to the element to which they’re attached, and you should be OK.
这种混淆是可以理解的,这就是为何我会在这里提到它,后面的章节我们会经常想起它。只要记住,伪类的作用是给它们绑定的元素添加一些“影子类”,就不容易犯(前面的)错误了。
选中根元素 Selecting the root element
This is the quintessence of structural simplicity: the pseudo-class :root selects the root element of the document. In HTML, this is always the html element. The real benefit of this selector is found when writing stylesheets for XML languages, where the root element may be different in every language—for example, in RSS 2.0 it’s the rss element—or even when you have more than one possible root element within a single language (though not a single document!).
这是结构简单性的精髓:伪类选择器
:root选择文档的根元素。在 HTML 中,根元素永远是html元素。在为 XML 语言添加样式时,这个选择器会非常有用,因为在不同的语言中根元素可能不同。例如,在 RSS 2.0 中,根元素是rss。即使在一种语言(甚至是一个文档)里,也可能会使用不止一个根元素。
Here’s an example of styling the root element in HTML, as illustrated in Figure 2-23:
图 2-23 展示了一个给 HTML 中的根元素添加样式的例子:
:root {
  border: 10px dotted gray;
}
body {
  border: 10px solid black;
}
图 2-23: 设置根元素样式
In HTML documents, you can always select the html element directly, without having to use the :root pseudo-class. There is a difference between the two selectors in terms of specificity, which we’ll cover in Chapter 3.
当然,在 HTML 文档中,可以直接选择
html元素,不需要使用:root伪类。这两个选择器在特度方面有差异,我们将在第 3 章讨论。
选择空元素
With the pseudo-class :empty, you can select any element that has no children of any kind, including text nodes, which covers both text and whitespace. This can be useful in suppressing elements that a CMS has generated without filling in any actual content. Thus, p:empty {display: none;} would prevent the display of any empty paragraphs.
使用伪类
:empty,可以选择任何没有子节点的元素——没有任何类型的子元素:包含文本节点,包括文字和空白。这有助于筛除 CMS 生成的没有填进任何实际内容的元素。因此,p:empty {display: none;}将会让所有空的段落不再显示。
Note that in order to be matched, an element must be, from a parsing perspective, truly empty—no whitespace, visible content, or descendant elements. Of the following elements, only the first and last would be matched by p:empty:
注意,一个元素如果要被
:empty匹配,它必须(从解析的角度看)是真正空的——没有空白、可见内容,或后代元素。在下面的元素中,只有第一个和最后一个会被p:empty匹配。
<p></p>
<p></p>
<p></p>
<p><!—-a comment--></p>
The second and third paragraphs are not matched by :empty because they are not empty: they contain, respectively, a single space and a single newline character. Both are considered text nodes, and thus prevent a state of emptiness. The last paragraph matches because comments are not considered content, not even whitespace. But put even one space or newline to either side of that comment, and p:empty would fail to match.
第二个和第三个段落不会匹配
:empty,因为它们不是空的:它们各自包含一个空格和一个换行符,都会被当做文本节点,因此不是空状态。最后一个段落能够匹配,因为注释既不会被当成内容,也不会被当成空白。但是如果在注释的任何一侧添加一个空格或者换行,p:empty将不再匹配它。
You might be tempted to just style all empty elements with something like *:empty {display: none;}, but there’s a hidden catch: :empty matches HTML’s empty elements, like img and input. It could even match textarea, unless you insert some default text into the textarea element. Thus, in terms of matching elements, img and img:empty are effectively the same. (They are different in terms of specificity, which we’ll cover in the next chapter.)
你可能会试着为所有空元素设置样式,像这样:
*:empty {display: none;},但是这里有个潜在的陷阱::empty会匹配 HTML 的空元素,如img和input,甚至会匹配textarea,除非你为textarea元素插入了一些默认文本。因此,从匹配元素的角度来说,img和img:empty是一样的(它们在特度上有区别,我们将在下一章讨论)。
<img src="salmon.png" alt="North Pacific Salmon" />
<br />
<input type="number" min="-1" max="1" step=".01" />
<textarea></textarea>
As of late 2017, :empty is unique in that it’s the only CSS selector that takes text nodes into consideration when determining matches. Every other selector type in Selectors Level 3 considers only elements, and ignores text nodes entirely—recall, for example, the sibling combinators.
唯一子元素 Selecting unique children
If you’ve ever wanted to select all the images that are wrapped by a hyperlink element, the :only-child pseudo-class is for you. It selects elements when they are the only child element of another element. So let’s say you want to add a border to any image that’s the only child of another element. You’d write:
如果您想选中所有由超链接元素包装的图像,:only-child 伪类适合您。 当它们是父元素中的唯一元素时,它将会被选中。 所以如果你想给父元素中唯一图像元素增加外框。 您可以这样写:
img:only-child {
  border: 1px solid black;
}
This would match any image that meets those criteria. Therefore, if you had a paragraph which contained an image and no other child elements, the image would be selected regardless of all the text surrounding it. If what you’re really after is images that are sole children and found inside hyperlinks, then you just modify the selector like so (which is illustrated in Figure 2-24):
这将匹配任何符合条件的图像。 因此,如果您的段落包含一个图像而没有其他子元素,无论周围的所有文本如何,都将选中该图像。 如果您想要被超链接包含的唯一图像元素,则只需像这样修改选择器(如图 2-24 所示):
a[href] img:only-child {
  border: 2px solid black;
}<a href="http://w3.org/"><img src="w3.png" alt="W3C" /></a>
<a href="http://w3.org/"><img src="w3.png" alt="" /> The W3C</a>
<a href="http://w3.org/"><img src="w3.png" alt="" /> <em>The W3C</em></a>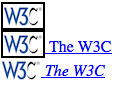
图 2-24: 选中超链接中的唯一图像子元素
There are two things to remember about :only-child. The first is that you always apply it to the element you want to be an only child, not to the parent element, as explained earlier. And that brings up the second thing to remember, which is that
when you use :only-child in a descendant selector, you aren’t restricting the elements listed to a parent-child relationship.
关于:only-child,有两件事要记住。 首先唯一子元素伪类总是应用于子元素,而不应用于父元素,这在前面已经解释过了。 相对应要记住的第二件事,就是当您在后代选择器中使用:only-child 时,不用严格列出元素之间的父子关系。
To go back to the hyperlinked-image example, a[href] img:only-child matches any image that is an only child and is descended from an a element, not is a child of an a element. To match, the element image must be the only child of its direct parent, and a descendant of a link, but that parent can itself be a descendant of that link. Therefore, all three of the images here would be matched, as shown in Figure 2-25:
回到超链接图像示例,a[href] img:only-child 匹配所有符合条件的图像,该图像是唯一子元素,但不代表是祖先元素的子元素,可以是后代元素。想要被选中,该图像元素必须是其直接父级的唯一子元素,并且是链接的后代,但是该父级本身可以是该链接的后代。 因此,这里的所有三个图像都将匹配,如图 2-25 所示:
a[href] img:only-child {border: 5px solid black;}
<a href="http://w3.org/"><img src="w3.png" alt="W3C" /></a>
<a href="http://w3.org/"
  ><span><img src="w3.png" alt="W3C" /></span
></a>
<a href="http://w3.org/"
  >A link to <span>the <img src="w3.png" alt="" /> web</span> site</a
>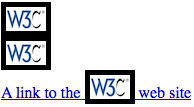
图 2-25: 选中超链接中的唯一图像子元素
In each case, the image is the only child element of its parent, and it is also descended from an a element. Thus, all three images are matched by the rule shown. If you wanted to restrict the rule so that it matched images that were the only children of a elements, then you’d just add the child combinator to yield a[href] > img:onlychild. With that change, only the first of the three images shown in Figure 2-25 would be matched.
在每种情况下,图像都是其父元素的唯一子元素,并且它也是 a 元素的后代。 因此,所有三个图像均通过所示规则匹配。 如果您想限制规则,使其与元素中唯一的子图像匹配,则只需添加子组合器 a[href]>img:onlychild 即可。 进行此更改后,将仅匹配图 2-25 中显示的三个图像中的第一个。
That’s all great, but what if you want to match images that are the only images inside hyperlinks, but there are other elements in there with them? Consider the following:
这太好了,但是如果您想匹配超链接中仅有的图像,但是其中还包含其他元素,该怎么办? 考虑下面这种情况:
<a href="http://w3.org/"><b>•</b><img src="w3.png" alt="W3C" /></a>In this case, we have an a element that has two children: b and img. That image, no longer being the only child of its parent (the hyperlink), can never be matched using :only-child. However, it can be matched using :only-of-type. This is illustrated in Figure 2-26:
在这种情况下,我们这一个元素具有两个子元素:b 和 img。 该图像不再是其父级(超链接)的唯一子级,因此无法使用:only-child 进行匹配。 但是,可以使用:only-of-type 进行匹配。 如图 2-26 所示:
a[href] img:only-of-type {
  border: 5px solid black;
}<a href="http://w3.org/"><b>•</b><img src="w3.png" alt="W3C" /></a>
<a href="http://w3.org/"
><span><b>•</b><img src="w3.png" alt="W3C" /></span
></a>
图 2-26: 选中该种类中的唯一图像
The difference is that :only-of-type will match any element that is the only of its type among all its siblings, whereas :only-child will only match if an element has no siblings at all.
两者的不同在于,:only-of-type 将会在所有同级元素中匹配指定类型的元素,而:only-child 只匹配没有其它同级元素的元素。
This can be very useful in cases such as selecting images within paragraphs without having to worry about the presence of hyperlinks or other inline elements:
这在某些情况下非常有用,例如在段落中选中图像,用这种做法不必担心超链接或其他内联元素的影响。
p > img:only-of-type {
  float: right;
  margin: 20px;
}
As long as there aren’t multiple images that are children of the same paragraph, then the image will be floated. You could also use this pseudo-class to apply extra styles to an h2 when it’s the only one in a section of a document, like this:
只要一个段落中不存在多个图像,那么这个图像就会应用样式并向右浮动。当 h2 元素是文档 section 里的唯一 h2 时,你还可以使用此伪类给它加上额外的样式。方法如下:
section > h2 {
  margin: 1em 0 0.33em;
  font-size: 1.8rem;
  border-bottom: 1px solid gray;
}
section > h2:only-of-type {
  font-size: 2.4rem;
}
Given those rules, any section that has only one child h2 will have it appear larger than usual. If there are two or more h2 children to a section, neither of them will be larger than the other. The presence of other children—whether they are other heading levels, paragraphs, tables, paragraphs, lists, and so on—will not interfere with matching.
根据这些规则,任何只有一个子 h2 的部分将显得比平时更大。 如果一个节中有两个或更多 h2 子级,则两个子级都不会比另一个大。 其他孩子的存在(无论它们是否是其他标题级别,段落,表格,段落,列表等)都不会干扰匹配。
There’s one more thing to make clear, which is that :only-of-type refers to elements and nothing else. Consider the following:
还有一件事情要弄清楚,那就是:“仅类型”是指元素,而没有别的。考虑以下情形:
p.unique:only-of-type {
  color: red;
}<div>
<p class="unique">This paragraph has a 'unique' class.</p>
<p>This paragraph doesn't have a class at all.</p>
</div>In this case, neither of the paragraphs will be selected. Why not? Because there are two paragraphs that are descendants of the div, so neither of them can be the only one of their type.
在这种情况下,将不会选择任何段落。 为什么不匹配呢?因为 div 有两个段落后代,所以它们都不是唯一的类型。
The class name is irrelevant here. We’re fooled into thinking that “type” is a generic description, because of how we parse language. Type, in the way :only-of-type means it, refers only to the element type. Thus, p.unique:only-of-type means
“select any p element whose class attribute contains the word unique when the p element is the only p element among its siblings.” It does not mean “select any p element whose class attribute contains the word unique when it’s the only sibling paragraph to meet that criterion.”
此处与类名无关。由于我们解析语言的方式,我们愚蠢地认为“类型”是一种通用描述。 类型::only-of-type 表示类型,它仅指元素类型。因此,p.unique:only-of-type 表示“当 p 元素是同级中唯一的 p 元素时,选择其 class 属性包含单词 unique 的任何 p 元素。”并不意味着“当满足唯一的同级段落时,选择 class 属性包含单词 unique 的任何 p 元素。”
选择首子元素和末子元素 Selecting first and last children
It’s pretty common to want to apply special styling to the first or last child of an element. A common example is styling a bunch of navigation links in a tab bar, and wanting to put some special visual touches on the first or last tab (or both). In the past, this was done by applying special classes to those elements. Now we have pseudo-classes to carry the load for us.
希望对元素的第一个或最后一个子元素应用特殊样式,这很常见。 一个常见的做法是在标签栏中设置一堆导航链接的样式,并希望在第一个或最后一个标签(或两者)上进行一些特殊的视觉修饰。 过去,这是通过将特殊类应用于这些元素来完成的。 现在我们有了伪类来为我们完成这个任务。
The pseudo-class :first-child is used to select elements that are the first children of other elements. Consider the following markup:
伪类:first-child 用于选择作为其他元素的第一个子元素的元素。 请看以下示例:
<div>
  <p>These are the necessary steps:</p>
  <ul>
    <li>Insert key</li>
    <li>Turn key <strong>clockwise</strong></li>
    <li>Push accelerator</li>
  </ul>
  <p>Do <em>not</em> push the brake at the same time as the accelerator.</p>
</div>
In this example, the elements that are first children are the first p, the first li, and the strong and em elements, which are all the first children of their respective parents. Given the following two rules:
在此示例中,作为第一个孩子的元素是第一个 p,第一个 li 以及 strong 和 em,都是各自父母的第一个孩子。给出以下两个规则:
p:first-child {
  font-weight: bold;
}
li:first-child {
  text-transform: uppercase;
}
we get the result shown in Figure 2-27.
效果如图 2-27 所示

图 2-27: 首个子元素添加样式
The first rule boldfaces any p element that is the first child of another element. The second rule uppercases any li element that is the first child of another element (which, in HTML, must be either an ol or ul element).
第一个规则用粗体标出所有是另一个元素的第一个子元素的 p 元素。 第二条规则将作为另一个元素(在 HTML 中必须是 ol 或 ul 元素)的第一个子元素的 li 元素设置为大写。
As has been mentioned, the most common error is assuming that a selector like p:first-child will select the first child of a p element. Remember the nature of pseudo-classes, which is to attach a sort of phantom class to the element associated
with the pseudo-class. If you were to add actual classes to the markup, it would look like this:
如前所述,最常见的错误是以为像 p:first-child 这样的选择器将选择 p 元素的第一个子元素。 记住伪类的性质,伪类是将一种幽灵类附加到关联的元素上。如果要向标签中添加实际的类,它将看起来像这样:
<div>
  <p class="first-child">These are the necessary steps:</p>
  <ul>
    <li class="first-child">Insert key</li>
    <li>Turn key <strong class="first-child">clockwise</strong></li>
    <li>Push accelerator</li>
  </ul>
  <p>
    Do <em class="first-child">not</em> push the brake at the same time as the
    accelerator.
  </p>
</div>
Therefore, if you want to select those em elements that are the first child of another element, you write em:first-child.
因此,如果您要选择作为另一个元素的第一个子元素的 em 元素,您可以这样编写 em:first-child。
The mirror image of :first-child is :last-child. If we take the previous example and just change the pseudo-classes, we get the result shown in Figure 2-28.
与:first-child 相对应的是:last-child。 如果我们采用前面的示例,仅更改伪类,则结果如图 2-28 所示。
p:last-child {font-weight: bold;}
li:last-child {text-transform: uppercase;}
<div>
  <p>These are the necessary steps:</p>
  <ul>
    <li>Insert key</li>
    <li>Turn key <strong>clockwise</strong></li>
    <li>Push accelerator</li>
  </ul>
  <p>
    Do <em>not</em> push the brake at the same time as the accelerator.
  </p>
</div>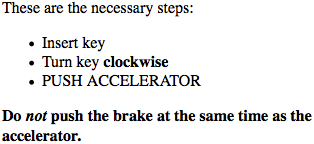
图 2-28: 最后一个子元素添加样式
The first rule boldfaces any p element that is the last child of another element. The second rule uppercases any li element that is the last child of another element. If you wanted to select the em element inside that last paragraph, you could use the selector p:last-child em, which selects any em element that descends from a p element that is itself the last child of another element.
第一个规则将所有作为另一个元素的最后一个子元素的 p 元素标记为粗体。 第二条规则将所有另一个元素的最后一个子元素 li 都大写。 如果要在最后一段中选择 em 元素,则可以使用选择器 p:last-child em,它选择所有 p 元素的 em 后代元素,而 p 元素本身就是另一个元素的最后一个子元素。
Interestingly, you can combine these two pseudo-classes to create a version of :onlychild. The following two rules will select the same elements:
有趣的是,您可以结合使用这两个伪类来创建:onlychild 版本。 以下两个规则将选择相同的元素:
p:only-child {
  color: red;
}
p:first-child:last-child {
  background-color: red;
}
Either way, we get paragraphs with red foreground and background colors (not a good idea, clearly).
无论哪种方式,我们都会获得带有红色字体色和背景色的段落(显然不是一个好主意)。
选择首类型和末类型 Selecting first and last of a type
In a manner similar to selecting the first and last children of an element, you can select the first or last of a type of element within another element. This permits things like selecting the first table inside a given element, regardless of whatever elements come before it.
与选择元素的第一个和最后一个子元素类似,您可以在另一个元素中选择一个元素类型的第一个或最后一个。 这允许在给定元素内选择第一个表之类的操作,不管它前面的元素是什么。
table:first-of-type {
  border-top: 2px solid gray;
}
Note that this does not apply to the entire document; that is, the rule shown will not select the first table in the document and skip all the others. It will instead select the first table element within each element that contains one, and skip any sibling table elements that come after the first. Thus, given the document structure shown in Figure 2-29, the circled nodes are the ones that are selected.
请注意,这不适用于整个文档。 也就是说,上面的规则不会只选择文档中的第一个表然后跳过所有其他表。相反,它将选择被另一元素包含的第一个表元素,并跳过第一个表元素之后的所有同级表元素。 因此,给定图 2-29 中所示的文档结构,带圆圈的节点就是所选的节点。
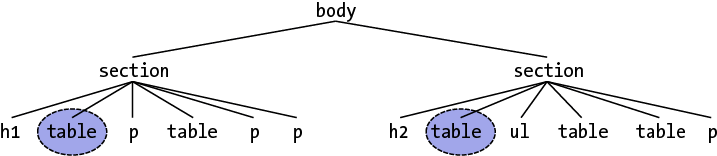
图 2-29: 选择首类型元素
Within the context of tables, a useful way to select the first data cell within a row regardless of whether a header cell comes before it in the row is as follows:
在表的内容中,一种选择每行中第一个数据单元的有用方法如下,这不需要考虑标题单元格是否在该行中位于它之前:
td:first-of-type {
  border-left: 1px solid red;
}
That would select the first data cell in each of the following table rows:
这将选择以下每个表行中的第一个数据单元:
<tr>
  <th scope="row">Count</th><td>7</td><td>6</td><td>11</td>
</tr>
<tr>
  <td>Q</td><td>X</td><td>-</td>
</tr>
Compare that to the effects of td:first-child, which would select the first td element in the second row, but not in the first row.
将其与 td:first-child 的效果进行比较,后者将在第二行而不是第一行中选择第一个 td 元素。
The flip side is :last-of-type, which selects the last instance of a given type from amongst its sibling elements. In a way, it’s just like :first-of-type except you start with the last element in a group of siblings and walk backward toward the first element until you reach an instance of the type. Given the document structure shown in Figure 2-30, the circled nodes are the ones selected by table:last-of-type.
另一个是:last-of-type,它从同级元素中选择给定类型的最后一个元素。 在某种程度上,它类似于:first-of-type,不同之处在于从一组兄弟姐妹中的最后一个元素开始,然后向后移向最后一个元素,直到到达该类型的元素。 给定图 2-30 中所示的文档结构,带圆圈的节点是由 table:last-of-type 选择的节点。
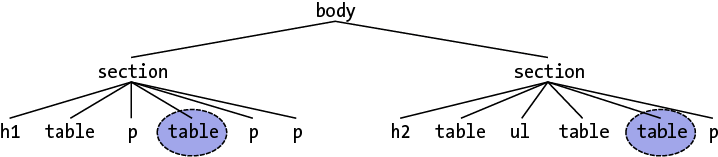
图 2-30: 选择末类型元素
As was noted with :only-of-type, remember that you are selecting elements of a type from among their sibling elements; thus, every set of siblings is considered separately. In other words, you are not selecting the first (or last) of all the elements of a type within the entire document as a single group. Each set of elements that share a parent is its own group, and you can select the first (or last) of a type within each group.
如:only-of-type 所示,请记住,您正在从其同级元素中选择一种类型的元素; 因此,每组兄弟姐妹都被单独考虑。 换句话说,您不应该将整个文档中某个类型的所有元素的第一个(或最后一个)归为一个组。 共享父对象的每组元素都为一个组,您可以在每个组中选择一种类型的第一个(或最后一个)。
Similar to what was noted in the previous section, you can combine these two pseudo-classes to create a version of :only-of-type. The following two rules will select the same elements:
与上一节中提到的类似,可以将这两个伪类组合在一起以创建:only-of-type 版本。 以下两个规则将选择相同的元素:
table:only-of-type {
  color: red;
}
table:first-of-type:last-of-type {
  background: red;
}
按序号选择元素 Selecting every nth child
If you can select elements that are the first, last, or only children of other elements, how about every third child? All even children? Only the ninth child? Rather than define a literally infinite number of named pseudo-classes, CSS has the :nth-child() pseudo-class. By filling integers or even simple algebraic expressions into the parentheses, you can select any arbitrarily numbered child element you like.
既然可以选择其他元素的第一个,最后一个或唯一子元素,那么怎么选择第三个子元素呢?或是所有偶数序号子元素,或是第九个子元素。 除了定义了字面上无准确编号的命名伪类,CSS 具有:nth-child()伪类。 通过在整数中填充整数甚至简单的代数表达式,您可以选择任何想要编号的子元素。
Let’s start with the :nth-child() equivalent of :first-child, which is :nthchild(1). In the following example, the selected elements will be the first paragraph and the first list item.
让我们从与:first-child 等效的:nth-child(1)入手讲述:nth-child()。 在以下示例中,所选元素将是第一段和第一列表项。
p:nth-child(1) {font-weight: bold;}
li:nth-child(1) {text-transform: uppercase;}
<div>
  <p>These are the necessary steps:</p>
  <ul>
    <li>Insert key</li>
    <li>Turn key <strong>clockwise</strong></li>
    <li>Push accelerator</li>
  </ul>
  <p>
    Do <em>not</em> push the brake at the same time as the accelerator.
  </p>
</div>
If we change the numbers from 1 to 2, however, then no paragraphs will be selected, and the middle (or second) list item will be selected, as illustrated in Figure 2-31:
但是,如果我们将数字从 1 更改为 2,则不会选择任何段落,但是会选择中间(或第二个)列表项,如图 2-31 所示:

图 2-31: 选择第二个类型子元素
You can insert any integer you choose; if you have a use case for selecting any ordered list that is the 93rd child element of its parent, then ol:nth-child(93) is ready to serve. This will match the 93rd child of any parent as long as that child is an ordered list. (This does not mean the 93rd ordered list among its siblings; see the next section for that.)
您可以插入任何整数;如果您有一个场景是选择作为其父级的第 93 个子元素的任何有序列表,则可以使用 ol:nth-child(93)。只要该有序列表是其父元素的第 93 个子元素,它就会被匹配(这并不意味着它是其同级元素中的第 93 个有序列表;有关该信息,请参阅下一节。)
More powerfully, you can use simple algebraic expressions in the form a n + b or a n − b to define recurring instances, where a and b are integers and n is present as itself. Furthermore, the + b or − b part is optional and thus can be dropped if it isn’t needed.
更强大的是,您可以使用 n + b 或 n - b 形式的简单代数表达式来定义重复出现的实例,其中 a 和 b 是整数,n 用于倍数。 此外,+ b 或-b 是可选的,因此在不需要时可以将其删除。
Let’s suppose we want to select every third list item in an unordered list, starting with the first. The following makes that possible, selecting the first and fourth items, as shown in Figure 2-32.
假设我们要从无序列表中选择第三个列表项,首先。通过以下操作,可以选择第一和第四项:如图 2-32 所示。
ul > li:nth-child(3n + 1) {
  text-transform: uppercase;
}
图 2-32: 设置每三个列表项的样式
The way this works is that n represents the series 0, 1, 2, 3, 4, and on into infinity. The browser then solves for 3 n + 1, yielding 1, 4, 7, 10, 13, and so on. Were we to drop the +1, thus leaving us with simply 3n, the results would be 0, 3, 6, 9, 12, and so on.
它的工作方式是 n 代表级数 0、1、2、3、4,然后无限大。 然后,浏览器求解 3n +1,得出 1、4、7、10、13,依此类推。 如果我们放弃+1,因此只剩下 3n,结果将是 0、3、6、9、12,依此类推。
Since there is no zeroth list item—all element counting starts with one, to the likely chagrin of array-slingers everywhere—the first list item selected by this expression would be the third list item in the list.
由于没有第零个列表项(所有元素计数都从一个开始),因此该表达式选择的第一个列表项将是列表中的第三个列表项。
Given that element counting starts with one, it’s a minor trick to deduce that :nthchild(2n) will select even-numbered children, and either :nth-child(2n+1) or :nth-child(2n-1) will select odd-numbered children. You can commit that to memory, or you can use the two special keywords that :nth-child() accepts: even and odd. Want to highlight every other row of a table, starting with the first? Here’s how you do it, with the results shown in Figure 2-33:
给定元素计数以 1 开始,得出:nth-child(2n)将选择偶数个孩子,而:nth-child(2n 1)或:nth-child(2n-1)是选择奇数的一个小技巧。您可以将它记着,或者使用 nth-child()接受的两个特殊关键字:偶数和奇数。 如果想要突出表中的奇数行(从第一行开始)? 方法如下,结果如图 2-33 所示:
tr:nth-child(odd) {
  background: silver;
}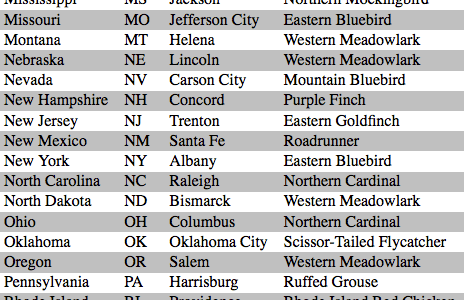
图 2-33: 设置表格奇数行样式
Anything more complex than every-other-element requires an an + b expression. Note that when you want to use a negative number for b, you have to remove the + sign or else the selector will fail entirely. Of the following two rules, only the first will do anything. The second will be dropped by the parser and ignored:
比隔个选择更复杂一点的选择器则需要一个+b 表达式。请注意,当您要为 b 使用负数时,必须删除+符号,否则选择器将完全失效。在以下两个规则中,只有第一个会生效。 第二个将被解析器删除并忽略:
tr:nth-child(4n - 2) {
  background: silver;
}
tr:nth-child(3n + −2) {
  background: red;
}
If you want to select every row starting with the ninth, you can use either of the following. They are similar in that they will select all rows starting with the ninth, but the latter one has greater specificity, which we discuss in Chapter 3:
如果要选择从第九个开始的每一行,则可以使用以下任一方法。 它们的相似之处在于,它们将选择从第九个开始的所有行,但是后一个具有更高的特异性,我们将在第 3 章中进行讨论:
tr:nth-child(n + 9) {
  background: silver;
}
tr:nth-child(8) ~ tr {
  background: silver;
}
As you might expect, there is a corresponding pseudo-class in :nth-last-child(). This lets you do the same thing as :nth-child(), except with :nth-last-child() you start from the last element in a list of siblings and count backward toward the beginning. If you’re intent on highlighting every other table row and making sure the very last row is one of the rows in the highlighting pattern, either one of these will work for you:
如您所料,:nth-last-child()中有一个对应的伪类。 这使您可以执行与:nth-child()相同的操作,但使用:nth-last-child()时,您从同级列表中的最后一个元素开始并向后计数。 如果您打算突出显示其他所有表行,并确保最后一行是突出显示模式中的行之一,那么以下做法将对您有用:
tr:nth-last-child(odd) {
  background: silver;
}
tr:nth-last-child(2n + 1) {
  background: silver;
} /* equivalent */
If the DOM is updated to add or remove table rows, there is no need to add or remove classes. By using structural selectors, these selectors will always match the odd rows of the updated DOM.
如果 DOM 已更新为添加或删除表行,则无需添加或删除类。 通过使用结构选择器,这些选择器将始终匹配更新的 DOM 的奇数行。
Any element can be matched using both :nth-child() and :nth-last-child() if it fits the criteria. Consider these rules, the results of which are shown in Figure 2-34:
如果符合条件,则可以使用:nth-child()和:nth-last-child()来匹配任何元素。 考虑以下规则,其结果如图 2-34 所示:
li:nth-child(3n + 3) {
  border-left: 5px solid black;
}
li:nth-last-child(4n - 1) {
  border-right: 5px solid black;
  background: silver;
}
图 2-34: :nth-child()和:nth-last-child()组合
It’s also the case that you can string these two pseudo-classes together as :nthchild(1):nth-last-child(1), thus creating a more verbose restatement of :onlychild. There’s no real reason to do so other than to create a selector with a higher specificity, but the option is there.
您也可以将这两个伪类串在一起::nthchild(1):nth-last-child(1),从而对:onlychild 进行更详细的重述。除了创建具有更高特度的选择器外,没有其他使用这种方法的理由,但是这种方法确实可行。
You can use CSS to determine how many list items are in a list, and style them accordingly:
您可以使用 CSS 确定列表中有多少个列表项,并相应地设置其样式:
li:only-child {
  width: 100%;
}
li:nth-child(1):nth-last-child(2),
li:nth-child(2):nth-last-child(1) {
  width: 50%;
}
li:nth-child(1):nth-last-child(3),
li:nth-child(1):nth-last-child(3) ~ li {
  width: 33.33%;
}
li:nth-child(1):nth-last-child(4),
li:nth-child(1):nth-last-child(4) ~ li {
  width: 25%;
}
In these examples, if a list item is the only list item, then the width is 100%. If a list item is the first item and also the second-from-the-last item, that means there are two items, and the width is 50%. If an item is the first item and also the third from the last item, then we make it, and the two sibling list items following it, 33% wide. Similarly, if a list item is the first item and also the fourth from the last item, it means that there are exactly four items, so we make it, and its three siblings, 25% of the width.
在这些示例中,如果列表项是唯一的列表项,则宽度为 100%。 如果列表项是第一项,也是从倒数第二项,则意味着有两个项,并且宽度为 50%。 如果一个项目是第一个项目,也是最后一个项目的第三个项目,则我们将其制成,其后的两个同级列表项目的宽度为 33%。 类似地,如果列表项是第一项,也是最后一项的第四项,则意味着恰好有四个项目,因此我们将其及其三个同级产品制成 25%宽度。
编号选择类型元素 Selecting every nth of a type
In what’s probably become a familiar pattern, the :nth-child() and :nth-lastchild() pseudo-classes have analogues in :nth-of-type() and :nth-last-oftype(). You can, for example, select every other hyperlink that’s a child of any given paragraph, starting with the second, using p > a:nth-of-type(even). This will ignore all other elements (spans, strongs, etc.) and consider only the links, as demonstrated in Figure 2-35:
你可能已经猜出,:nth-child()和:nth-lastchild()伪类在:nth-of-type()和:nth-last-oftype()中具有类似物。 例如,您可以使用 p> a:nth-of-type(even),从第二个开始选择所有给定段落的子链接。 这将忽略所有其他元素(span,strongs 等),仅考虑链接,如图 2-35 所示:
p > a:nth-of-type(even) {
  background: blue;
  color: white;
}
图 2-35: 选择偶数编号链接
If you want to work from the last hyperlink backward, then you’d use p > a:nthlast-of-type(even).
如果您想从最后一个超链接向前选择,则可以使用 p>a:nth-last-of-type(even)。
As before, these select elements of a type from among their sibling elements, not from among all the elements of a type within the entire document as a single group. Each element has its own list of siblings, and selections happen within each group.
如前所述,这些类型的选择元素是从其同级元素中选择的,而不是从整个文档中作为一个组的类型的所有元素之中选择的。 每个元素都有其自己的兄弟姐妹列表,并且在每个组中进行选择。
As you might expect, you can string these two together as :nth-of-type(1):nthlast-of-type(1) to restate :only-of-type, only with higher specificity. (We will explain specificity in Chapter 3, I promise.)
如您所料,您可以将这两个字符串串在一起::nth-of-type(1) :nth-last-of-type(1),以更高的特异性重新声明:only-of-type。(特异性我们会在第三章作详细介绍,我保证!)
动态伪类 Dynamic Pseudo-Classes
Beyond the structural pseudo-classes, there are a set of pseudo-classes that relate to structure but can change based on changes made to the page after it’s been rendered. In other words, the styles are applied to pieces of a document based on something in addition to the structure of the document, and in a way that cannot be precisely deduced simply by studying the document’s markup.
除了结构化伪类之外,还有一组与结构有关的伪类,但是可以根据页面渲染后的更改进行更改。 换句话说,样式是根据文档结构以外的其他方式应用于文档的某些部分,并且这种方式无法通过简单地研究文档的标记来精确推导出。
It may sound like we’re applying styles at random, but not so. Instead, we’re applying styles based on somewhat ephemeral conditions that can’t be predicted in advance. Nevertheless, the circumstances under which the styles will appear are, in fact, welldefined. Think of it this way: during a sporting event, whenever the home team scores, the crowd will cheer. You don’t know exactly when during a game the team will score, but when it does, the crowd will cheer, just as predicted. The fact that you can’t predict the exact moment of the cheer doesn’t make it any less expected.
听起来好像我们在随机应用样式,但事实并非如此。 其实,我们是基于暂时无法预测的短暂情况来应用样式。然而实际上,样式出现的情况是明确定义的。不妨这样想:在体育赛事中,每当主队得分时,观众都会欢呼雀跃。您不知道球队在比赛中什么时候得分,但是当比赛得分时,观众会如预期的那样欢呼。您无法预测欢呼的确切时间这一事实并不能改变接下来被期望发生的事。
Consider the anchor element (a), which (in HTML and related languages) establishes a link from one document to another. Anchors are always anchors, but some anchors refer to pages that have already been visited, while others refer to pages that have yet to be visited. You can’t tell the difference by simply looking at the HTML markup, because in the markup, all anchors look the same. The only way to tell which links have been visited is by comparing the links in a document to the user’s browser history. So there are actually two basic types of links: visited and unvisited.
考虑锚元素(a),该元素(使用 HTML 和相关语言)建立了从一个文档到另一个文档的链接。 锚点始终是锚点,但是有些锚点是指已经访问过的页面,而其他锚点是指尚未访问的页面。 您不能仅通过查看 HTML 标记就可以分辨出差异,因为在标记中,所有锚点都相同。 判断访问过哪些链接的唯一方法是将文档中的链接与用户的浏览器历史记录进行比较。 因此,实际上有两种基本类型的链接:已访问和未访问。
超链接伪类 Hyperlink pseudo-classes
CSS2.1 defines two pseudo-classes that apply only to hyperlinks. In HTML, these are any a elements with an href attribute; in XML languages, they’re any elements that act as links to another resource. Table 2-2 describes the pseudo-classes you can apply to them.
CSS2.1 定义了两个仅适用于超链接的伪类。 在 HTML 中,这些是具有 href 属性的任何元素; 在 XML 语言中,它们是充当另一个资源的链接。表 2-2 说明了您可以将伪类应用于他们。
表格 2-2:超链接伪类
| 类型 | 描述 |
|---|---|
| :link | 指向任何没有被访问过的具有超链接的锚(即具有 href 属性) |
| :visited | 指向任何已访问地址的超链接的锚点。出于安全考虑,访问链接可以受到严格限制;有关详细信息,请参见第 79 页的侧栏“访问的链接和隐私” |
The first of the pseudo-classes in Table 2-2 may seem a bit redundant. After all, if an anchor hasn’t been visited, then it must be unvisited, right? If that’s the case, all we should need is the following:
表 2-2 中的第一个伪类似乎有点多余。毕竟,如果没有访问过某个锚点,那它肯定不是:visited 的,对吗?在这种情况下,我们所需要做的只是以下几点:
a {
  color: blue;
}
a:visited {
  color: red;
}
Although this format seems reasonable, it’s actually not quite enough. The first of the rules shown here applies not only to unvisited links, but also to placeholder links such as this one:
尽管这种格式看起来合理,但实际上还不够。 此处显示的第一个规则不仅适用于未访问的链接,还适用于诸如此类的占位符链接:
<a>4. The Lives of Meerkats</a>The resulting text would be blue because the a element will match the rule a {color: blue;}. Therefore, to avoid applying your link styles to placeholders, use the :link and :visited pseudo-classes:
结果文本将为蓝色,因为 a 元素将与规则
{{color:blue;}相匹配。因此,为避免将链接样式应用于占位符,请使用:link 和:visited 伪类:
a:link {
  color: blue;
} /* unvisited links are blue */
a:visited {
  color: red;
} /* visited links are red */
This is a good place to revisit attribute and class selectors and show how they can be combined with pseudo-classes. For example, let’s say you want to change the color of links that point outside your own site. In most circumstances we can use the startswith attribute selector. However, some CMS’s set all links to be absolute URLS, in which case you could assign a class to each of these anchors. It’s easy:
在这里可以回顾属性和类选择器,并展示如何将它们与伪类结合使用。 例如,假设您要更改指向自己网站外部的链接的颜色。 在大多数情况下,我们可以使用 startswith 属性选择器。 但是,某些 CMS 会将所有链接设置为绝对 URL,在这种情况下,您可以为每个锚点分配一个类。 这很容易:
<a href="/about.html">My About page</a>
<a href="https://www.site.net/" class="external">An external site</a>
To apply different styles to the external link, all you need is a rule like this:
要将不同的样式应用于外部链接,您需要做的就是这样的一条规则:
a.external:link,
a[href^="http"]:link {
  color: slateblue;
}
a.external:visited,
a[href^="http"]:visited {
  color: maroon;
}
This rule will make the second anchor in the preceding markup slateblue by default, and maroon once visited, while the first anchor will remain the default color for hyperlinks (usually blue when not visited and purple once visited). For improved usability and accessibility, visited links should be easily differentiable from non-visited links.
此规则将默认使上一个标记中的第二个锚为 slateblue,并且一经访问后变栗色,而第一个锚将保持超链接的默认颜色(通常为不访问时为蓝色,访问后为紫色)。为了提高可用性和可访问性,已访问链接应易于与未访问链接区分开。
样式化的访问链接使访问者可以知道他们去过的地方以及他们尚未访问的地方。这在大型可能难以记住的网站下尤其重要,特别是对于那些认知障碍者访问过哪些页面。 不仅仅突出显示了 W3C Web Content Accessi 其中的访问链接能力之一,它还可以使搜索内容更快,更多高效,使用体验更好。
The same general syntax is used for ID selectors as well:
ID 选择器也使用相同的语法:
a#footer-copyright:link {
  background: yellow;
}
a#footer-copyright:visited {
  background: gray;
}
You can chain the two link-state pseudo-classes together, but there’s no reason why you ever would: a link cannot be both visited and unvisited at the same time!
您可以将两个链接状态伪类链接在一起,但是没有理由这么做:不能同时访问和不访问链接!
Visited Links and Privacy
访问链接和隐私
For well over a decade, it was possible to style visited links with any CSS properties available, just as you could unvisited links. However, in the mid-2000s several people demonstrated that one could use visual styling and simple DOM scripting to determine if a user had visited a given page. For example, given the rule :visited {fontweight: bold;}, a script could find all of the boldfaced links and tell the user which of those sites they’d visited—or, worse still, report those sites back to a server. A similar, non-scripted tactic uses background images to achieve the same result.
十多年来,可以使用任何可用的 CSS 属性设置访问链接的样式,就像您可以访问未访问的链接一样。但是,在 2000 年代中期,一些人证明人们可以使用视觉样式和简单的 DOM 脚本来确定用户是否访问了给定的页面。例如,给定规则:visited {fontweight:bold;},脚本可以找到所有加粗字体的链接,并告诉用户他们访问了哪些站点,或者更糟的是,将这些站点报告给服务器。一种类似的非脚本做法使用背景图像也实现相同的效果。
While this might not seem terribly serious to you, it can be utterly devastating for a web user in a country where one can be jailed for visiting certain sites—opposition parties, unsanctioned religious organizations, “immoral” or “corrupting” sites, and so on. It can also be used by phishing sites to determine which online banks a user has visited. Thus, two steps were taken.
尽管这对您来说似乎并不十分严重,但对于可能因访问某些政党,未经批准的宗教组织,“不道德”或“腐败”网站而被判入狱的国家或地区的网络用户就有很大问题。网络钓鱼网站也可以使用它来确定用户浏览了哪些在线银行。 因此,采取了两个步骤。
The first step is that only color-related properties can be applied to visited links: color, background-color, column-rule-color, outline-color, border-color, and the individual-side border color properties (e.g., border-top-color). Attempts to apply any other property to a visited link will be ignored. Furthermore, any styles defined for :link will be applied to visited links as well as unvisited links, which effectively makes :link “style any hyperlink,” instead of “style any unvisited hyperlink.
第一步是仅将与颜色相关的属性应用于已访问的链接:颜色,背景颜色,列颜色,外框颜色,边框颜色以及单边框颜色属性(例如 border-top-color)。尝试将任何其他属性应用于访问的链接将被忽略。 此外,为:link 定义的任何样式都将应用于访问的链接以及未访问的链接,这将有效地使:link“为任何超链接设置样式”,而不是“为任何未访问的超链接设置样式”。
The second step is that if a visited link has its styles queried via the DOM, the resulting value will be as if the link were not visited. Thus, if you’ve defined visited links to be purple rather than unvisited links’ blue, even though the link will appear purple onscreen, a DOM query of its color will return the blue value, not the purple one.
第二步是,如果访问的链接通过 DOM 查询其样式,则结果值将好像未访问该链接一样。 因此,如果您将访问的链接定义为紫色而不是未访问的链接的蓝色,即使该链接在屏幕上显示为紫色,则其颜色的 DOM 查询将返回蓝色值,而不是紫色。
As of late 2017, this behavior is present throughout all browsing modes, not just “private browsing” modes. Even though we’re limited in how we can use CSS to differentiate visited links from non-visited links, it is important for usability and accessibility to use the limited styles supported by visited links to differentiate them from unvisited links.
截至 2017 年底,此行为在所有浏览模式中均存在,而不仅仅是“私人浏览”模式。 尽管我们在使用 CSS 区分访问过的链接和未访问过的链接方面受到限制,但是对于可用性和可访问性而言,使用访问过的链接支持的限制样式将它们与未访问的链接区分开来也很重要。
用户行为伪类 User action pseudo-classes
CSS defines a few pseudo-classes that can change a document’s appearance based on actions taken by the user. These dynamic pseudo-classes have traditionally been used to style hyperlinks, but the possibilities are much wider. Table 2-3 describes these pseudo-classes.
CSS 定义了一些伪类,它们可以根据以下内容更改文档的外观:用户采取的行动。 传统上一直使用这些超链接的动态伪类样式。 表 2-3 介绍了这些伪类。
表格 2-3:行为伪类
| 类型 | 描述 |
|---|---|
| :focus | 指向被聚焦的输入元素,无论是键盘输入或是其他方式输入 |
| :hover | 指向被鼠标悬停的元素,例如指向被鼠标悬停上方的超链接 |
| :active | 指向被用户激活的元素,例如用户点击按钮不松开时指向被点击按钮 |
Elements that can become :active include links, buttons, menu items, and any element with a tabindex value. These elements and all other interactive elements, including form controls and elements that are content-editable, can also receive focus.
可以应用:active 的元素包括链接,按钮,菜单项以及任何具有 tabindex 值的元素。 这些元素和所有其他交互式元素(包括表单控件和可内容编辑的元素)也可以被作用到。
As with :link and :visited, these pseudo-classes are most familiar in the context of hyperlinks. Many web pages have styles that look like this:
就像:link 和:visited,这两个伪类经常被用于超链接文本。许多网页像下面用法一样使用它们:
a:link {
  color: navy;
}
a:visited {
  color: gray;
}
a:focus {
  color: orange;
}
a:hover {
  color: red;
}
a:active {
  color: yellow;
}
伪类的顺序比想象中重要。 通常的建议是“ link-visited-hoveractive”,尽管现在已经修改为“ link-visited-focushover-active”。下一章解释为什么要如此注重顺序,并讨论您可能更改甚至忽略推荐顺序的场景
Notice that the dynamic pseudo-classes can be applied to any element, which is good since it’s often useful to apply dynamic styles to elements that aren’t links. For example, using this markup:
请注意,动态伪类可以应用于任何元素,这很好,因为将动态样式应用于不是链接的元素通常很有用。 例如,使用以下标签:
input:focus {
  background: silver;
  font-weight: bold;
}
you could highlight a form element that is ready to accept keyboard input, as shown in Figure 2-36.
你可以将表格中准备好接受键盘输入的控件高亮显示。效果如图 2-36 所示。
图 2-36: 高亮表单聚焦控件
You can also perform some rather odd feats by applying dynamic pseudo-classes to arbitrary elements. You might decide to give users a “highlight” effect by way of the following:
您还可以通过将动态伪类应用于任意元素来执行一些相当奇怪的行为。 您可能决定通过以下方式为用户提供“突出”效果:
body *:hover {
  background: yellow;
}
This rule will cause any element that’s descended from the body element to display a yellow background when it’s in a hover state. Headings, paragraphs, lists, tables, images, and anything else found inside the body will be changed to have a yellow background. You could also change the font, put a border around the element being hovered, or alter anything else the browser will allow.
此规则将导致 body 元素的任何后代元素处于悬停状态时显示黄色背景。 标题,段落,列表,表格,图像以及在 body 标签内发现的其他任何东西都会变成黄色背景。 您也可以更改字体,在悬停时元素周围加上边框,或者在浏览器允许的范围内进行各种其它更改。
虽然可以使用:focus 随意设置元素样式,但不要从焦点元素中删除元素本身所有样式。 区分哪个当前具有焦点的元素对于可访问性至关重要,尤其是对于使用键盘浏览您的网站或应用程序的用户。
动态样式的问题 Real-world issues with dynamic styling
Dynamic pseudo-classes present some interesting issues and peculiarities. For example, it’s possible to set visited and unvisited links to one font size and make hovered links a larger size, as shown in Figure 2-37:
动态伪类提出了一些有趣的问题和特性。例如,可以将访问和未访问的链接设置为一种字体大小,并将其悬停链接设置较大的字体,如图 2-37 所示:
a:link,
a:visited {
  font-size: 13px;
}
a:hover,
a:active {
  font-size: 20px;
}
图 2-37: 通过动态样式改变布局
As you can see, the user agent increases the size of the anchor while the mouse pointer hovers over it; or, thanks to the :active setting, when a user touches it on a touch screen. A user agent that supports this behavior must redraw the document while an anchor is in hover state, which could force a reflow of all the content that follows the link.
如您所见,当鼠标指针悬停在锚上时,用户代理会增加锚的大小。 或者,由于:active 设置,当用户在触摸屏上触摸它时。支持此行为的用户代理必须在锚点处于悬停状态时重绘文档,这可能会迫使对链接后面的所有内容进行重排。
2.6.4 UI 状态伪类 UI-State Pseudo-Classes
Closely related to the dynamic pseudo-classes are the user-interface (UI) state pseudoclasses, which are summarized in Table 2-4. These pseudo-classes allow for styling based on the current state of user-interface elements like checkboxes.
与动态伪类密切相关的是用户界面(UI)状态伪类,表 2-4 中对此进行了汇总。这些伪类允许根据用户界面元素(如复选框)的当前状态进行样式设置。
表格 2-3:行为伪类
| 类型 | 描述 |
|---|---|
| :enabled | 指向那些允许输入的 UI 元素(例如表单中的 input) |
| :disabled | 指向那些不允许输入的 UI 元素(例如表单中被禁止输入的 input) |
| :checked | 指向已经被选中的单选或复选框,无论是文档自身选中的还是用户点击选中的 |
| :indeterminate | 指向没有被选中的单选或复选框,这个状态仅能通过 js 来设置,不用由用户来触发 |
| :default | 指向被默认选中的单选、复选框或下拉框 |
| :valid | 指向用户输入合法数据的元素 |
| :invalid | 指向用户输入不合法数据的元素 |
| :in-range | 指向用户输入的数据在指定大小范围内的元素 |
| :out-ofrange | 指向用户输入的数据不在指定大小范围内的元素 |
| :required | 指向要求用户必须输入数据的元素 |
| :optional | 指向不强制要求用户必须输入数据的元素 |
| :read-write | 指向可编辑元素 |
| :read-only | 指向只读元素 |
Although the state of a UI element can certainly be changed by user action—for example, a user checking or unchecking a checkbox—UI-state pseudo-classes are not classified as purely dynamic because they can also be affected by the document structure or DOM scripting.
尽管 UI 元素的状态可以通过用户操作(例如,用户选中或取消选中复选框)进行更改,但是 UI 状态伪类并未归类为纯动态的,因为它们也可能受到文档结构或 DOM 脚本的影响。
您可能会认为:focus 属于本节,而不是之前的内容。 但是,css3 规定:focus 与:hover 和:active 放一起。 这很可能因为它们都没有归在 css2 的 UI 状态伪类。 不过,更重要的 focus 是可以应用在非 UI 元素(例如标题或段落),一个例子是通过语音浏览器阅读。 仅此一点就不能将其视为 UI 状态伪类
可用和不可用交互元素 Enabled and disabled UI elements
Thanks to both DOM scripting and HTML5, it is possible to mark a user-interface element (or group of user interface elements) as being disabled. A disabled element is displayed, but cannot be selected, activated, or otherwise interacted with by the user. Authors can set an element to be disabled either through DOM scripting, or (in HTML5) by adding a disabled attribute to the element’s markup.
由于 DOM 脚本和 HTML5,可以将交互元素(或一组交互元素)标记为已禁用。 禁用的元素会显示,但用户无法选择,激活或与之交互。 作者可以通过 DOM 脚本或(在 HTML5 中)通过将禁用的属性添加到元素的标记中来设置要禁用的元素。
Any element that hasn’t been disabled is by definition enabled. You can style these two states using the :enabled and :disabled pseudo-classes. It’s much more common to style disabled elements and leave enabled elements alone, but both have their uses, as illustrated in Figure 2-38:
根据定义,所有未禁用的元素均,默认为启用。您可以使用:enabled 和:disabled 伪类为这两种状态设置样式。设置禁用元素的样式并保留启用元素的样式更为常见,但两者都有其用途,如图 2-38 所示:
:enabled {
  font-weight: bold;
}
:disabled {
  opacity: 0.5;
}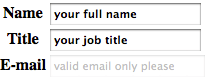
图 2-38: 可用元素和不可用元素添加样式
选中状态 Check states
In addition to being enabled or disabled, certain UI elements can be checked or unchecked—in HTML, the input types “checkbox” and “radio” fit this definition. Selectors level 3 offers a :checked pseudo-class to handle elements in that state, though curiously it omits an :unchecked. There is also the :indeterminate pseudoclass, which matches any checkable UI element that is neither checked nor unchecked. These states are illustrated in Figure 2-39:
除了启用或禁用之外,还可以选中或取消选中某些 UI 元素-在 HTML 中,输入类型“复选框”和“单选框”符合此定义。 CSS3 提供了:checked 伪类来处理该状态下的元素,奇怪的是,它省略了:unchecked。除此之外还有:indeterminate 伪类,它与任何未选中或未选中的可选中 UI 元素匹配。 这些状态如图 2-39 所示:
:checked {
  background: silver;
}
:indeterminate {
  border: red;
}
In addition, you can use the negation pseudo-class, which is covered later, to select checkboxes which are not checked with input[type="checkbox]:not(:checked). Only radio buttons and checkboxes can be checked. All other elements, and these two when not checked, are :not(:checked).
另外,您可以使用稍后将涉及的否定伪类 input [type =“checkbox”]:not(:checked)来选择未选中的复选框,只有单选按钮和复选框能被选中。所有其他元素,以及前两个在位被选中的情况下,都被:not(:checked)匹配。

图 2-39: 选中和未选中元素添加样式
Although checkable elements are unchecked by default, it’s possible for a HTML author to toggle them on by adding the checked attribute to an element’s markup. An author can also use DOM scripting to flip an element’s checked state to checked or unchecked, whichever they prefer.
尽管默认情况下可选元素为未选状态,但 HTML 作者可以通过将选中的属性添加到元素的标签中来启用它们。 作者还可以使用 DOM 脚本将元素的选中状态翻转为选中或未选中,就看他们愿意使用哪种方法了。
There is a third state, “indeterminate.” As of late 2017, this state can only be set through DOM scripting or by the user agent itself; there is no markup-level method to set elements to an indeterminate state. The purpose of allowing an indeterminate state is to visually indicate that the element needs to be checked (or unchecked) by the user. However, note that this is purely a visual effect: it does not affect the underlying state of the UI element, which is either checked or unchecked, depending on document markup and the effects of any DOM scripting.
第三个状态是“不确定”。截至 2017 年底,只能通过 DOM 脚本或用户代理本身来设置此状态。 没有标记的方法可以将元素设置为不确定状态。允许不确定状态的目的是在视觉上指示用户需要选中(或取消选中)元素。但是,请注意,这纯粹是视觉效果:它不会影响 UI 元素的基础状态,该基础状态是选中还是未选中,取决于文档标记和任何 DOM 脚本的效果。
Although the previous examples show styled radio buttons, remember that direct styling of radio buttons and checkboxes with CSS is actually very limited. However, that shouldn’t limit your use of the selected-option pseudo-classes. As an example, you can style the labels associated with your checkboxes and radio buttons using a combination of :checked and the adjacent sibling combinator:
尽管前面的示例显示了样式化的单选按钮,但是请记住,使用 CSS 直接设置单选按钮和复选框的样式实际上非常有限。但是,这不应限制您对 selected-option 伪类的使用。例如,您可以使用:checked 和相邻的兄弟组合器的组合来设置与复选框和单选按钮关联的标签的样式:
input[type="checkbox"]:checked + label {
color: red;
font-style: italic;
}
<input id="chbx" type="checkbox"> <label for="chbx">I am a label</label>
默认选项伪类 Default option pseudo-class
The :default pseudo-class matches the UI elements that are the default among a set of similar elements. This typically applies to context menu items, buttons, and select lists/menus. If there are several same-named radio buttons, the one that was originally checked matches :default, even if the UI has been updated by the user so that it no longer matches :checked. If a checkbox was checked on page load, :default matches it. Any initially-selected option(s) in a select element will match. The :default pseudo-class can also match buttons and menu items:
:default 伪类与 UI 元素匹配,UI 元素是一组相似元素中的默认元素。这通常适用于上下文菜单项,按钮和选择列表/菜单。如果有多个同名的单选按钮,则最初选中的按钮将匹配:default,即使用户已更新 UI 使其不再匹配:checked 也是如此。如果在页面加载时选中了复选框,则:default 与之匹配。select 元素中所有最初选择的选项都将匹配。:default 伪类也可以匹配按钮和菜单项:
[type="checkbox"]:default + label { font-style: italic; }
<input type="checkbox" id="chbx" checked name="foo" value="bar">
<label for="chbx">This was checked on page load</label>
可选伪类 Optionality pseudo-classes
The pseudo-class :required matches any form control that is required, as denoted by the presence of the required attribute (in HTML5). The :optional pseudo-class matches form controls that do not have the required attribute, or whose required attribute has a value of false.
当 required 属性(在 HTML5 标签中)存在,伪类:required 与任何必填的表单控件匹配。 :optional 伪类与没有必需属性或者其必需属性的值为 false 的表单控件匹配。
A form element is :required or :optional if a value for it is, respectively, required or optional before the form to which it belongs can be validly submitted. For example:
一个表单元素分别是:required 或:optional,则可以在表单提交之前确保元素里面的值是符合要求的。例如:
input:required { border: 1px solid #f00;}
input:optional { border: 1px solid #ccc;}
<input type="email" placeholder="enter an email address" required>
<input type="email" placeholder="optional email address">
<input type="email" placeholder="optional email address" required="false">
The first email input will match the :required pseudo-class because of the presence of the required attribute. The second input is optional, and therefore will match the :optional pseudo-class. The same is true for the third input, which has a required attribute, but the value is false.
由于存在必填属性,因此第一个电子邮件输入将匹配:required 伪类。 第二个输入是可选的,因此将匹配:optional 伪类。对于具有必需属性的第三个输入也是如此,但是该值为 false。
We could also use attribute selectors instead. The following selectors are equivalent to the preceding ones:
我们还可以使用属性选择器来实现这种效果,下面做法的效果与上面相同:
input[required] {
  border: 1px solid #f00;
}
input:not([required]) {
  border: 1px solid #ccc;
}
Elements that are not form-input elements can be neither required nor optional.
非表单元素不能设置成必填或非必填。
有效性伪类 Validity pseudo-classes
The :valid pseudo-class refers to a user input that meets all of its data validity requirements. The :invalid pseudo-class, on the other hand, refers to a user input that does not meet all of its data validity requirements.
:valid 伪类匹配满足其所有数据有效性要求的用户输入。 另一方面,:invalid 伪类匹配未满足其所有数据有效性要求的用户输入。
The validity pseudo-classes :valid and :invalid only apply to elements having the capacity for data validity requirements: a div will never match either selector, but an input could match either, depending on the current state of the interface.
有效性伪类:valid 和:invalid 仅适用于具有数据有效性要求的元素:div 永远不会匹配其中任何一个选择器,但是 input 可以匹配任何一个,具体取决于输入框的当前状态。
Here’s an example where an image is dropped into the background of any email input which has focus, with one image being used when the input is invalid and another used when the input is valid, as illustrated in Figure 2-40:
举个例子,其中将一个图像放置到所有具有焦点的电子邮件 input 的背景中,其中一个图像在输入无效时使用,另一幅在输入有效时使用,如图 2-40 所示:
input[type="email"]:focus {
background-position: 100% 50%;
background-repeat: no-repeat;
}
input[type="email"]:focus:invalid {
background-image: url(warning.jpg);
}
input[type="email"]:focus:valid {
background-image: url(checkmark.jpg);
}
<input type="email">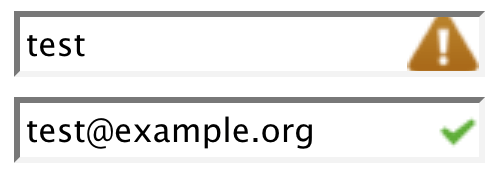
图 2-40: 合法输入元素和非法输入元素添加样式
这些伪类状态取决于用户代理返回的样式结果,因此可能无法如您期望的结果。 例如,在 2017 年末,电子邮件输入为空,多个用户代理判定为输入合法,尽管事实为空输入的电子邮件地址无效。在这些验证程序得到改进之前,最好谨慎对待有效性伪类。
范围伪类 Range pseudo-classes
The range pseudo-classes include :in-range, which refers to a user input whose value is between the minimum and maximum values set by HTML5’s min and max attributes, and :out-of-range, which refers to a user input whose value is below the minimum or above the maximum values allowed by the control.
范围伪类包括::in-range,它匹配用户输入的值在 HTML5 的 min 和 max 属性所设置的最小值和最大值之间的元素;以及:out-of-range,它匹配用户输入的其值,低于控件允许的最小值或最大值的元素。
For example, consider a number input that accepts numbers in the range 0 to 1,000:
举个例子,一个数字输入被规定输入范围在 0 到 1000 之间:
input[type="number"]:focus {
background-position: 100% 50%;
background-repeat: no-repeat;
}
input[type="number"]:focus:out-of-range {
background-image: url(warning.jpg);
}
input[type="number"]:focus:in-range {
background-image: url(checkmark.jpg);
}
<input id="nickels" type="number" min="0" max="1000" />
The :in-range and :out-of-range pseudo-classes apply only to elements with range limitations. Elements that don’t have range limitations, like links for inputs of type tel, will not be matched by either pseudo-class.
:in-range 和:out-of-range 伪类仅适用于具有范围限制的元素。没有范围限制的元素(例如 tel 类型的输入链接)将不会与任何一个伪类匹配。
There is also a step attribute in HTML5. If a value is invalid because it does not match the step value, but is still between or equal to the min and max values, it will match :invalid while also still matching :in-range. That is to say, a value can be inrange while also being invalid.
HTML5 中还有一个 step 属性。如果一个值因为它与步长值不匹配,但仍在最小值和最大值之间,则将匹配:invalid,同时仍匹配:in-range。 也就是说,值可以在范围内,同时也无效。
Thus, in the following scenario, the input’s value will be both red and boldfaced, because 23 is in range but is not evenly divisible by 10:
因此,下面的例子中,输入框的值同时是红色和黑体,因为 23 在规定范围内,但是不是 10 的倍数。
input[type="number"]:invalid {color: red;}
input[type="number"]:in-range {font-weight: bold;}
<input id="by-tens" type="number" min="0" max="1000" step="10" value="23" />
可变伪类 Mutability pseudo-classes
The mutability pseudo-classes include :read-write, which refers to a user input that is editable by the user; and :read-only, which matches user inputs that are not editable. Only elements that have the capacity to be altered by user input can match :read-write.
可变伪类包括::read-write,它是指用户可编辑的用户输入;和:read-only,与不可编辑的用户输入匹配。只有能够通过用户输入更改的元素才能被:read-write 匹配。
For example, in HTML, a non-disabled, non-read-only input element is :read-write, as is any element with the contenteditable attribute. Everything else matches :read-only:
例如,在 HTML 中,非禁用的非只读 input 元素是:read-write,任何具有 contenteditable 属性的元素也是如此。 其他所有元素都被:read-only 匹配:
By default, neither of the following rules would ever match: textarea elements are read-write, and pre elements are read-only.
默认情况下,下面的规则不会生效,因为 textarea 元素是可编辑的,而 pre 元素是只读的。
textarea:read-only {
  opacity: 0.75;
}
pre:read-write:hover {
  border: 1px dashed green;
}
However, each can be made to match as follows:
不过,下面这种情况可以匹配到:
<textarea disabled></textarea>
<pre contenteditable>Type your own code!</pre>
Because the textarea is given a disabled attribute, it becomes read-only, and so will have the first rule apply. Similarly, the pre here has been given the attribute contente ditable, so now it is a read-write element. This will be matched by the second rule.
因为 textarea 元素被赋予一个禁用属性,它变成了只读的,所以它会被第一条规则匹配上。类似地,这里的 pre 元素拥有一个 contenteditable 属性,所以现在它变成可编辑元素,它会被第二条规则匹配上。
2.6.5 锚点伪类 The :target Pseudo-Class
When a URL includes a fragment identifier, the piece of the document at which itpoints is called (in CSS) the target. Thus, you can uniquely style any element that isthe target of a URL fragment identifier with the :target pseudo-class.
当 URL 包含片段标识符时,它所指向的文档被称为目标(在 CSS 中)。因此,您可以使用:target 伪类唯一地设置作为 URL 片段标识符目标的所有元素的样式。
Even if you’re unfamiliar with the term “fragment identifier,” you’ve probably seen them in action. Consider this URL:
即使你对片段标识符不熟悉,你也会在实践中遇到它们,看看这个 URL:
http://www.w3.org/TR/css3-selectors/#target-pseudo
The target-pseudo portion of the URL is the fragment identifier, which is marked bythe # symbol. If the referenced page (http://www.w3.org/TR/css3-selectors/) has an element with an ID of target-pseudo, then that element becomes the target of the fragment identifier.
这个 URL 的用井号分割的伪部分就是片段标识符。如果引用的页面(http://www.w3.org/TR/css3-selectors/)具有ID为target-pseudo的元素,则该元素将成为片段标识符的目标。
Thanks to :target, you can highlight any targeted element within a document, or you can devise different styles for various types of elements that might be targetedsay, one style for targeted headings, another for targeted tables, and so on. Figure 2-41 shows an example of :target in action:
多亏了:target,您可以突出显示文档中的任何目标元素,也可以为可能成为目标的各种类型的元素设计不同的样式,一种针对目标标题的样式,另一种针对目标表的样式,等等。图 2-41 显示了:target 实际使用的示例:
*:target {
  border-left: 5px solid gray;
  background: yellow url(target.png) top right no-repeat;
}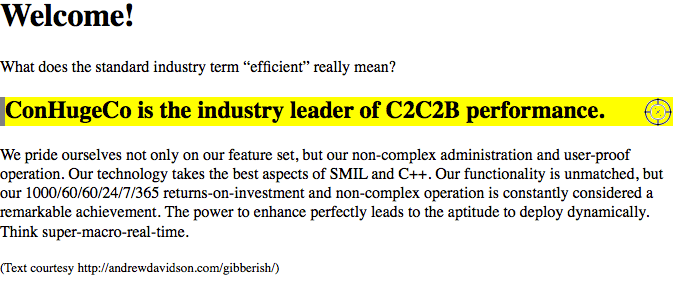
图 2-41: Styling a fragment identifer target
:target styles will not be applied in two circumstances:
- If the page is accessed via a URL that does not have a fragment identifier
- If the page is accessed via a URL that has a fragment identifier, but the identifier does not match any elements within the document
:target 样式不会在这两种情况下应用:
1.如果页面是通过没有片段标识符的 URL 访问的
2.如果通过具有片段标识符的 URL 访问该页面,但是该标识符与文档中的任何元素都不匹配
More interestingly, though, what happens if multiple elements within a document can be matched by the fragment identifier—for example, if the author erroneously included three separate instances of <div id="target-pseudo"> in the same document?
但是,更有趣的是,如果文档中的多个元素可以由片段标识符进行匹配,例如,如果作者在同一文档中错误地包含了三个单独的
<div id =“ target-pseudo”>实例,会发生什么?
The short answer is that CSS doesn’t have or need rules to cover this case, because all CSS is concerned with is styling targets. Whether the browser picks just one of the three elements to be the target or designates all three as co-equal targets, :target styles should be applied to anything that is a valid target.
答案是 CSS 没有或不需要规则来解决这种情况,因为所有 CSS 都关注的是样式目标。 无论浏览器仅选择三个元素之一作为目标还是将所有三个元素指定为同等目标,:target 样式都应用于有效目标。
2.6.6 语言伪类 The :lang Pseudo-Class
For situations where you want to select an element based on its language, you can use the :lang() pseudo-class. In terms of its matching patterns, the :lang() pseudo-class is similar to the |= attribute selector. For example, to italicize elements whose content is written in French, you could write either of the following:
对于要根据其语言选择元素的情况,可以使用:lang()伪类。 就其匹配模式而言,:lang()伪类类似于| =属性选择器。 例如,要斜体化其内容是用法语编写的元素,可以使用以下任意一种:
*:lang(fr) {
  font-style: italic;
}
*[lang|="fr"] {
  font-style: italic;
}
The primary difference between the pseudo-class selector and the attribute selector is that language information can be derived from a number of sources, some of which are outside the element itself. For the attribute selector, the element must have the attribute present to match. The :lang pseudo-class, on the other hand, matches descendants of an element with the language declaration. As Selectors Level 3 states:
伪类选择器和属性选择器之间的主要区别在于,语言信息可以从许多源中获取,其中某些源在元素本身之外。 对于属性选择器,元素必须具有存在的属性才能匹配。 另一方面,:lang 伪类将元素的后代与语言声明进行匹配。如 CSS3 所述:
In HTML, the language is determined by a combination of the lang attribute, and possibly information from the meta elements and the protocol (such as HTTP headers). XML uses an attribute called xml:lang, and there may be other document languagespecific methods for determining the language.
在 HTML 中,语言是由 lang 属性以及可能来自 meta 元素和协议的信息(例如 HTTP 标头)的组合确定的。 XML 使用称为 xml:lang 的属性,并且可能还有其他特定于文档语言的方法来确定语言。
The pseudo-class will operate on all of that information, whereas the attribute selector can only work if there is a lang attribute present in the element’s markup. Therefore, the pseudo-class is more robust than the attribute selector and is probably a better choice in most cases where language-specific styling is needed.
伪类将对所有这些信息进行操作,而属性选择器仅在元素的标记中存在 lang 属性时才起作用。 因此,伪类比属性选择器更健壮,在大多数需要特定于语言的样式的情况下,伪类可能是更好的选择。
2.6.7 否定伪类 The Negation Pseudo-Class
Every selector we’ve covered thus far has had one thing in common: they’re all positive selectors. In other words, they are used to identify the things that should be selected, thus excluding by implication all the things that don’t match and are thus not selected.
到目前为止,我们介绍的每个选择器都有一个共同点:它们都是肯定的选择器。 换句话说,它们被用来识别应该选择的事物,从而暗示地排除了所有不匹配因而未被选择的元素。
For those times when you want to invert this formulation and select elements based on what they are not, Selectors Level 3 introduced the negation pseudo-class, :not(). It’s not quite like any other selector, fittingly enough, and it does have some restrictions on its use, but let’s start with an example.
在那些时候您想要反转此方法,根据不是它们匹配的元素来选择元素的时候,CSS3 引入了否定伪类:not()。 它与其他选择器不太一样,非常合适某些场景,但在使用上有一些限制,让我们从一个示例开始。
Let’s suppose you want to apply a style to every list item that doesn’t have a class of moreinfo, as illustrated in Figure 2-42. That used to be very difficult, and in certain cases impossible, to make happen. If we wanted all the list items to be italic except those with the class .moreinfo, we used to declare all the links as italic, generally having to target the ul with a class, then normalize back based on the class, making sure the override came last in the source order, and had equal or higher specificity. Now we can declare:
假设您想对每个没有 moreinfo 类的列表项应用一种样式,如图 2-42 所示。这在以前很难实现,在某些情况下甚至是不可能的。如果我们希望除.moreinfo 类之外的所有列表项都为斜体,我们通常将所有链接声明为斜体,通常是将 ul 定位为一个类,然后基于该类进行归一化,为确保覆盖,必须在顺序中排在最后,并且具有相同或更高的特异性。现在我们可以声明:
li:not(.moreinfo) {
  font-style: italic;
}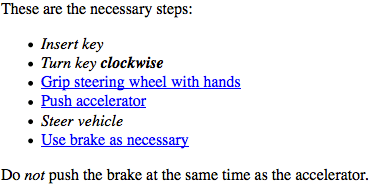
图 2-42: Styling list items that don’t have a certain class
The way :not() works is that you attach it to an element, and then in the parentheses you fill in a simple selector. A simple selector, according to the W3C, is:
:not()的工作方式是将其附加到元素上,然后在括号中填充一个简单的选择器。 根据 W3C,这简单的选择器是:
either a type selector, universal selector, attribute selector, class selector, ID selector, or pseudo-class.
类型选择器,通用选择器,属性选择器,类选择器,ID 选择器或伪类。
Basically, a simple selector is a selector with no ancestral-descendant relationship.
基本上,简单的选择器是没有祖先后代关系的选择器。
Note the “either” there: you can only use one of those inside :not(). You can’t group them and you can’t combine them using combinators, which means you can’t use a descendant selector, because the space separating elements in a descendant selector is a combinator. Those restrictions may (indeed most likely will) be lifted in the future, but we can still do quite a lot even within the given constraints.
注意那里的“两个”:您只能在:not()中使用其中一个。 您无法对它们进行分组,也无法使用组合器对其进行组合,这意味着您无法使用后代选择器,因为后代选择器中的空格分隔元素是组合器。 这些限制可能(实际上很可能会在将来)取消,但是即使在给定的限制下,我们仍然可以做很多事情。
For example, let’s flip around the previous example and select all elements with a class of moreinfo that are not list items. This is illustrated in Figure 2-43:
例如,让我们回到上一个示例,并选择所有 moreinfo 类的不是列表项的元素。 如图 2-43 所示:
.moreinfo:not(li) {
  font-style: italic;
}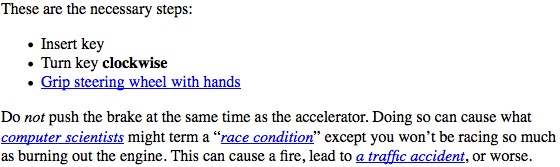
图 2-43: Styling elements with a certain class that aren’t list items
Translated into English, the selector would say, “Select all elements with a class whose value contains the word moreinfo as long as they are not li elements.” Similarly, the translation of li:not(.moreinfo) would be “Select all li elements as long as they do not have a class whose value contains the word moreinfo.”
选择器翻译后会是:“选择所有类中的值都包含单词 moreinfo 的所有元素,只要它们不是 li 元素即可。”类似地,li:not(.moreinfo)的翻译为“ 选择所有 li 元素,只要它们不具有其值包含单词 moreinfo 的类。”
Technically, you can put a universal selector into the parentheses, but there’s very little point. After all, p:not(*) would mean “Select any p element as long as it isn’t any element,” and there’s no such thing as an element that is not an element. Very similar to that would be p:not(p), which would also select nothing. It’s also possible to write things like p:not(div), which will select any p element that is not a div element—in other words, all of them. Again, there is very little reason to do so.
从技术上讲,您可以将通用选择器放在括号中,但没有什么意义。 毕竟,p:not(*)的意思是“选择所有 p 元素,只要它不是元素”,并且不存在诸如非元素之类的东西。 与此非常相似的是 p:not(p),它也不会选择任何内容。 也可以编写诸如 p:not(div)之类的东西,它将选择不是 div 元素的任何 p 元素,换句话说,全部选择。同样,没有什么理由这样做。
You can also use the negation pseudo-class at any point in a more complex selector. Thus, to select all tables that are not children of a section element, you would write _:not(section) > table. Similarly, to select table header cells that are not part of the table header, you’d write something like table _:not(thead) > tr > th, with a result like that shown in Figure 2-44.
您还可以在更复杂的选择器中的任意位置使用否定伪类。 因此,要选择不是 section 元素的子代的所有表,应编写*:not(section)> table。 同样,要选择不属于表头的表头单元格,则应编写诸如表*:not(thead)> tr> th 的内容,其结果如图 2-44 所示。
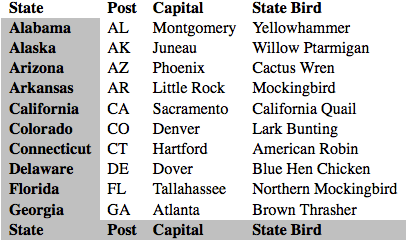
图 2-44: Styling header cells outside the table’s head area
What you cannot do is nest negation pseudo-classes; thus, p:not(:not(p)) is invalid and will be ignored. It’s also, logically, the equivalent of just writing p, so there’s no point anyway. Furthermore, you cannot reference pseudo-elements (which we’ll cover shortly) inside the parentheses, since they are not simple selectors.
您不能做的是嵌套否定伪类。 因此,p:not(:not(p))无效,将被忽略。 从逻辑上讲,它也等效于写 p,所以毫无意义。 此外,您不能在括号内引用伪元素(稍后将介绍),因为它们不是简单选择器。
On the other hand, it’s possible to chain negations together to create a sort of “and also not this” effect. For example, you might want to select all elements with a class of link that are neither list items nor paragraphs:
另一方面,可以将否定链接在一起以创建某种“而且还不是”效果。例如,您可能希望选择所有具有链接类的元素,这些元素既不是列表项也不是段落:
*.link:not(li):not(p) {
  font-style: italic;
}
That translates to “Select all elements with a class whose value contains the word link as long as they are neither li nor p elements.”
转换为“选择一个类,其值包含单词 link 的所有元素,只要它们既不是 li 也不是 p 元素。”
One thing to watch out for is that you can have situations where rules combine in unexpected ways, mostly because we’re not used to thinking of selection in the negative. Consider this test case:
需要注意的一件事是,您可能会遇到规则以意想不到的方式合并的情况,这主要是因为我们不习惯否定的选择。 考虑以下测试案例:
div:not(.one) p {font-weight: normal;}
div.one p {font-weight: bold;}
<div class="one">
  <div class="two">
    <p>I'm a paragraph!</p>
  </div>
</div>
The paragraph will be boldfaced, not normal-weight. This is because both rules match: the p element is descended from a div whose class does not contain the word one (<div class="two">), but it is also descended from a div whose class contains the word one. Both rules match, and so both apply. Since there is a conflict, the cascade is used to resolve the conflict, and the second rule wins. The structural arrangement of the markup, with the div.two being “closer” to the paragraph than div.one, is irrelevant.
该段将以粗体显示,而不是普通字体。 这是因为两个规则都匹配:p 元素来自其类不包含单词 one(
<div class =“two”>)的 div,但是它也源自其类包含单词 one 的 div。 两条规则都匹配,因此都适用。 由于存在冲突,因此使用级联来解决冲突,第二条规则获胜。 标记的结构安排是无关紧要的,就算第二部分比第一部分更接近段落。
2.7 伪元素选择器 Pseudo-Element Selectors
Much as pseudo-classes assign phantom classes to anchors, pseudo-elements insert fictional elements into a document in order to achieve certain effects. Four basic pseudo-elements were defined in CSS 2, and they let you style the first letter of an element, style the first line of an element, and both create and style “before” and “after” content. There are other pseudo-classes that have been defined since CSS 2 (e.g., ::marker), and we’ll explore those in the chapters of the book for which they’re relevant. The four from CSS2 will be covered here because they’re old-school, and because they make a convenient way to talk about pseudo-element behavior.
与伪类将幽灵类分配给锚点一样,伪元素将虚构元素插入文档中以实现某些效果。CSS2 中定义了四个基本的伪元素,它们使您可以设置元素的第一个字母的样式,设置元素的第一行的样式以及创建“before”和“after”内容并为其设置样式。自 CSS2 以来,还定义了其他伪类(例如:: marker),我们将在本书的章节中探讨与它们相关的伪类。CSS2 中的这四个内容也将在这里进行介绍,因为它们很基础,并且它们为讨论伪元素行为提供了便捷的方法。
Unlike the single colon of pseudo-classes, pseudo-elements employ a double-colon syntax, like ::first-line. This is meant to distinguish pseudo-elements from pseudo-classes. This was not always the case—in CSS2, both selector types used a sin‐ gle colon—so for backward compatibility, browsers will accept single-colon pseudoelement selectors. Don’t take this as an excuse to be sloppy, though! Use the proper number of colons at all times in order to future-proof your CSS; after all, there is no way to predict when browsers will stop accepting single-colon pseudo-element selectors.
与伪类的单冒号不同,伪元素采用双冒号语法,例如:: first-line。 这是为了区分伪元素和伪类。 情况并非总是如此(在 CSS2 中,两种选择器类型都使用单个冒号),因此为了向后兼容,浏览器将接受单冒号伪元素选择器。 不过,不要以此为借口草率! 始终使用适当数量的冒号,以便将来对 CSS 进行验证; 毕竟,无法预测浏览器何时将停止接受单冒号伪元素选择器。
Note that all pseudo-elements must be placed at the very end of the selector in which they appear. It would not be legal to write p::first-line em since the pseudoelement comes before the subject of the selector (the subject is the last element listed).
请注意,所有伪元素必须放置在它们出现的选择器的最末端。 写 p::first-line em 是不合法的,因为伪元素位于选择器的主体之前(主体是列出的最后一个元素)。
This also means that only one pseudo-element is permitted in a given selector, though that restriction may be eased in future versions of CSS.
这也意味着在给定的选择器中仅允许使用一个伪元素,尽管在将来的 CSS 版本中或许会放宽该限制。
2.7.1 首字母样式 Styling the First Letter
The ::first-letter pseudo-element styles the first letter, or a leading punctuation character and the first letter (if the text starts with punctuation), of any non-inline element. This rule causes the first letter of every paragraph to be colored red:
::first-letter 伪元素设置所有非内联元素的第一个字母,或前导标点字符和第一个字母(如果文本以标点符号开头)。 此规则使每个段落的第一个字母变为红色:
p::first-letter {
  color: red;
}
The ::first-letter pseudo-element is most commonly used to create an “initial cap” or “drop cap” typographic effect. You could make the first letter of each p twice as big as the rest of the heading, though you may want to only apply this styling to the first letter of the first paragraph:
::first-letter 伪元素最常用于创建“初始上升”或“首字下沉”印刷效果。您可以使每个 p 的第一个字母的大小是标题其余部分的两倍,尽管您可能只想将此样式应用于第一段的第一个字母:
p:first-of-type::first-letter {
  font-size: 200%;
}
The result of this rule is illustrated in Figure 2-45.
这段规则的效果如图 2-45 所示。

图 2-45: The ::frst-letter pseudo-element in action
This rule effectively causes the user agent to style a fictional, or “faux” element, that encloses the first letter of each p. It would look something like this:
该规则有效地使用户代理设置一个虚构的或“虚假”元素的样式,该元素包含这每个段落的首字母。它看起来像这样:
<p><p-first-letter>T</p-first-letter>his is a p element, with a styled first
letter</h2>
The ::first-letter styles are applied only to the contents of the fictional element shown in the example. This <p-first-letter> element does not appear in the document source, nor even in the DOM tree. Instead, its existence is constructed on the fly by the user agent and is used to apply the ::first-letter style(s) to the appropriate bit of text. In other words, <p-first-letter> is a pseudo-element. Remember, you don’t have to add any new tags. The user agent styles the first letter for you as if you had encased it in a styled element.
first-letter 样式应用于适当的文本位。换句话说, <p-first-letter>是一个伪元素。 请记住,您不必添加任何新标签。 用户代理为您设置第一个字母的样式,就好像您已将其封装在样式元素中一样。
The first letter is defined as the first typographic letter unit of the originating element, if it is not preceded by other content, like an image. The specifications use “letter unit” because some languages have letters made up of more than character, like “oe” in Norse. Punctuation that precedes or follows the first letter unit, even if there are several such symbols, are included in the ::first-letter pseudo-element.
如果第一个字母之前没有其他内容(例如图像),则将被定义为原始元素的第一个印刷字母单元。 应该规范使用“字母单位”,因为某些语言的字母由多个字符组成,例如挪威语中的“oe”。 ::first-letter 伪元素中包括在第一个字母单元之前或之后的标点符号,即使存在多个这样的符号。
2.7.2 设置首行的样式 Styling the First Line
Similarly, ::first-line can be used to affect the first line of text in an element. For example, you could make the first line of each paragraph in a document large and purple:
类似地,::first-line 可用于影响元素中文本的第一行。 例如,您可以将文档中每个段落的第一行设置为紫色:
p::first-line {
  font-size: 150%;
  color: purple;
}
In Figure 2-46, the style is applied to the first displayed line of text in each paragraph. This is true no matter how wide or narrow the display region is. If the first line contains only the first five words of the paragraph, then only those five words will be big and purple. If the first line contains the first 30 words of the element, then all 30 will be big and purple.
在图 2-46 中,样式应用于每个段落中第一行显示的文本。 无论显示区域有多宽,这都是正确的。 如果第一行仅包含该段落的前五个单词,则只有这五个单词字体变大且颜色变成紫色。 如果第一行包含元素的前 30 个字,则所有 30 个字都将是紫色的。

图 2-46: The ::frst-line pseudo-element in action
Because the text from “This” to “only” should be big and purple, the user agent employs a fictional markup that looks something like this:
因为从“This”到“only”的文本应该是变大且紫色的,所以用户代理使用虚构的标记,看起来像这样:
<p>
  <p-first-line>This is a paragraph of text that has only</p-first-line>
  one stylesheet applied to it. That style causes the first line to be big and
  purple. No other line will have those styles applied.
</p>
If the first line of text were edited to include only the first seven words of the paragraph, then the fictional </p-first-line> would move back and occur just after the word “that.” If the user were to increase or decrease the font-size rendering, or expand or contract the browser window causing the width of the text to change, thereby causing the number of words on the first line to increase or decrease, the browser automatically sets only the words in the currently displayed first line to be both big and purple.
如果将文本的第一行编辑为仅包含该段落的前七个词,则虚构的
</p-first-line>将会向后移动并出现在“that”一词之后。如果用户要增加或减小字体大小的呈现方式,或扩大或缩小浏览器窗口,从而导致文本的宽度改变,从而导致第一行上的单词数增加或减少,浏览器会自动仅将当前显示的单词设置为第一行变大且变紫色。
The length of the first line depends on a number of factors, including the font-size, letter spacing, width of the parent container, etc. Depending on the markup, and the length of that first line, it is possible that the end of the first line comes in the middle of a nested element. If the ::first-line breaks up a nested element, such as an em or a hyperlink, the properties attached to the ::first-line will only apply to the por‐ tion of that nested element that is displayed on the first line.
第一行的长度取决于许多因素,包括字体大小,字母间距,父容器的宽度等。取决于标签和第一行的长度,很有可能第一行位于嵌套元素的中间。如果
first-line 附带的属性将仅适用于第一行上显示的嵌套元素的一部分。
2.7.3
The ::first-letter and ::first-line pseudo-elements currently can be applied only to block-display elements such as headings or paragraphs, and not to inlinedisplay elements such as hyperlinks. There are also limits on the CSS properties that may be applied to ::first-line and ::first-letter. Table 2-5 gives an idea of these limitations.
first-line 伪元素当前只能应用于块显示元素(例如标题或段落),而不能应用于行内元素(例如超链接)。CSS 属性也有一些限制,这些属性可能适用于 first-letter。 表 2-5 给出了这些限制。
表格 2-5:伪元素的属性限制
| ::first-letter | ::first-line |
|---|---|
| All font properties | All font properties |
| All background properties | All background properties |
| All text decoration properties | All margin properties |
| All inline typesetting properties | All padding properties |
| All inline layout properties | All border properties |
| All border properties | All text decoration properties |
| box-shadow | All inline typesetting properties |
| color | color |
| opacity | opacity |
2.7.4 在元素前后添加内容 Styling (or Creating) Content Before and After Elements
Let’s say you want to preface every h2 element with a pair of silver square brackets as a typographical effect:
假设您要为每个 h2 元素加上一对银色方括号作为印刷效果:
h2::before {
  content: "]]";
  color: silver;
}
CSS lets you insert generated content, and then style it directly using the pseudoelements ::before and ::after. Figure 2-47 illustrates an example.
CSS 允许您插入生成的内容,然后直接使用伪元素:: before 和:: after 设置样式。 图 2-47 给出了一个示例。

图 2-47: Inserting content before an element
The pseudo-element is used to insert the generated content and to style it. To place content after an element, use the pseudo-element ::after. You could end your documents with an appropriate finish:
伪元素用于插入生成的内容并设置其样式。 要将内容放在元素之后,请使用伪元素:: after。 下面这样做可以用适当的符号来结束文档:
body::after {
  content: "The End.";
}
Generated content is a separate subject, and the entire topic (including more detail on ::before and ::after) is covered more thoroughly in Chapter 15.
生成的内容是一个单独的主题,第 15 章将更详细地介绍整个主题(包括:: before 和:: after 的更多详细信息)。
2.8 小结 Summary
By using selectors based on the document’s language, authors can create CSS rules that apply to a large number of similar elements just as easily as they can construct rules that apply in very narrow circumstances. The ability to group together both selectors and rules keeps stylesheets compact and flexible, which incidentally leads to smaller file sizes and faster download times.
通过使用基于文档语言的选择器,作者可以创建适用于大量相似元素的 CSS 规则,就像他们可以轻松地构建适用于非常狭窄环境的规则一样。将选择器和规则组合在一起的能力使样式表更紧凑、更灵活,这也顺便带来了更小的文件大小和更快的下载时间。
Selectors are the one thing that user agents usually must get right because the inability to correctly interpret selectors pretty much prevents a user agent from using CSS at all. On the flip side, it’s crucial for authors to correctly write selectors because errors can prevent the user agent from applying the styles as intended. An integral part of correctly understanding selectors and how they can be combined is a strong grasp of how selectors relate to document structure and how mechanisms—such as inheritance and the cascade itself—come into play when determining how an element will be styled.
选择器是用户代理通常必须正确处理的一件事情,因为无法正确解释选择器很大程度上阻碍了用户代理使用 CSS。另一方面,对于作者来说,正确地编写选择器是至关重要的,因为错误可能会阻止用户代理按预期应用样式。正确理解选择器以及如何组合选择器的一个重要部分是深入了解选择器与文档结构的关系,以及在确定元素的样式时如何使用机制(如继承和级联本身)。